
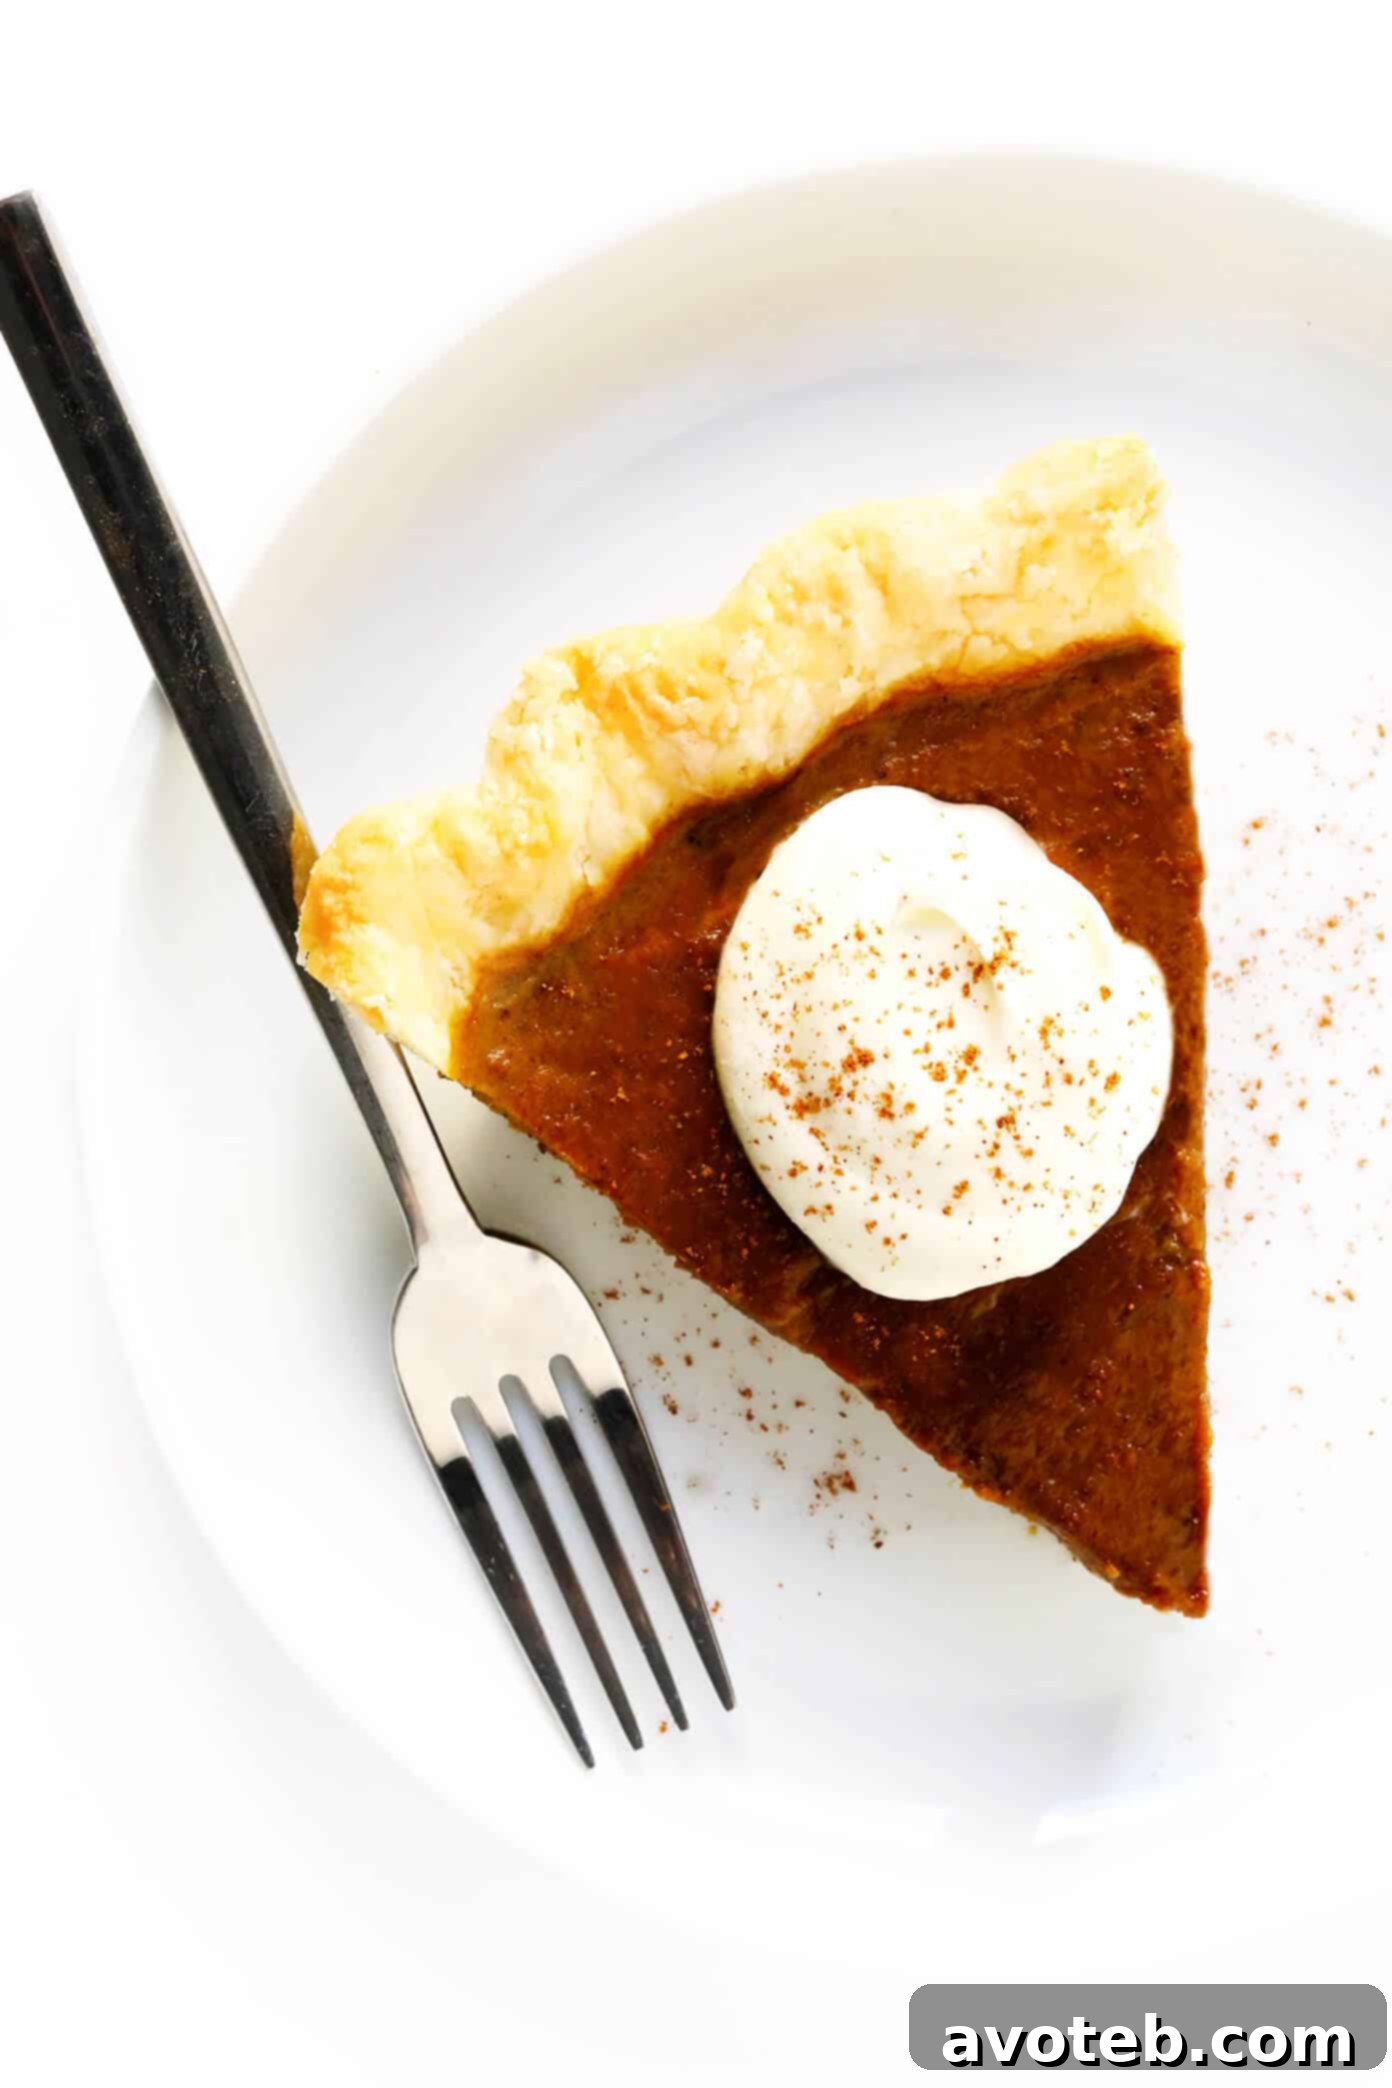
This healthier pumpkin pie recipe is naturally sweetened with maple syrup, easy to make with everyday ingredients, and tastes so flavorful and delicious!
As the vibrant colors of autumn unfold and the comforting chill of fall arrives, our thoughts often turn to the warmth of home, cherished traditions, and, of course, the irresistible aroma of freshly baked pumpkin pie. For many, pumpkin pie is more than just a dessert; it’s a symbol of gathering, gratitude, and the festive spirit of the holiday season, especially Thanksgiving. While the classic rendition holds a special place in our hearts, there’s a growing desire for options that allow us to indulge responsibly without sacrificing taste or tradition. This year, I am absolutely delighted to share a pumpkin pie recipe that not only captures the timeless essence and nostalgic flavors we adore but also incorporates simple, healthier adjustments to make it even more exceptional.
This isn’t just a slight modification; it’s a thoughtful re-imagining that brings forth a dessert that is both lighter and incredibly satisfying. Prepare to discover your new favorite way to bake—and enjoy—the ultimate holiday treat. This recipe is destined to become a staple on your Thanksgiving table and a beloved dessert for any autumnal celebration.
Why This Is The Best Healthier Pumpkin Pie Recipe
What makes this pumpkin pie truly stand out? It’s the harmonious blend of classic comfort with modern, health-conscious sensibilities. We’ve taken the beloved framework of a traditional pumpkin pie and elevated it through deliberate, simple tweaks, resulting in a dessert that feels both indulgently decadent and surprisingly wholesome.
Naturally Sweetened with Pure Maple Syrup
One of the most impactful changes in this recipe is the complete substitution of refined white sugar with pure maple syrup. This natural sweetener is a game-changer, offering a nuanced sweetness that is less overpowering than granulated sugar, allowing the natural flavors of the pumpkin and spices to truly shine. Beyond its gentle sweetness, pure maple syrup infuses the entire pie filling with its distinctive, warm, and subtly caramel-like notes. This inherent richness of maple syrup doesn’t just sweeten; it deepens the overall flavor profile, creating a more complex and satisfying experience. Opting for maple syrup is an excellent choice for those looking to minimize their intake of processed sugars, providing a more wholesome and flavorful alternative.
Flexible for Dairy-Free and Gluten-Free Diets
In today’s diverse culinary landscape, dietary accommodations are more important than ever. This recipe excels in its adaptability, making it accessible to a wider range of eaters. Instead of the traditional evaporated milk, which is often a staple in classic pumpkin pies, this recipe allows you to choose your preferred milk. Whether you opt for conventional cow’s milk, or a plant-based alternative like almond milk, oat milk, or even a can of full-fat coconut milk for extra creaminess, the results are consistently delicious. This flexibility makes it incredibly easy to prepare a dairy-free pumpkin pie that is just as rich, smooth, and satisfying as any traditional version. Furthermore, while I personally favor my homemade pie crust recipe (which can even be sweetened with coconut sugar), the pumpkin pie filling itself is naturally gluten-free. This means you can effortlessly substitute with your favorite store-bought or homemade gluten-free pie crust, making it a perfectly wholesome and inclusive dessert for everyone at your table.
Enhanced and Harmonious Flavor Profile
To further elevate the sensory experience, I’ve subtly increased the amount of pumpkin pie spice and incorporated a generous touch of pure vanilla extract into the filling. This careful adjustment ensures that each bite is packed with a comforting medley of aromatic spices—cinnamon, ginger, nutmeg, cloves, and allspice—without overwhelming the natural sweetness or the delicate pumpkin flavor. The vanilla extract acts as a perfect counterpoint, adding a sophisticated layer of mellow sweetness and an inviting aroma that enhances all the other ingredients. This meticulous balance results in a deeply flavorful pie that feels incredibly warm and inviting, truly embodying the essence of fall and the holidays without relying on excessive sugar.
The culmination of these thoughtful modifications is a pumpkin pie that is not only straightforward to prepare but also delivers an intensely satisfying taste. It feels lighter on the palate yet boasts a rich, creamy texture and a depth of flavor that rivals, and perhaps even surpasses, its traditional counterparts. Whether you adorn your slice with a cloud of freshly whipped cream, a scoop of your favorite vanilla bean ice cream, a scattering of toasted pecans, or simply savor its pure, unadorned goodness, this pie is guaranteed to be a cherished addition to any dessert spread. It’s a delightful journey back to beloved memories, reimagined for a healthier, more inclusive, and equally delicious celebration. Get ready to create new cherished memories and fall deeply in love with the art of pumpkin pie baking all over again.
Essential Ingredients for Your Perfect Pumpkin Pie
Crafting this naturally-sweetened pumpkin pie requires a few carefully selected ingredients, each playing an indispensable role in achieving its exceptional taste, silky texture, and overall appeal. Let’s delve deeper into what you’ll need to create this culinary masterpiece:
- Your Preferred Pie Crust: The very foundation of an outstanding pie is its crust. For this recipe, an unbaked 9-inch pie crust is essential. You have the flexibility to choose: either prepare a homemade crust from scratch, which allows for greater control over ingredients (my favorite recipe can be made with coconut sugar for natural sweetness), or opt for the convenience of a good quality store-bought crust. If you are aiming for a gluten-free pie, simply ensure that your chosen crust is explicitly labeled and certified gluten-free. A crucial tip for achieving a flaky crust and preventing a soggy bottom is to keep your prepared crust well-chilled in the refrigerator until the very moment you are ready to add the filling. This helps maintain its structure during baking.
- Pure Pumpkin Purée: This is the very heart and soul of your pumpkin pie. It is absolutely vital to use pure pumpkin purée and not canned pumpkin pie filling, which typically contains added sugars, spices, and sometimes other ingredients that would disrupt the careful balance of this recipe. While any high-quality 100% pumpkin purée will work, I personally have a long-standing preference for Libby’s brand due to its consistent texture and rich flavor. Always double-check the label to ensure you’re getting pure pumpkin.
- Eggs: Large eggs are crucial for this recipe, serving as the primary binder that gives the pumpkin filling its characteristic smooth, custard-like consistency. You will need four large eggs in total: three will be incorporated into the luscious pie filling, and one will be set aside for an optional but highly recommended egg wash. The egg wash, when lightly brushed onto the pie crust edges, helps them bake to a beautiful, golden-brown hue and contributes to a perfectly crisp texture.
- Pure Maple Syrup: As our star natural sweetener, pure maple syrup is far more than just a sugar substitute. It contributes a distinctive depth of flavor with its inherent notes of caramel and woodsy sweetness, which cannot be replicated by granulated sugar. For the best flavor and texture, it is imperative to use 100% pure maple syrup; imitation syrups will not yield the same rich taste or desired consistency. Because maple syrup is a liquid sweetener, it requires a thickening agent to ensure the pie sets properly.
- Cornstarch: Given the liquid nature of maple syrup, cornstarch plays a critical role in this recipe. It acts as a subtle yet effective thickening agent for the pie filling, ensuring that your pumpkin pie sets beautifully into a smooth, sliceable custard that holds its shape without being overly dense or firm. It is key to achieving that perfect, delicate, melt-in-your-mouth texture and preventing a watery filling.
- Milk of Your Preference: This recipe boasts wonderful versatility regarding milk choices. I often opt for plain almond milk, which contributes a subtle nutty undertone and keeps the pie dairy-free. However, plain oat milk, rich full-fat canned coconut milk (for an even creamier, more decadent result), or traditional cow’s milk (whole milk for maximum creaminess, or 2% for a slightly lighter option) will all perform beautifully. Select the milk that best suits your taste preferences and any dietary requirements.
- Signature Spices and Flavor Enhancers: The magic of pumpkin pie often lies in its expertly balanced spice blend and complementary flavors.
- Pumpkin Pie Spice: This iconic blend is the quintessential taste of autumn and the holidays. If you don’t happen to have a pre-mixed jar of pumpkin pie spice on hand, creating your own aromatic blend is incredibly simple: combine 1½ teaspoons of ground cinnamon, ¾ teaspoon ground ginger, ½ teaspoon ground nutmeg, ⅛ teaspoon ground cloves, and ⅛ teaspoon ground allspice. This homemade mix ensures fresh, potent flavor.
- Vanilla Extract: A touch of high-quality pure vanilla extract is absolutely indispensable. It doesn’t just add its own sweet aroma; it brightens and deepens all the other flavors in the pie, creating a more harmonious and sophisticated taste profile.
- Fine Sea Salt: Often overlooked, a small pinch of fine sea salt is a crucial ingredient. It acts as a flavor enhancer, balancing the sweetness of the maple syrup and intensifying the natural flavors of the pumpkin and spices, making them sing. It prevents the pie from tasting flat and ensures a well-rounded, delightful experience.
With these carefully chosen and detailed ingredients, you are perfectly equipped to bake a healthier, incredibly flavorful, and beautifully textured pumpkin pie that will surely become a cherished part of your culinary repertoire.
How To Bake The Best Pumpkin Pie From Scratch
Creating this healthier pumpkin pie is a remarkably straightforward and rewarding process. By following these clear, step-by-step instructions, you will achieve a perfect, deliciously satisfying result every single time. Let’s walk through the baking journey together to ensure a smooth and successful experience:
- Prepare Your Oven: Begin by preheating your oven to 350°F (175°C). Allowing your oven ample time to reach and stabilize at the correct temperature is a critical first step. Proper preheating ensures even cooking from the moment the pie enters the oven, which is essential for the filling to set correctly and the crust to bake evenly.
- Ready the Pie Crust: Take your 9-inch pie crust, whether it’s a delicate homemade one or a convenient store-bought option, and prepare it according to its specific recipe or package instructions. It is crucial that the pie crust remains unbaked for this particular recipe. A vital technique to achieve a wonderfully flaky crust and to prevent a soggy bottom—a common pie pitfall—is to thoroughly chill your crust. Place your prepared pie crust in the refrigerator for at least 15-20 minutes, or even longer, up to an hour, just before you intend to pour in the filling. This chilling period firms up the fats within the crust, which in turn helps it hold its shape beautifully and develop that desirable flaky texture during the baking process.
- Craft the Silky Filling: In a generously sized mixing bowl, combine all the star ingredients for your filling: the pure pumpkin purée, three of the large eggs (remember to reserve one egg for the optional egg wash), the pure maple syrup, your chosen variety of milk (be it almond, oat, cow’s, or coconut milk), cornstarch, the fragrant pumpkin pie spice, pure vanilla extract, and a pinch of fine sea salt. Whisk all these ingredients together with a balloon whisk until they are thoroughly combined and the mixture presents a smooth, uniform consistency. Be mindful not to overmix the filling; whisking just until no streaks of individual ingredients are visible is sufficient. This gentle approach helps ensure a consistent, velvety texture throughout your finished pie.
- Apply the Optional Egg Wash: For those who desire a professional-looking, gorgeously golden-brown crust, an egg wash is a simple yet effective step. In a separate, small bowl, whisk together the remaining single egg with an additional tablespoon of milk (or water) until it is well combined. Using a pastry brush, lightly and evenly apply this egg wash over the exposed edges of your pie crust. This not only significantly enhances the crust’s color as it bakes but also contributes to a delicate sheen and a slightly crisper finish.
- Combine and Fill: With your filling perfectly prepared, carefully pour the smooth pumpkin mixture into your thoroughly chilled, unbaked pie crust. Gently use the back of a spoon or a small spatula to smooth out the top of the filling, ensuring an even and attractive surface. Be careful not to overfill the crust; leave a small margin at the top to allow for any slight expansion during baking and to prevent spillage.
- Bake to Perfection: Gently transfer the pie to your preheated oven. Bake for approximately 50-55 minutes. Please note that exact baking times can vary depending on the calibration of your specific oven, so it’s important to monitor it closely as it bakes. The pie is perfectly done when the outer edges of the filling appear set and firm, but the very center still shows a slight, delicate jiggle when the pie is gently nudged. For a more precise test of doneness, you can carefully insert a toothpick or a thin knife into the outer edge of the filling (about an inch from the crust); if it comes out clean, the pie is ready. If you notice the crust edges browning too quickly, you can loosely cover them with strips of aluminum foil to prevent over-browning.
- Cool and Chill for Optimal Setting: Once baked, carefully remove the pie from the oven. Immediately transfer the hot pie pan to a wire baking rack and allow it to cool completely at room temperature. This cooling process is crucial and can take several hours (typically 2-4 hours). Gradual cooling is absolutely essential for the filling to fully set and helps prevent any unsightly cracks from forming on the surface. After the pie has reached room temperature, move it to the refrigerator and chill it for at least 2-3 hours, or ideally overnight, until it is thoroughly cold and firm. This chilling period is not just for setting; it also allows the diverse flavors to meld beautifully and ensures that you can achieve clean, precise slices.
- Serve and Enjoy: Once your pumpkin pie is completely chilled, your masterpiece is finally ready to be unveiled, sliced, and enjoyed. For an extra touch of elegance and indulgence, garnish each slice with a generous dollop of homemade whipped cream (or coconut whipped cream for a dairy-free option), a decadent scoop of vanilla bean ice cream, a light sprinkle of finely chopped toasted nuts (such as pecans or walnuts), or a delicate dusting of ground cinnamon. This healthier pumpkin pie is almost always best served cold, allowing its rich flavors and smooth texture to truly shine. Enjoy!
By diligently following these comprehensive steps, you are guaranteed to create a truly spectacular pumpkin pie that is both healthier and bursting with those iconic, comforting autumnal flavors. It will undoubtedly be the perfect, show-stopping centerpiece for your holiday dessert spread.
Make-Ahead, Storage, and Expert Tips
To ensure your pumpkin pie experience is as enjoyable and stress-free as possible, especially during busy holiday seasons, here are some invaluable tips for making it ahead of time, storing it properly, and achieving a consistently perfect bake:
Make-Ahead Instructions for Effortless Holiday Entertaining
Pumpkin pie is one of those fantastic desserts that can, and often should, be prepared in advance. This makes it an ideal choice for busy holidays like Thanksgiving, allowing you to free up precious kitchen time on the big day. You can bake the entire pie one to two days before you plan to serve it. Once the pie has finished baking and has cooled completely at room temperature on a wire rack, simply wrap it loosely with plastic wrap or aluminum foil. Store the wrapped pie in the refrigerator. This advance preparation not only lightens your holiday workload but also allows the intricate flavors of the pumpkin and spices to meld and deepen, often resulting in an even more delicious and harmonious taste on the second day. Just remember to keep it thoroughly chilled until serving.
Proper Storage for Lasting Freshness
Any leftover pumpkin pie should always be stored in the refrigerator to maintain its freshness and safety. Cover the pie loosely with plastic wrap or transfer individual slices to an airtight container. When stored correctly in the refrigerator, your pumpkin pie will remain fresh, creamy, and wonderfully delicious for 3-4 days. While some pies tolerate freezing well, the delicate custard filling of pumpkin pie can sometimes experience a slight change in texture—potentially becoming a bit watery or developing a slightly grainy consistency—upon thawing. For this reason, it is generally recommended to enjoy pumpkin pie fresh or within a few days of baking for the best possible experience.
Expert Baking Tips for Consistent Success
- Preventing Unsightly Cracks: The most common culprits behind cracks in pumpkin pie are overbaking and cooling the pie too rapidly. To avoid this, pay close attention to the pie during the final stages of baking. Remember, a slight, gentle jiggle in the very center of the pie is actually a good sign that it’s perfectly cooked. Once removed from the oven, resist the urge to immediately refrigerate it. Allow the pie to cool slowly and completely at room temperature on a wire rack before transferring it to the fridge. This gradual cooling process is key to preventing surface cracks.
- Battling a Soggy Crust: A soggy pie crust can be a real disappointment. Chilling your unbaked pie crust thoroughly before adding the filling is a crucial step that significantly helps. For bakers who frequently encounter soggy bottoms, a light pre-bake or ‘blind baking’ the crust for about 10-15 minutes before pouring in the filling can be an effective preventative measure, though for this specific recipe, thorough chilling of the raw crust is typically sufficient.
- Customizing Your Spice Blend: While the provided pumpkin pie spice blend is meticulously balanced and perfect as is, feel absolutely free to adjust it to your personal preference. If you enjoy a more pronounced kick of ginger, add an extra pinch! If you prefer a more subtle spice profile, you can slightly reduce the amounts. Trust your taste buds!
- For the Richest, Most Authentic Flavor: Always, without exception, use pure pumpkin purée. Steer clear of canned pumpkin pie filling, as it contains pre-added sugars and spices that will throw off the carefully crafted balance of this healthier recipe. Similarly, always opt for 100% pure maple syrup; its natural sweetness and depth of flavor are irreplaceable.
- Optimal Serving Temperature: Pumpkin pie is almost universally best enjoyed chilled. The cold temperature helps the creamy custard filling firm up beautifully and provides a delightful, refreshing contrast to the warm, inviting spices. Chilled slices also tend to be cleaner and more appealing.
By keeping these expert tips and considerations in mind, you’re not just baking a pie; you’re truly crafting a memorable dessert that’s perfect for any occasion, ensuring delectable results that everyone will adore, every single time.
Discover More Delicious Pie Recipes for Every Occasion
If the joy of baking and savoring this healthier pumpkin pie has sparked your enthusiasm for pie making, you’ll be thrilled to explore other delightful and varied pie creations. Pies are incredibly versatile desserts, perfect for capping off a grand feast, celebrating a special occasion, or simply providing a comforting treat on a quiet evening. Broaden your baking horizons with these additional favorite pie recipes, each promising to satisfy different cravings and impress your guests:
- Bourbon Pumpkin Pie: Elevate the classic pumpkin pie with a sophisticated twist. This recipe infuses the traditional filling with a hint of bourbon, adding an intriguing layer of warmth, complexity, and a subtle boozy note. It’s an excellent choice for adult gatherings and those seeking a more adventurous flavor profile.
- French Silk Pie (Chocolate Pie): Prepare to indulge in pure chocolate bliss with this rich, creamy, and utterly decadent chocolate pie. Featuring a light-as-air, mousse-like texture and an intensely chocolatey flavor, this pie is a dream come true for any chocolate lover and a guaranteed showstopper.
- Lemon Meringue Pie: Experience a delightful dance of flavors with this iconic dessert. A vibrant, tangy lemon custard fills a crisp crust, all crowned with a majestic, towering cloud of fluffy, sweet, and lightly toasted meringue. It’s a refreshing classic that offers a perfect balance of sweet and tart.
- Pecan Pie: A beloved Southern classic, this pie features a gloriously sweet, gooey filling generously packed with crunchy, toasted pecans, all nestled within a perfectly flaky pie crust. It’s an irresistible treat for those who adore nuts, caramel-like flavors, and a comforting, textural contrast.
Whether you’re meticulously planning for an elaborate holiday feast, a casual family dinner, or simply craving a sweet escape, these diverse pie recipes offer a wonderful array of flavors, textures, and baking challenges to explore. Each one promises a delightful culinary adventure and a truly satisfying reward. Happy baking!

The BEST Pumpkin Pie Recipe!
- Prep Time: 15 mins
- Cook Time: 50 mins
- Total Time: 1 hour 5 mins
- Yield: 8–12 servings 1x
Ingredients
- 1 (9-inch) unbaked pie crust, homemade or store-bought
- 1 (15-ounce) can pumpkin purée*
- 4 eggs, divided
- 1/2 cup maple syrup
- 1/2 cup milk (such as cow’s milk, plain almond milk, oat milk, etc.)
- 2 tablespoons cornstarch
- 1 tablespoon pumpkin pie spice
- 1 teaspoon vanilla extract
- 1/4 teaspoon fine sea salt
Instructions
- Heat oven. Preheat oven to 350°F (175°C).
- Make the pie crust. Prepare an (unbaked) 9-inch pie crust according to recipe/package instructions. (I recommend chilling the crust in the fridge for at least 15 minutes before adding the filling, so that it is nice and firm and will hold its shape while baking.)
- Make the filling. In a large mixing bowl, whisk the pumpkin purée, three of the eggs, maple syrup, milk, cornstarch, pumpkin pie spice, vanilla extract and salt together until well combined.
- Make the egg wash. In a separate small bowl, whisk together the remaining one egg and an extra tablespoon or milk (or water) until combined. Brush the egg wash lightly over the edges of the pie crust, which will help it to bake up nice and golden.
- Combine. Pour the filling into the prepared pie crust and smooth out the top so that it is nice and flat.
- Bake. Bake for 50-55 minutes, or until the center of the pie filling is ever-so-slightly jiggly. (If you insert a toothpick in the outer edges of the pie filling, it should come out clean.) Transfer the pie to a wire baking rack and let it cool until it reaches room temperature. Then transfer to the fridge for 2-3 hours until it is completely chilled.
- Serve. Slice and serve chilled, garnished with whipped cream or ice cream if desired.
Equipment
Pumpkin Purée
Buy Now →
Glass Pie Plate
Buy Now →
Mixing Bowls
Buy Now →
Notes
*Pumpkin purée: This is different than canned pumpkin pie filling. I prefer Libby’s brand of pumpkin purée.
*Gluten-free option: This pumpkin pie filling is naturally gluten-free. But to make a gluten-free pumpkin pie recipe, you will need to use store-bought or homemade gluten-free crust.
*Source: Pumpkin pie filling slightly adapted from iFoodReal.