
Master the Art: How to Carve a Turkey Like a Pro for Your Holiday Feast

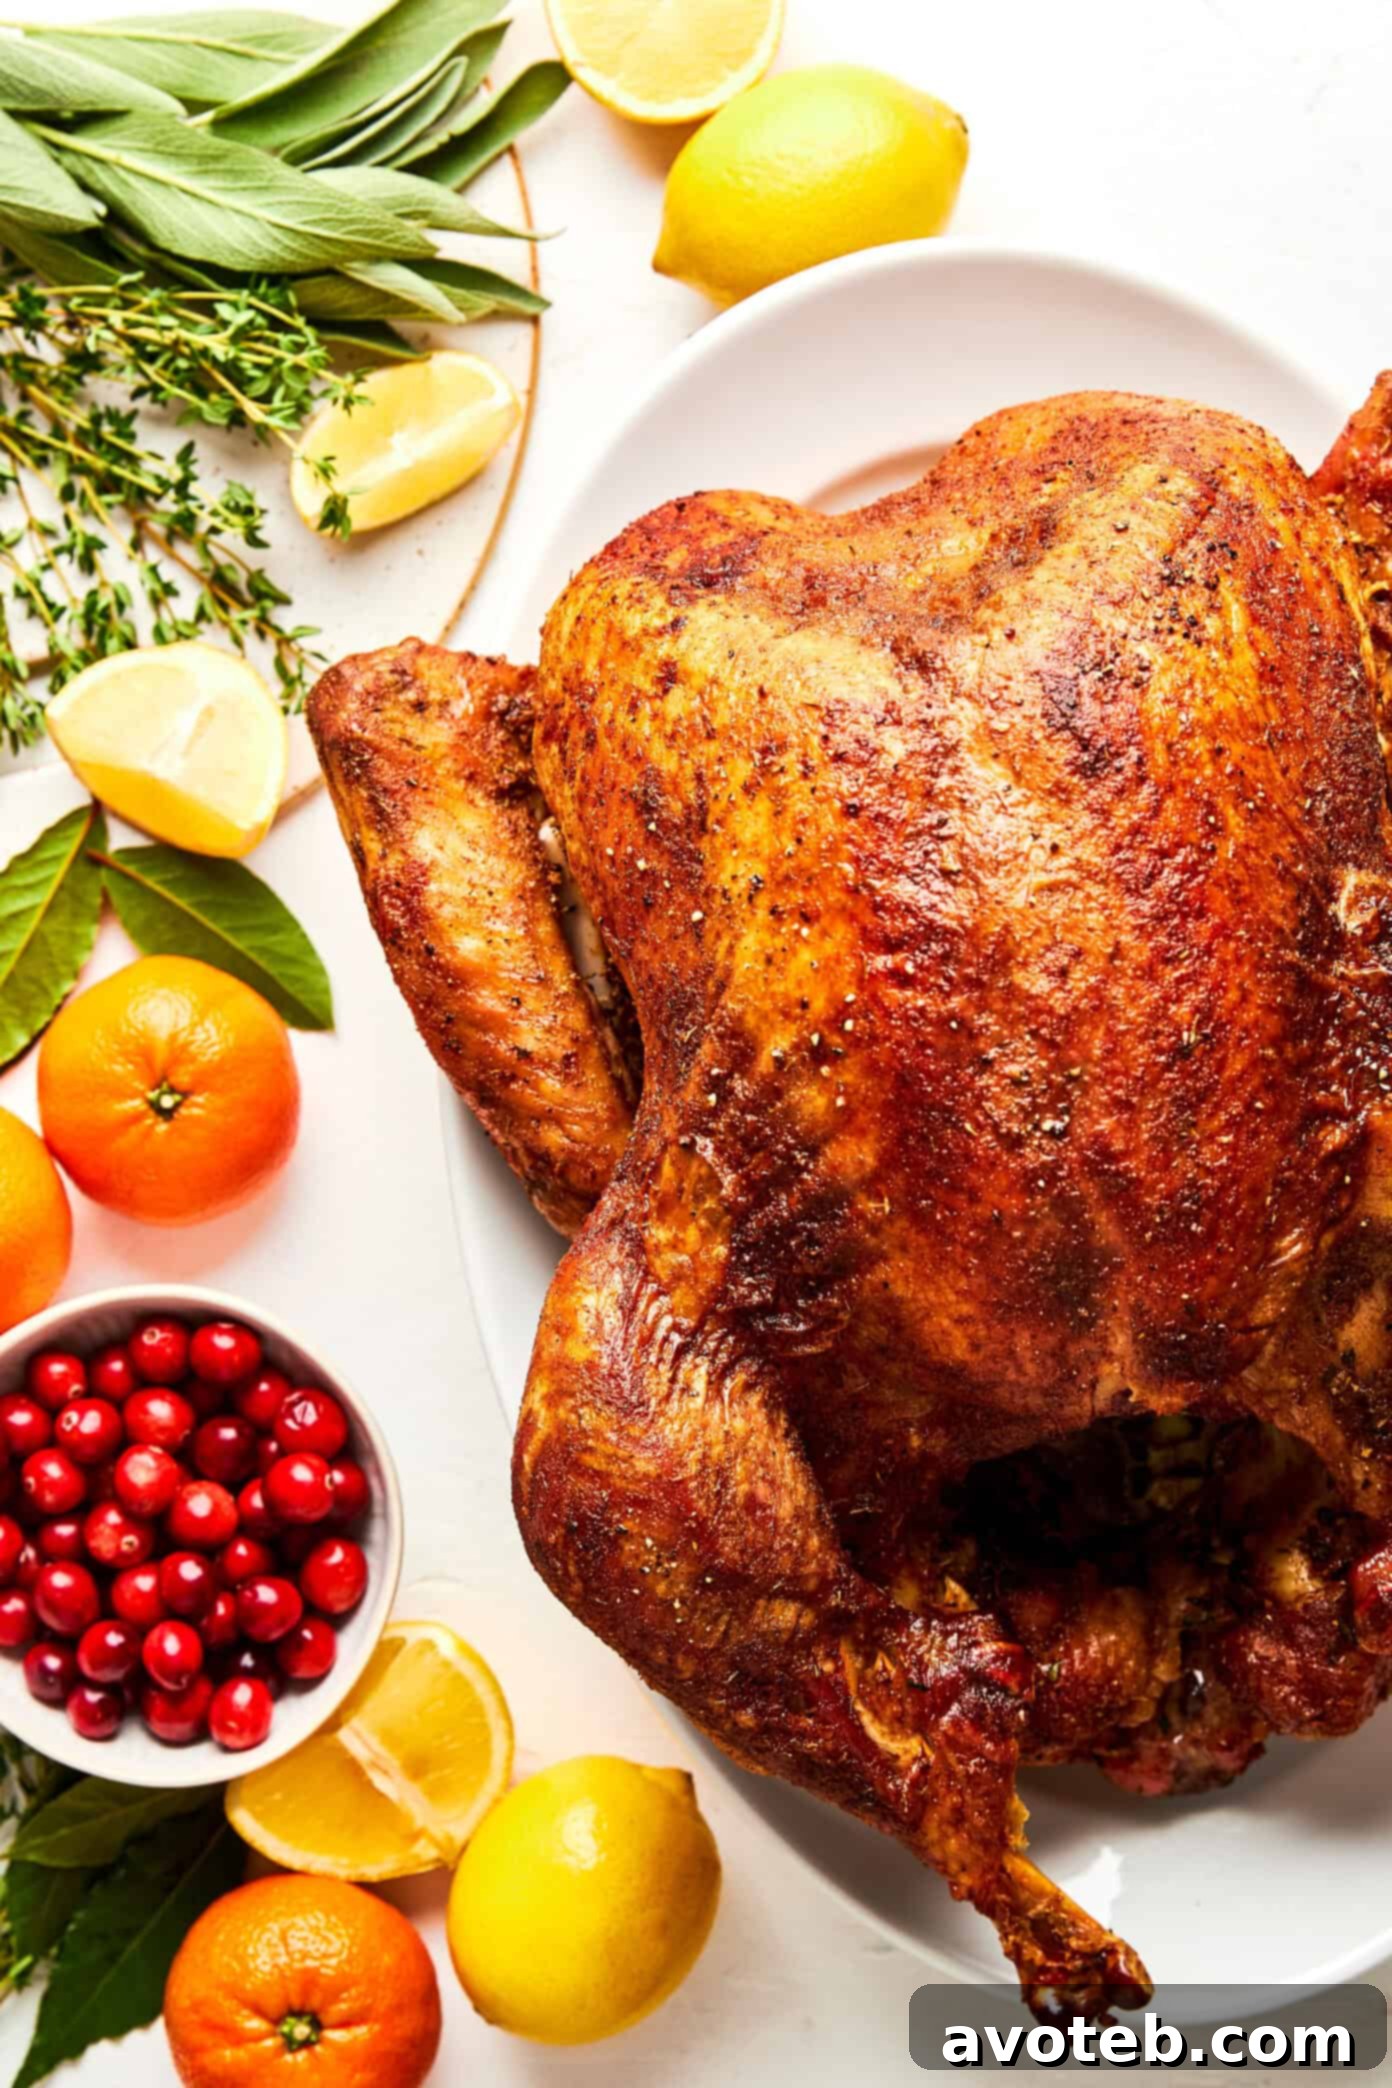
The moment of truth arrives. You’ve spent hours perfecting your roasted turkey, and now it sits majestically on the platter, golden and glistening. But as you pick up the carving knife, a familiar thought might creep in: “Okay, it looks amazing, but how do I actually carve this thing gracefully?” If this sounds like you, rest assured, you are far from alone. Carving a turkey can feel daunting, especially when a hungry crowd is watching, but it’s a skill that’s surprisingly easy to master with the right approach.
The good news is that carving a turkey beautifully and efficiently is simpler than you might imagine. It’s all about understanding the bird’s anatomy, following the natural joints, and making clean, precise cuts. By working from the outside in, slicing against the grain, and presenting your perfectly carved turkey, you’ll transform a potential holiday headache into a moment of culinary triumph. Imagine serving tender, evenly sliced turkey breast and perfectly separated dark meat, making every guest feel like they’re dining at a five-star restaurant.
This comprehensive guide will walk you through every step of the turkey carving process, equipping you with the knowledge and confidence to tackle even the largest birds. We’ve included a step-by-step video demonstration and detailed photos to illustrate each cut, along with invaluable tips and tricks I’ve gathered from years of holiday turkey carving. So, grab your best carving knife, give it a quick sharpen (a small but crucial step!), and let’s turn you into a turkey-carving connoisseur!
Preparing to carve your turkey shouldn’t add stress to your holiday meal. With these straightforward techniques, you’ll not only carve with ease but also impress your family and friends with a professional-looking platter. Let’s make this year’s turkey carving experience smooth, enjoyable, and utterly delicious.
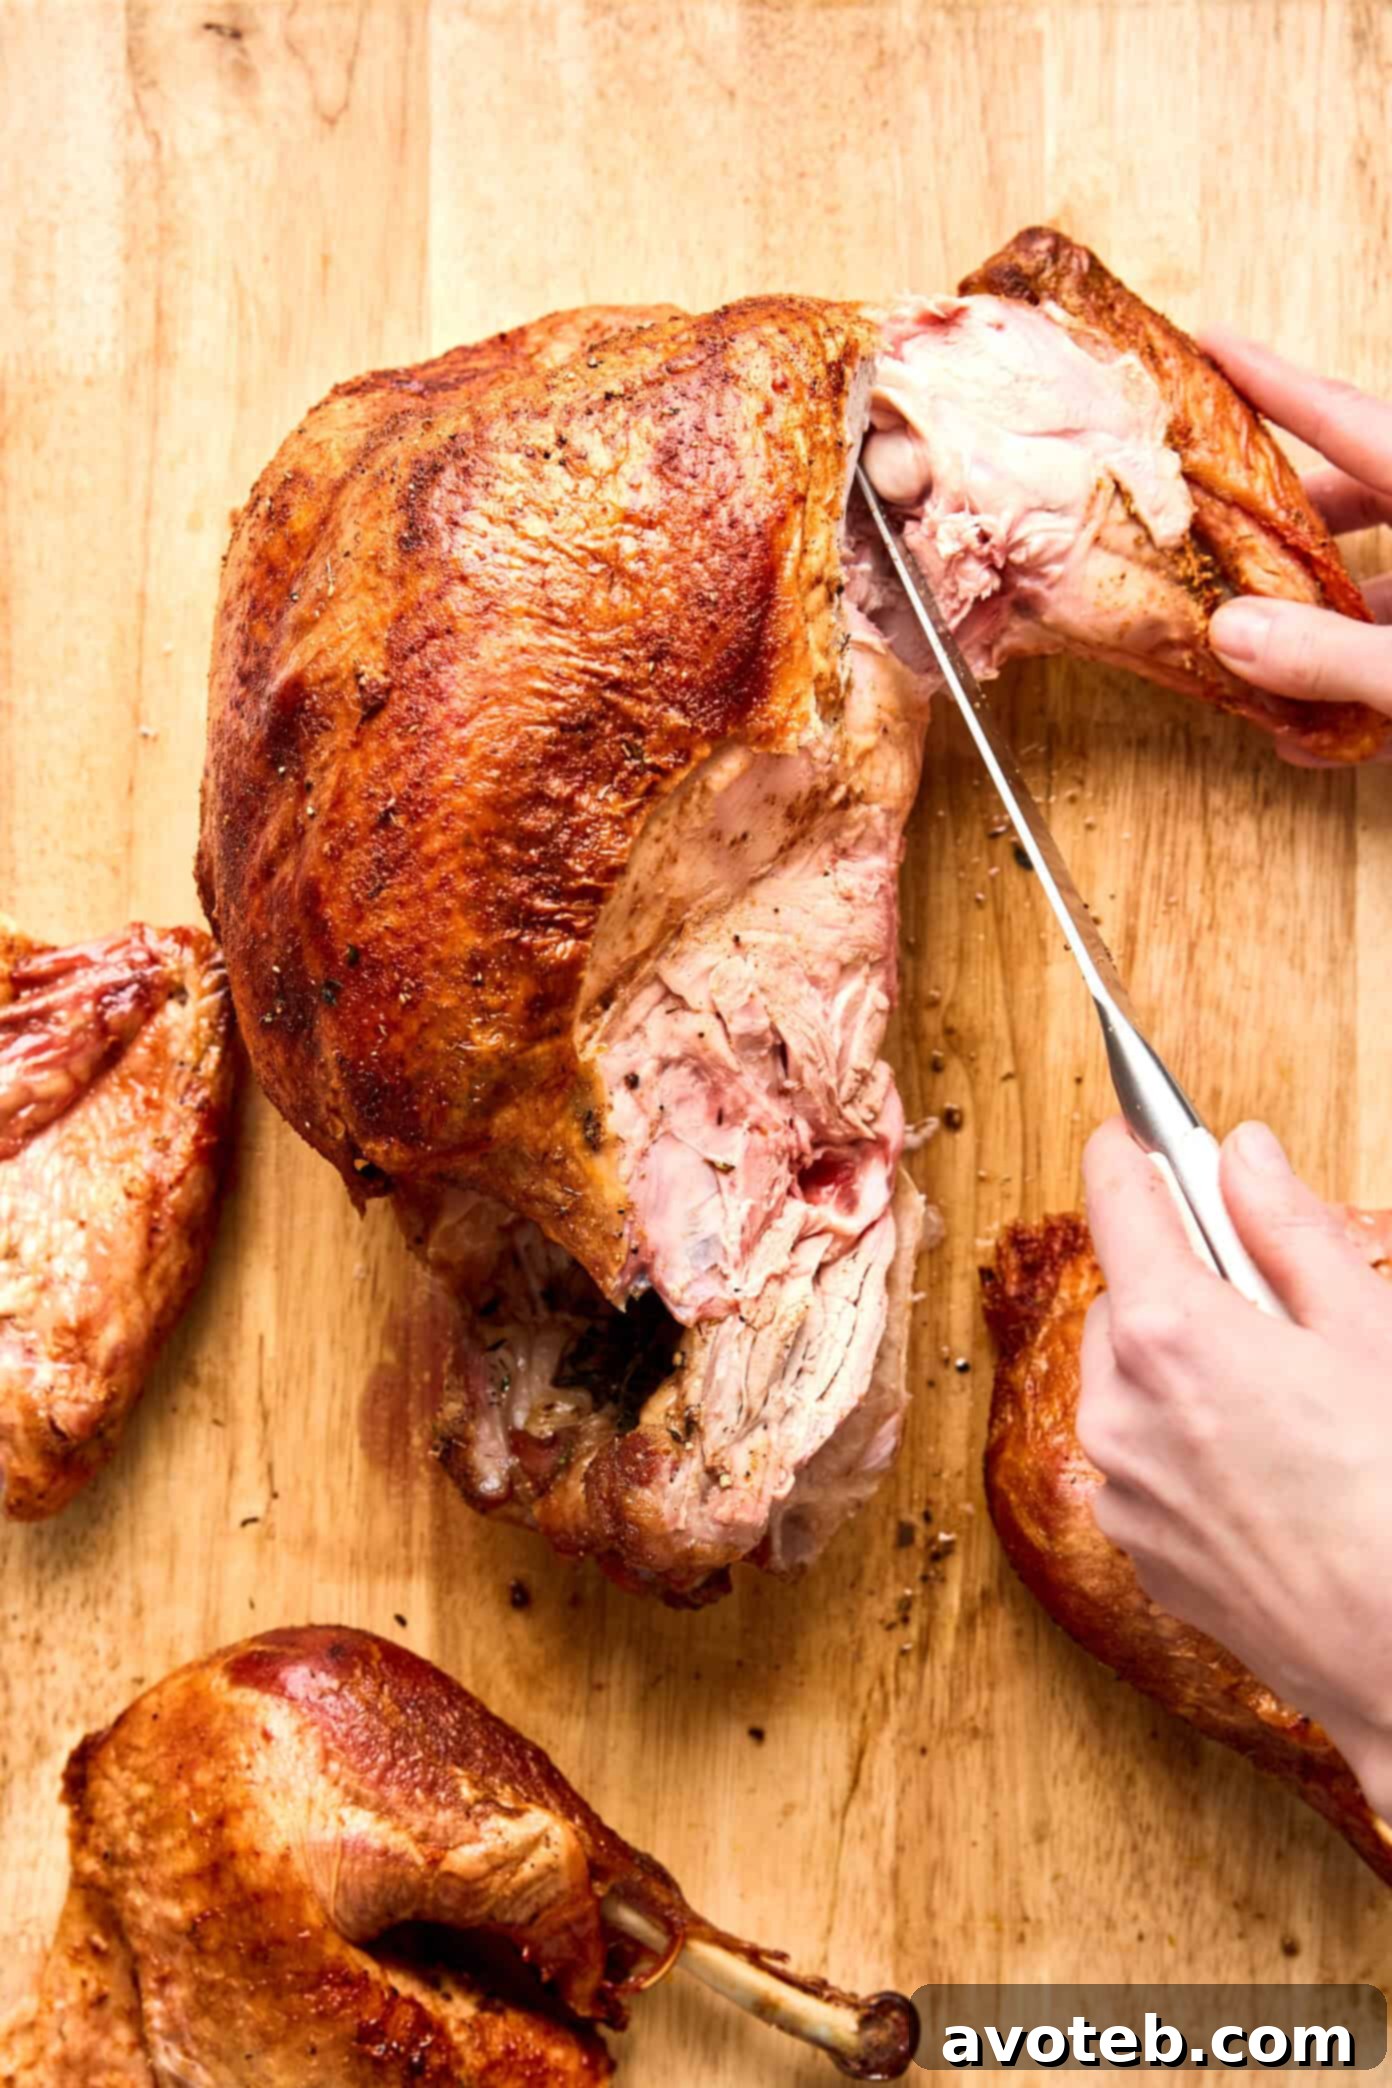
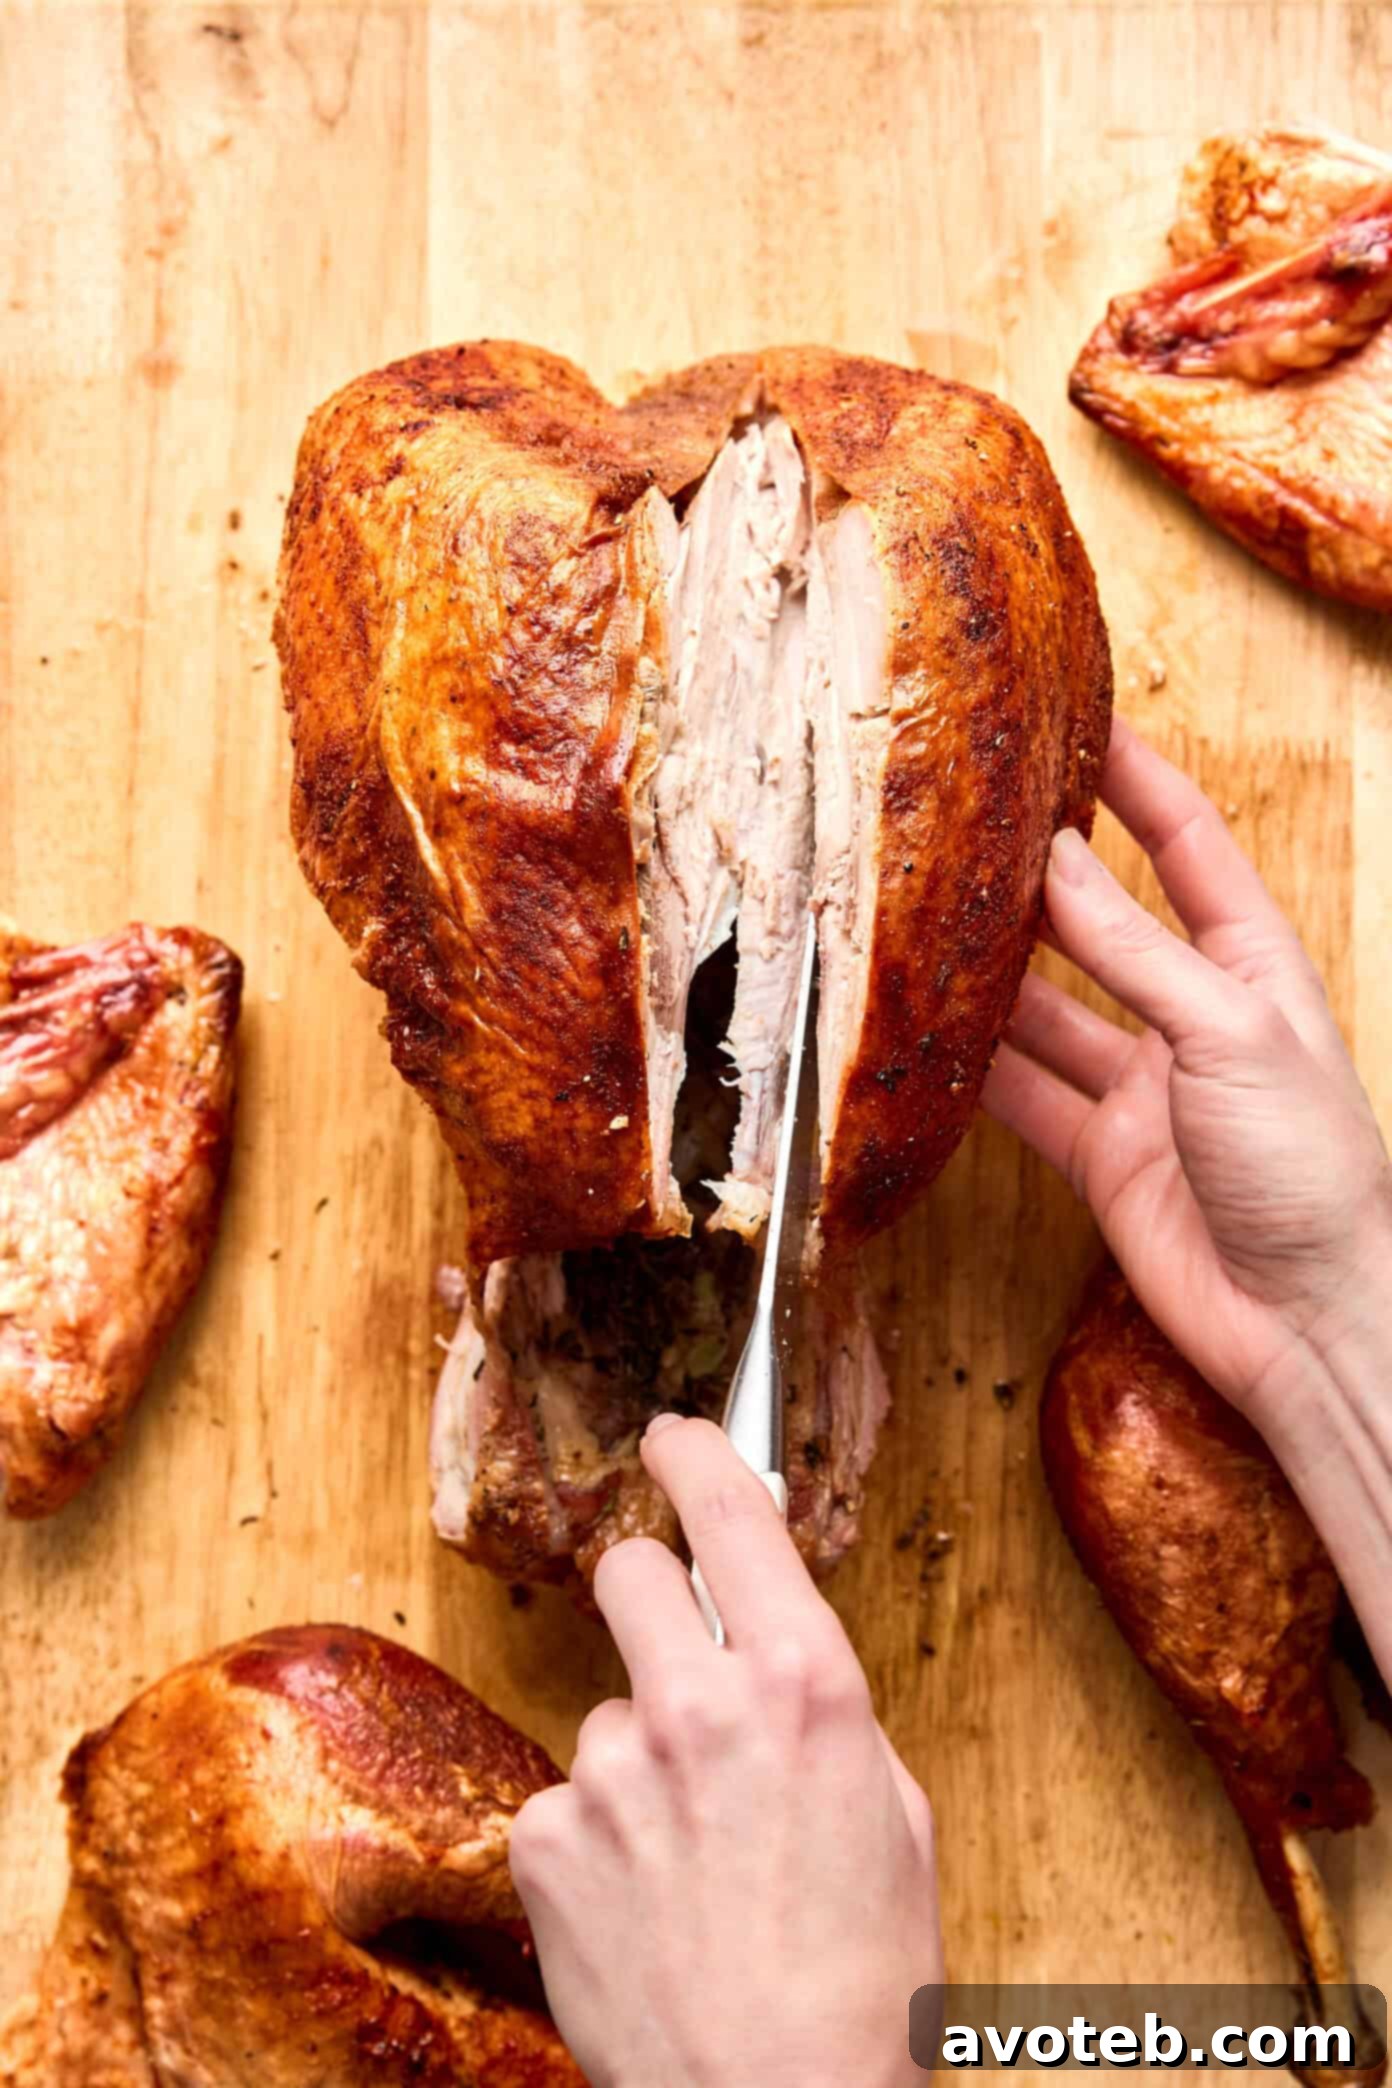
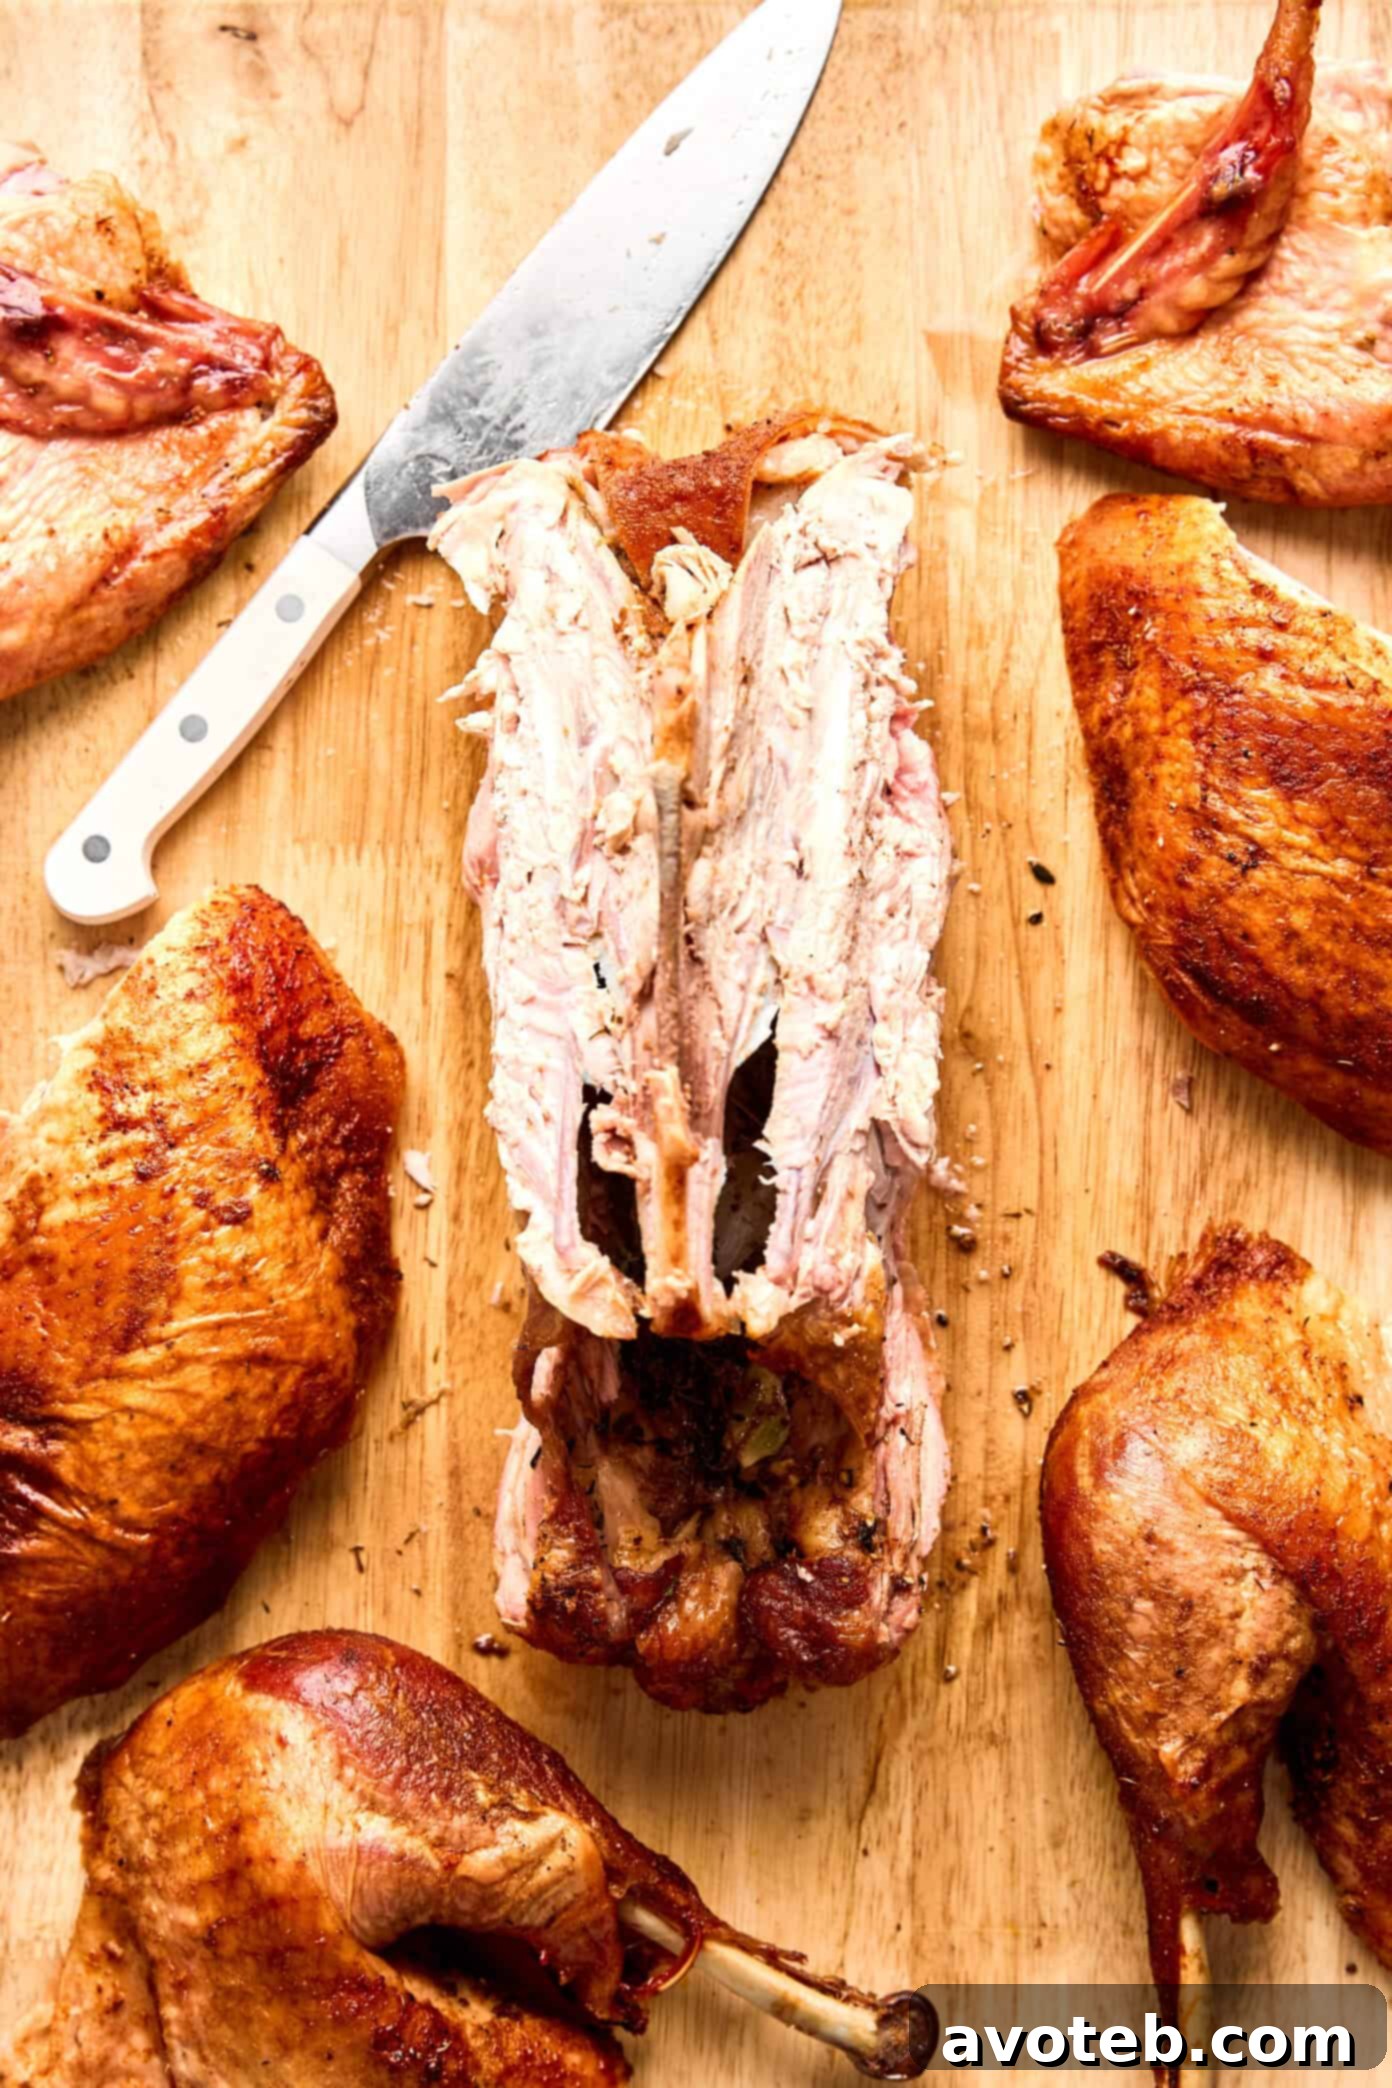
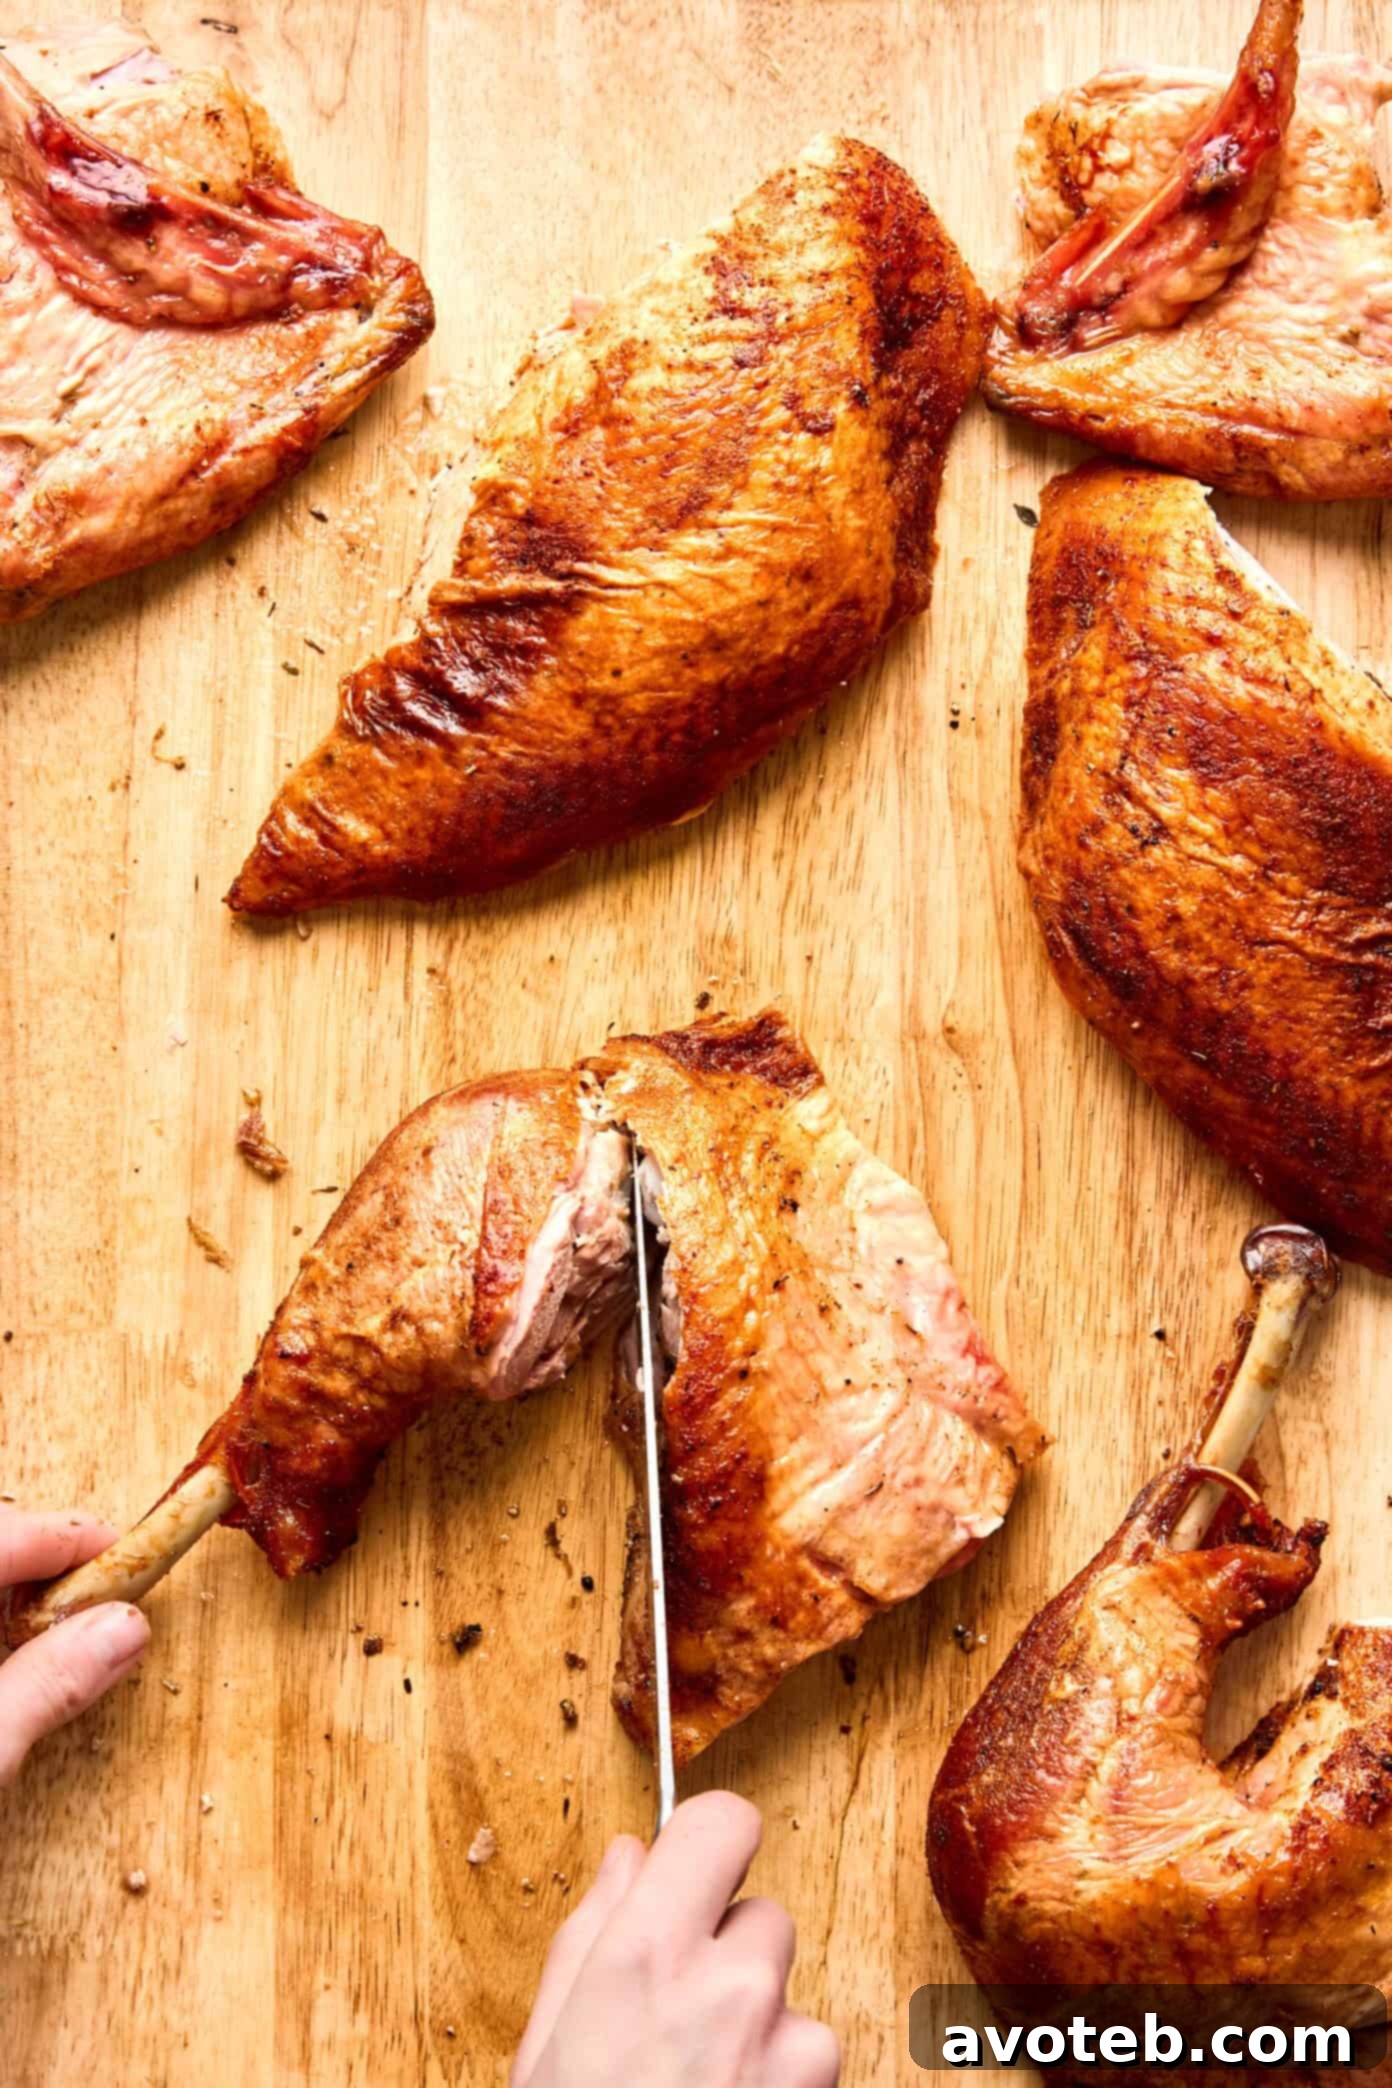
A Comprehensive Guide: How To Carve A Turkey Flawlessly
Carving a turkey can seem complex, but by following a logical sequence and understanding a few basic principles, you’ll find it remarkably straightforward. Below, you’ll find detailed instructions that mirror the visual steps in our video and photo gallery, ensuring you get the most out of your holiday bird.
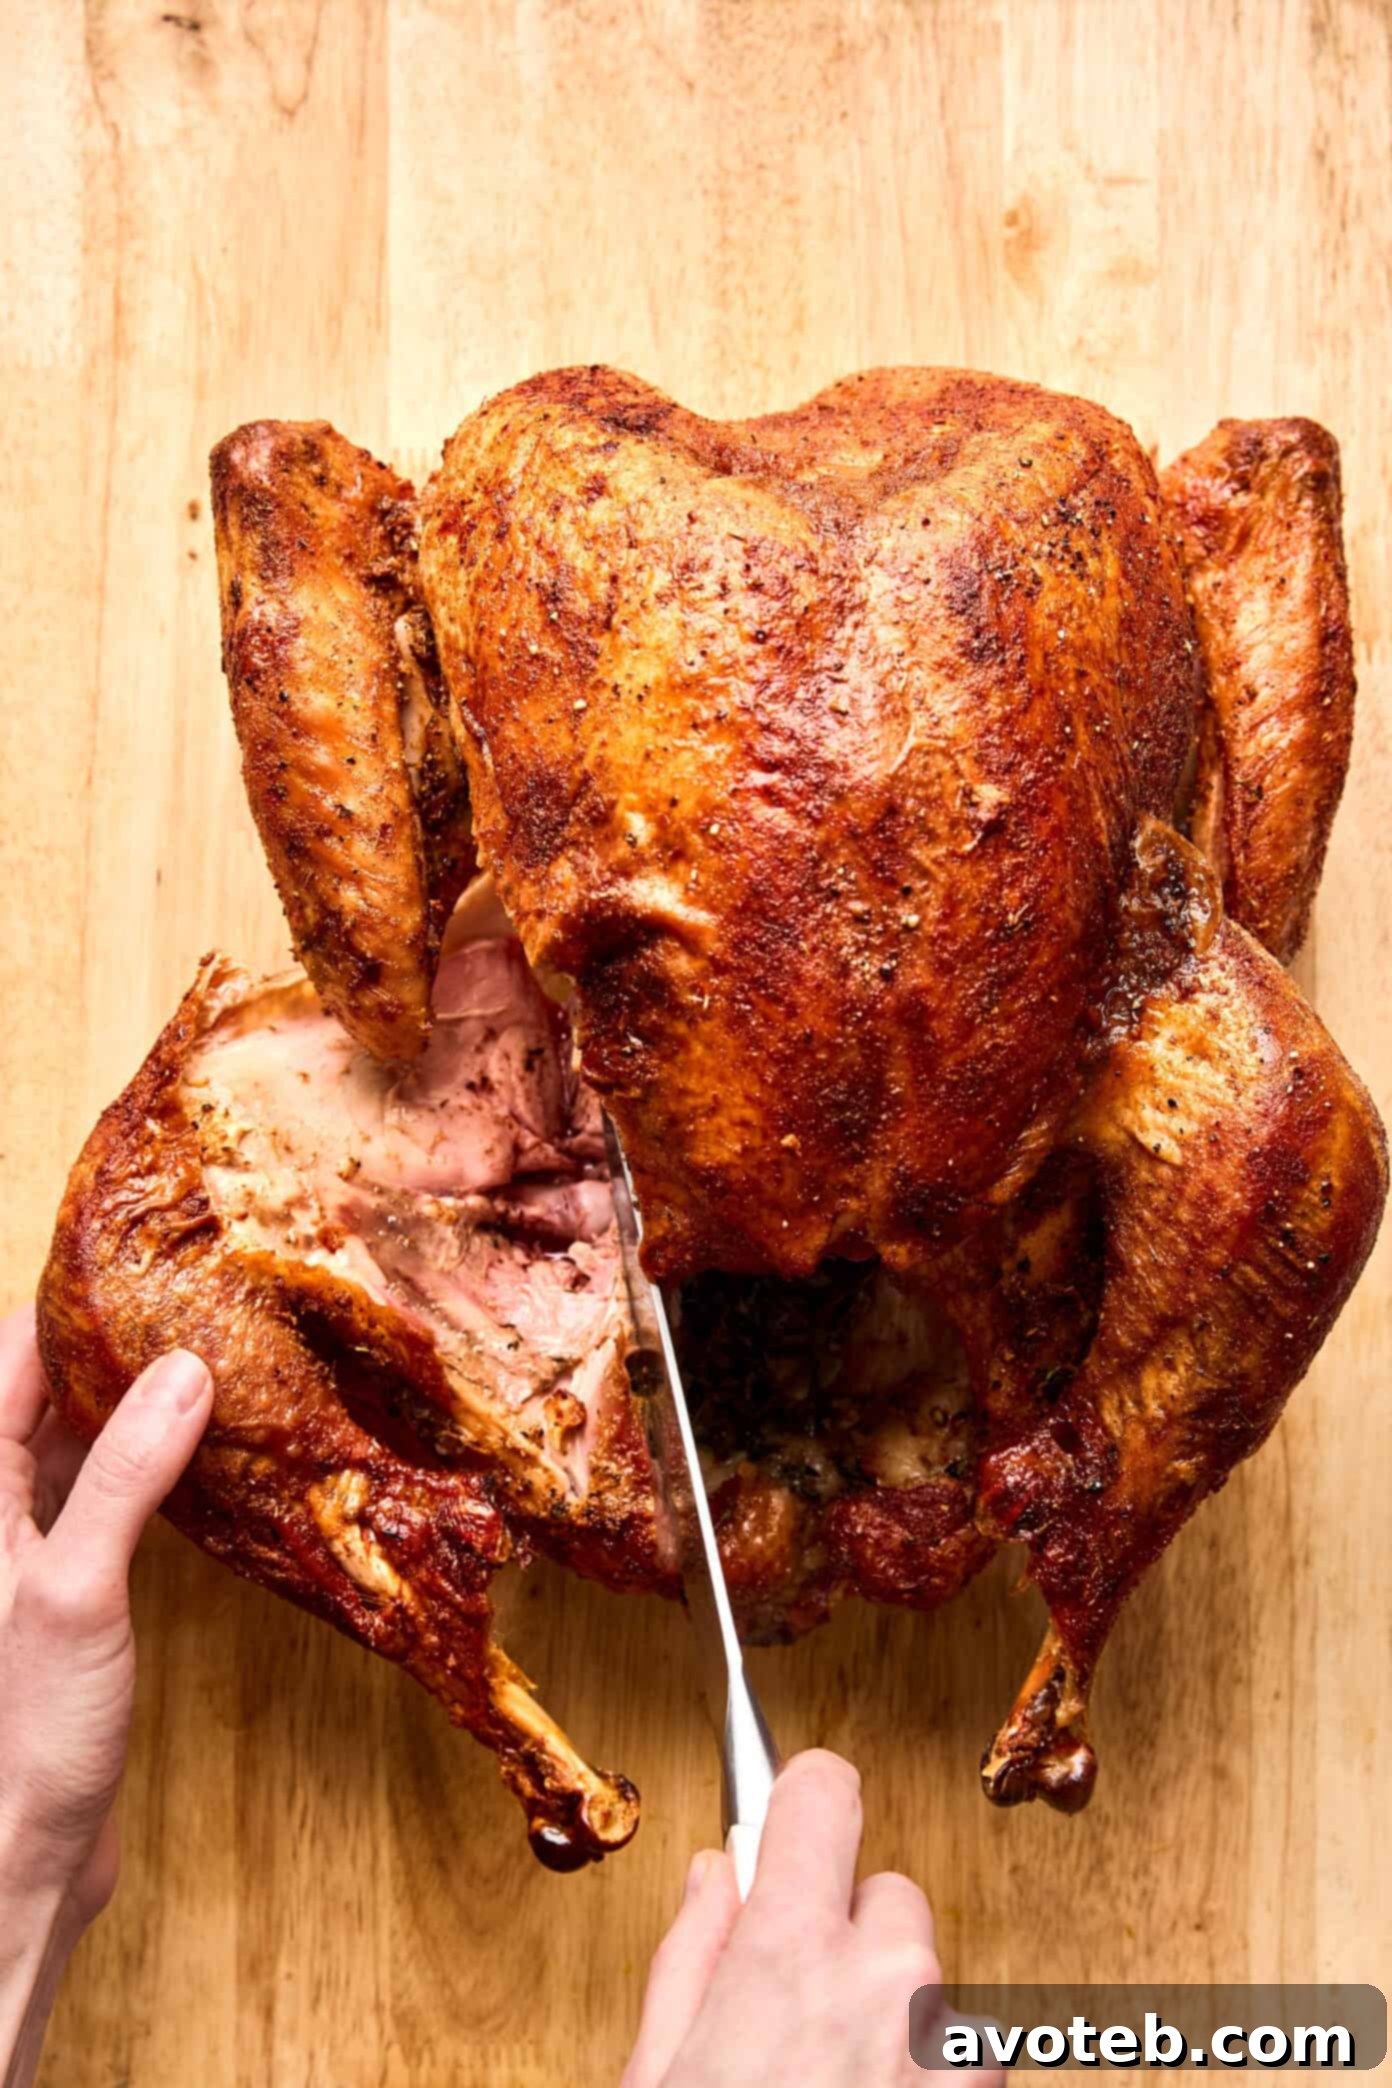
- Remove the Legs and Thighs: Begin by placing the roasted turkey breast-side up on a sturdy cutting board. Locate the natural seam where the leg and thigh connect to the body. Using your carving knife, make a clean cut through the skin and meat along this seam. Gently pull the leg outward, away from the body, until you expose the hip joint. Once the joint is visible, carefully slice through it with a firm motion to detach the entire leg-and-thigh piece. Repeat this process on the other side. Remember, you should always aim to cut through joints, not bone, to achieve clean separations. If you encounter resistance, slightly adjust your angle to find the joint’s precise location.
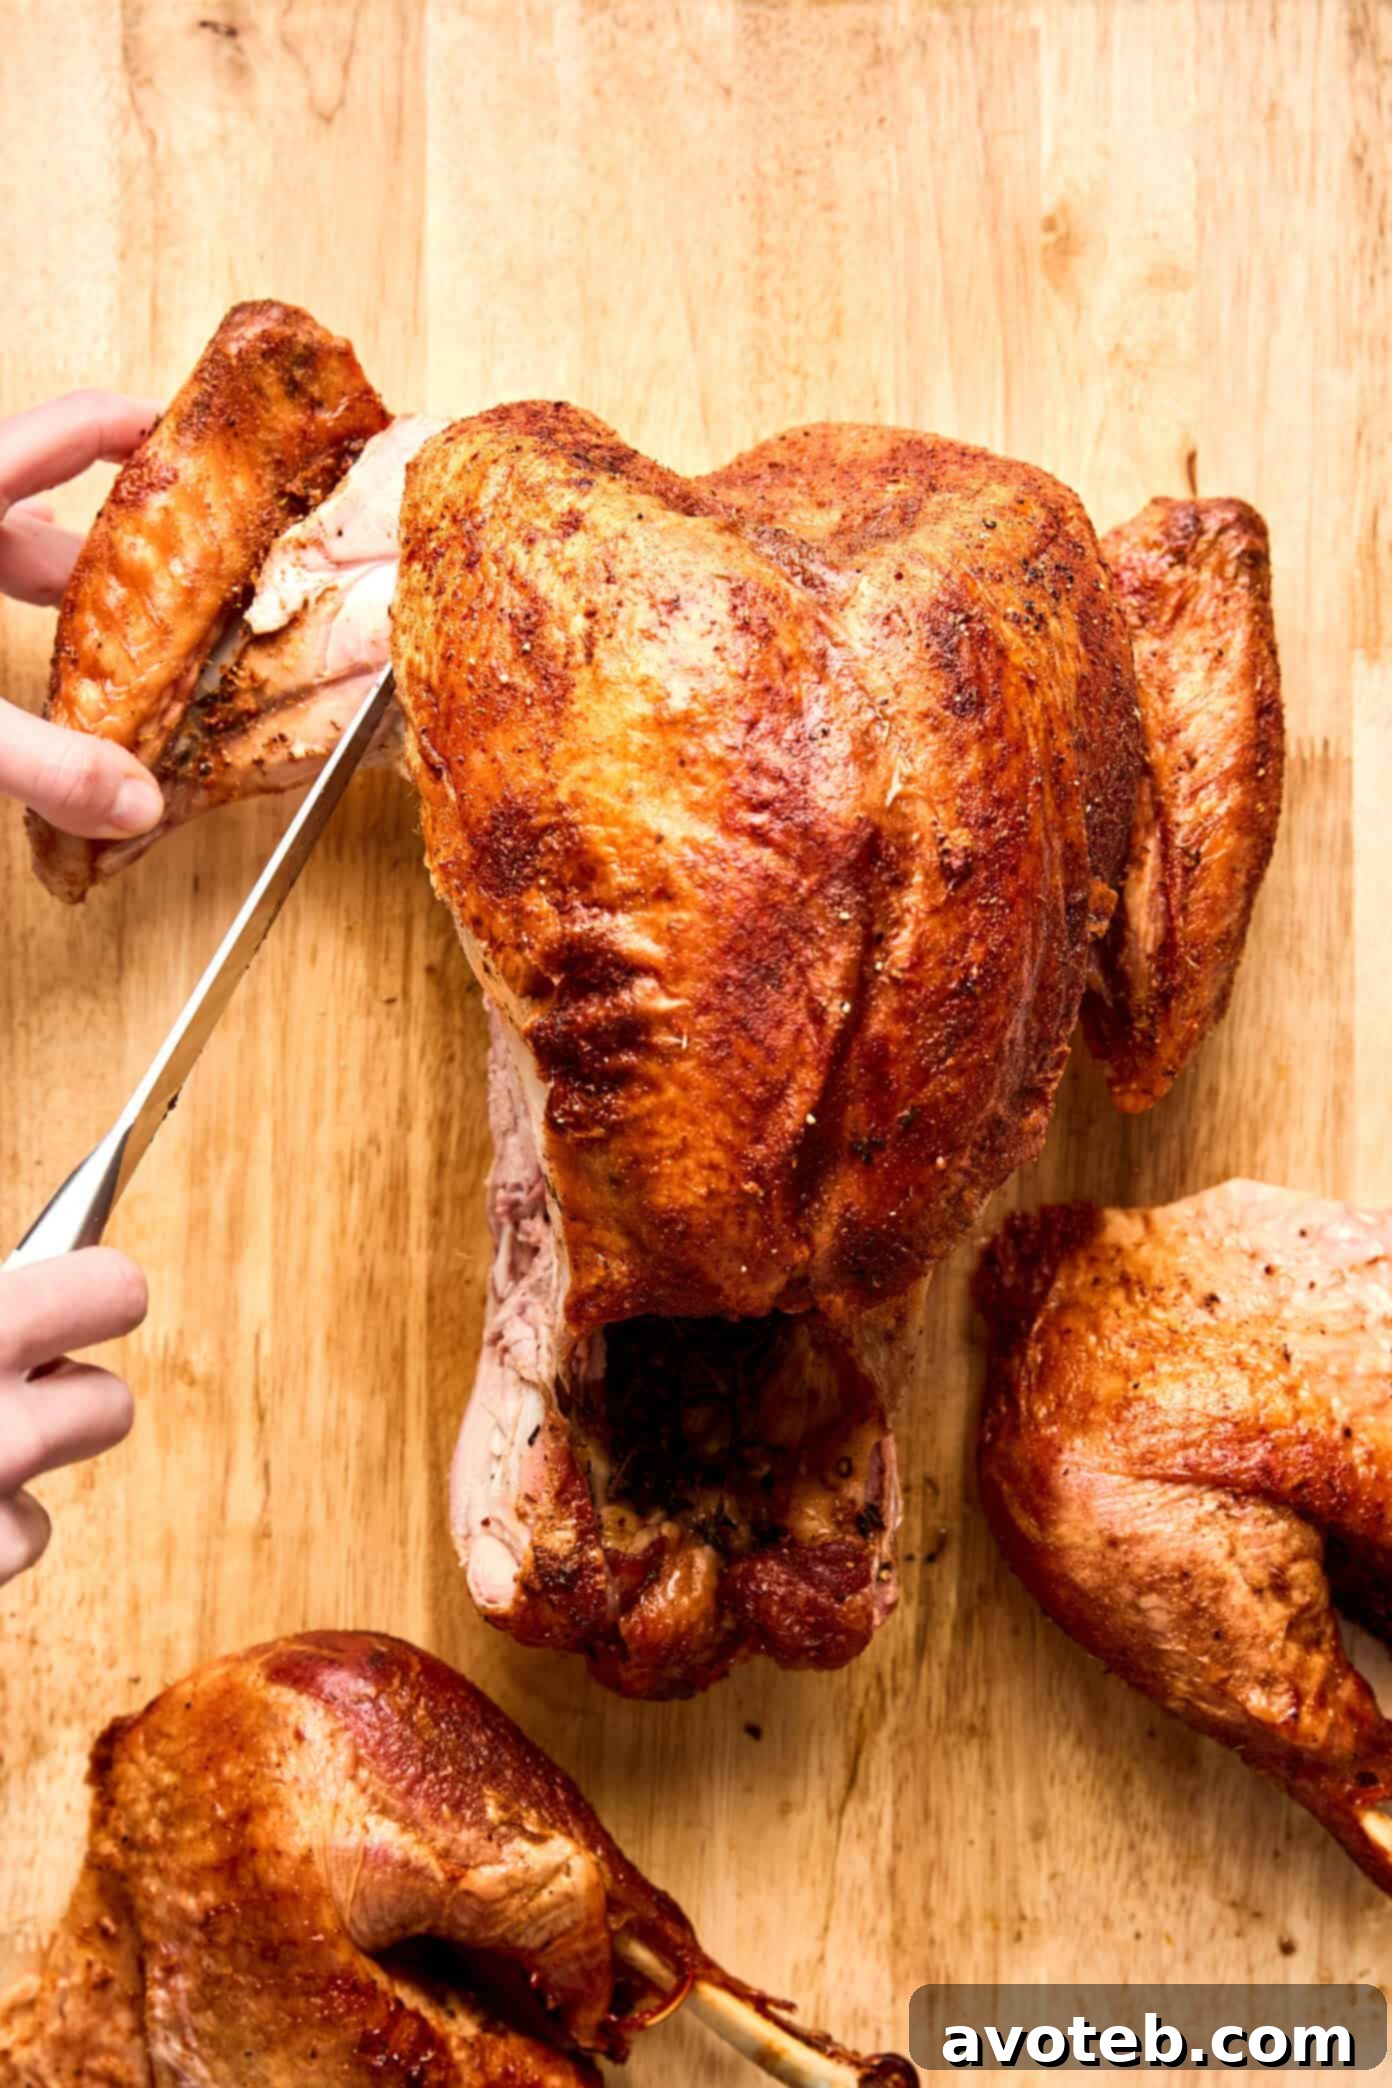
- Detach the Wings: Next, turn your attention to the wings. Similar to the legs, gently pull each wing outward to reveal the joint where it connects to the turkey’s body. Use your knife or a pair of sturdy kitchen shears to cut directly through this joint. A clean cut here will make for an elegant presentation. If desired, you can trim off the very tips of the wings for a neater appearance, or leave them for a more rustic look. Set the detached wings aside to be arranged on the serving platter later.
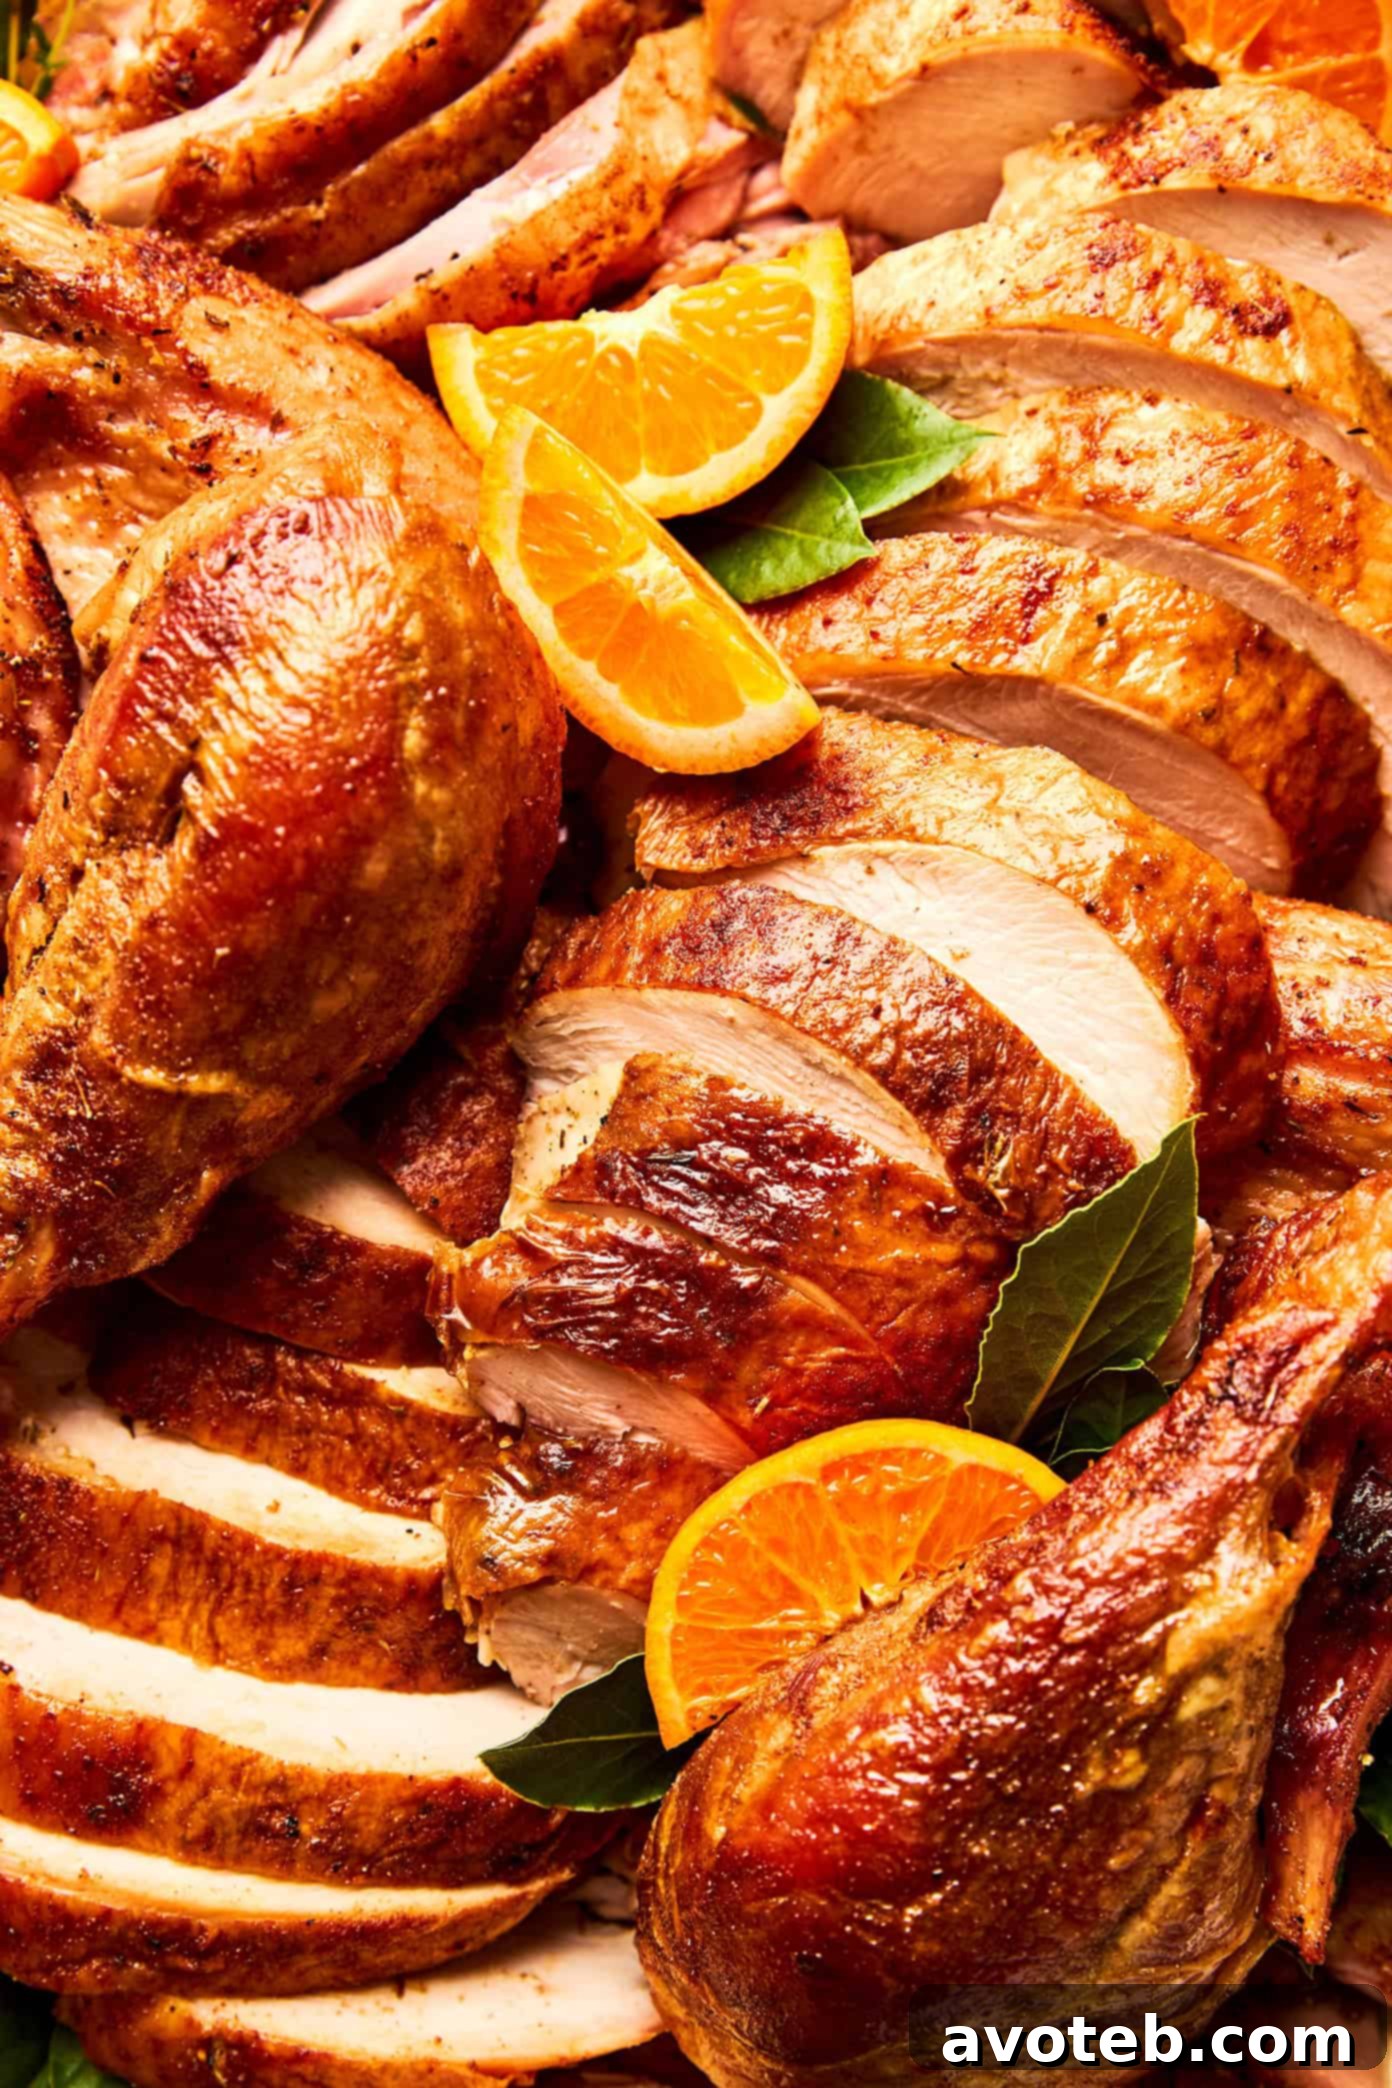
- Carve the Breast Meat with Precision: This is often the centerpiece of the platter. Locate the breastbone, which runs down the center of the turkey. Make a long, clean vertical cut down one side of the breastbone. Keep your knife blade close to the rib cage, following its curve, to carefully separate one entire breast half from the carcass. The goal is to remove it in one large, intact piece. Once removed, place the breast piece skin-side up on your cutting board. Now, slice the breast meat crosswise (against the grain) into even slices, typically about ¼-inch thick, or to your preferred thickness. Slicing against the grain is crucial for tender, easily chewable pieces. Repeat this entire process for the other breast half. Arrange these beautiful slices neatly on your serving platter, overlapping them slightly for an inviting display.
- Separate Thighs and Drumsticks: With the leg-and-thigh pieces now separated, it’s time to break them down further. Lay each piece skin-side down (or in a comfortable position that gives you good leverage) on the cutting board. Feel for the joint that connects the thigh to the drumstick. It’s usually a clear, rounded area. Slice directly through this joint to separate the two sections. For the thigh meat, you can slice it parallel to the bone, creating neat, boneless pieces. The drumstick can be served whole, especially for those who enjoy eating it off the bone, or you can carve the meat from the drumstick bone, if preferred.
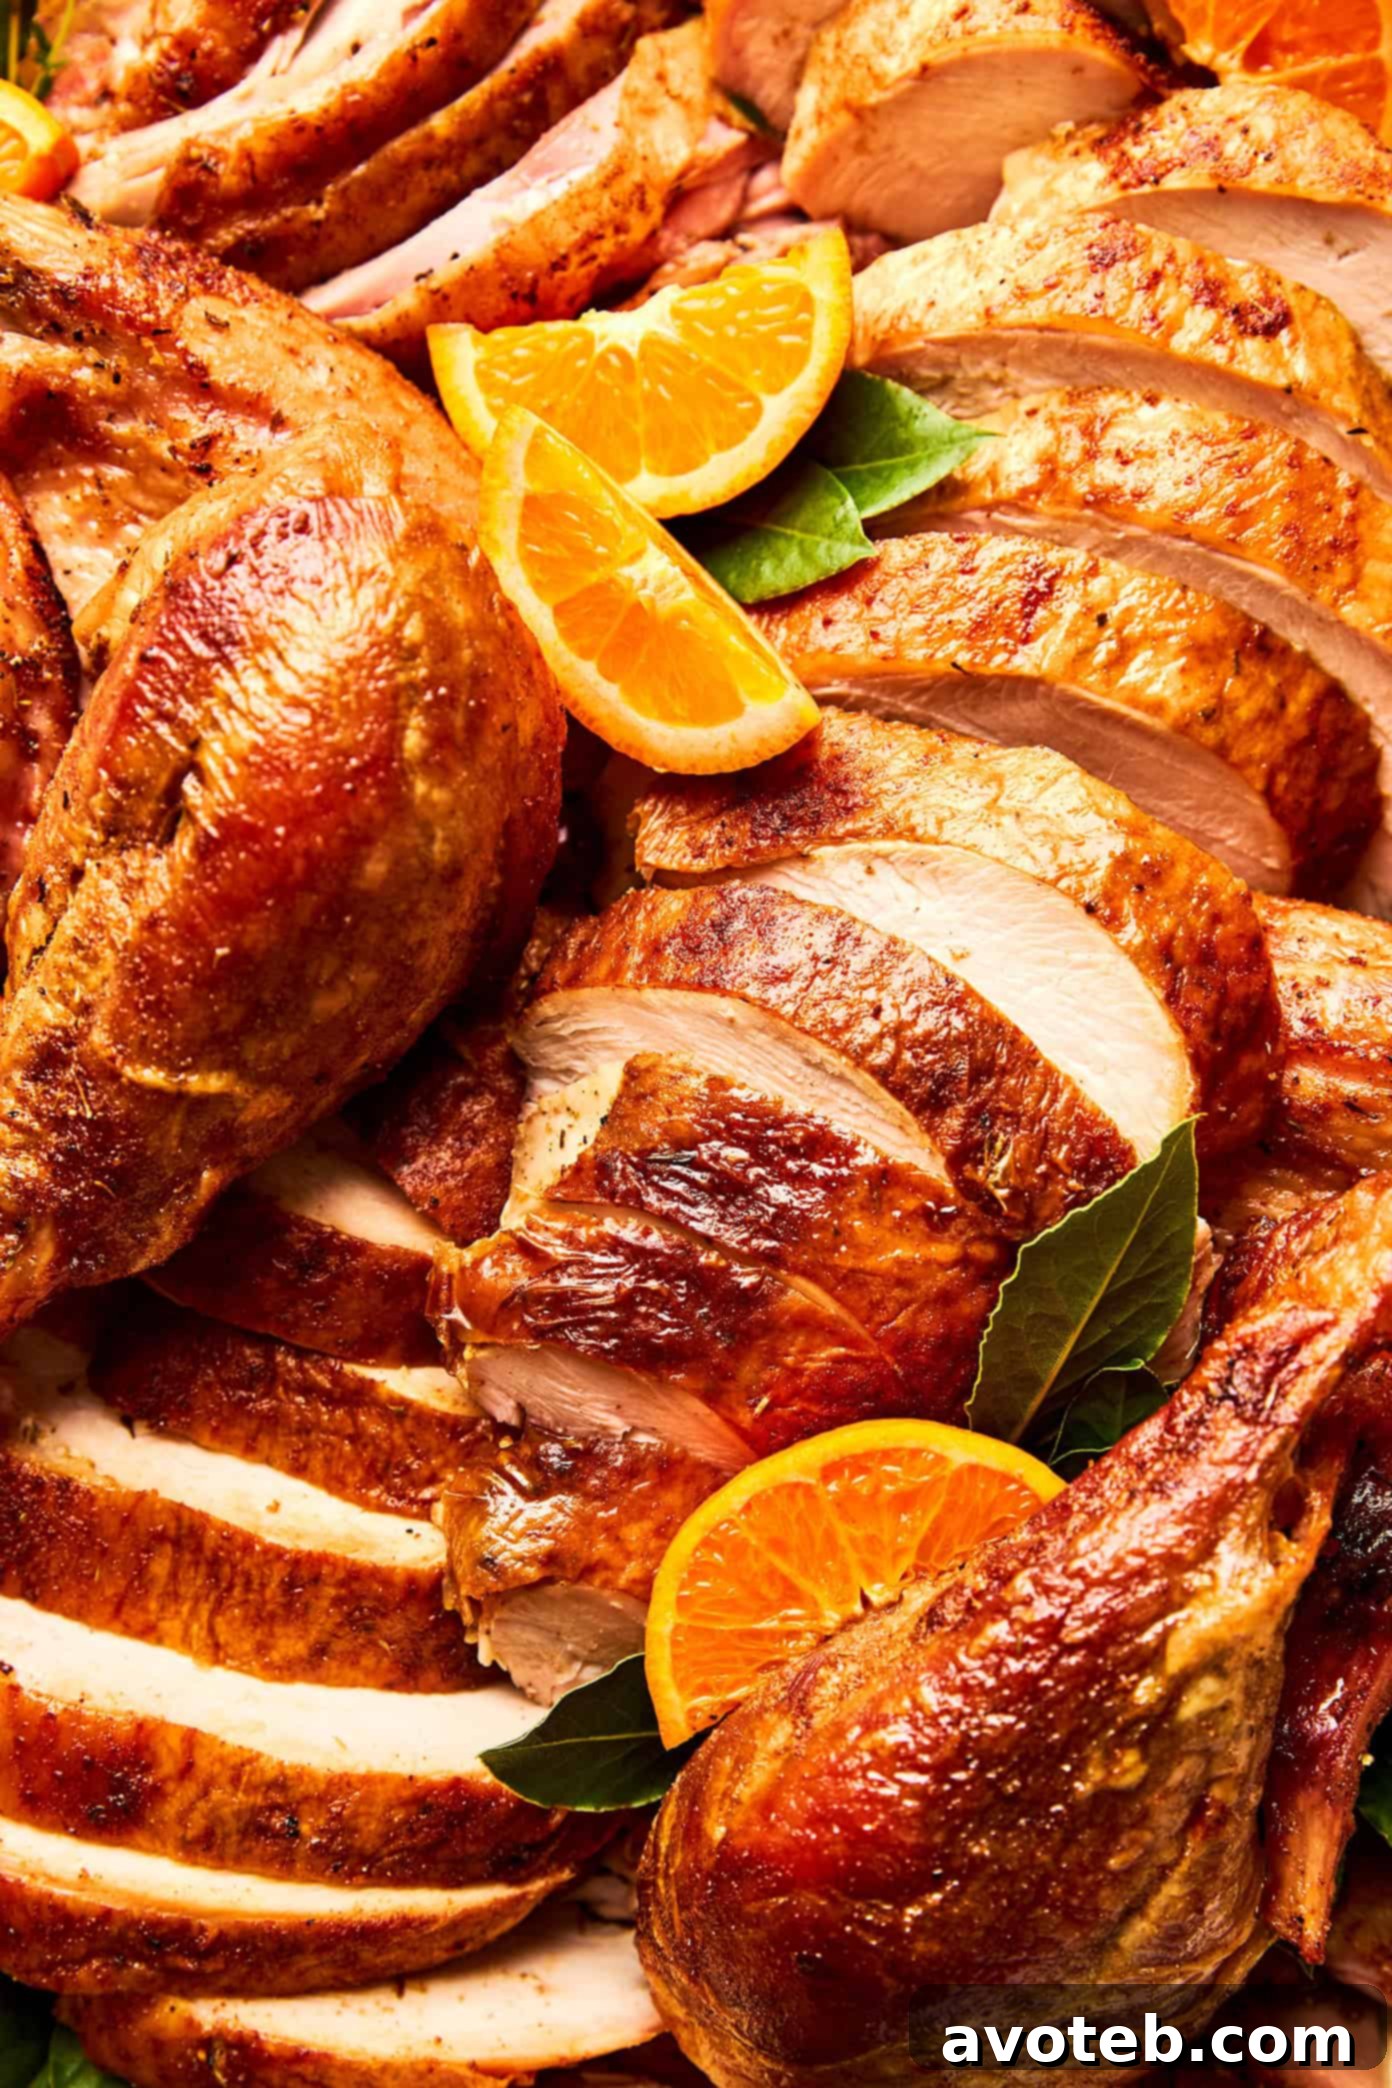
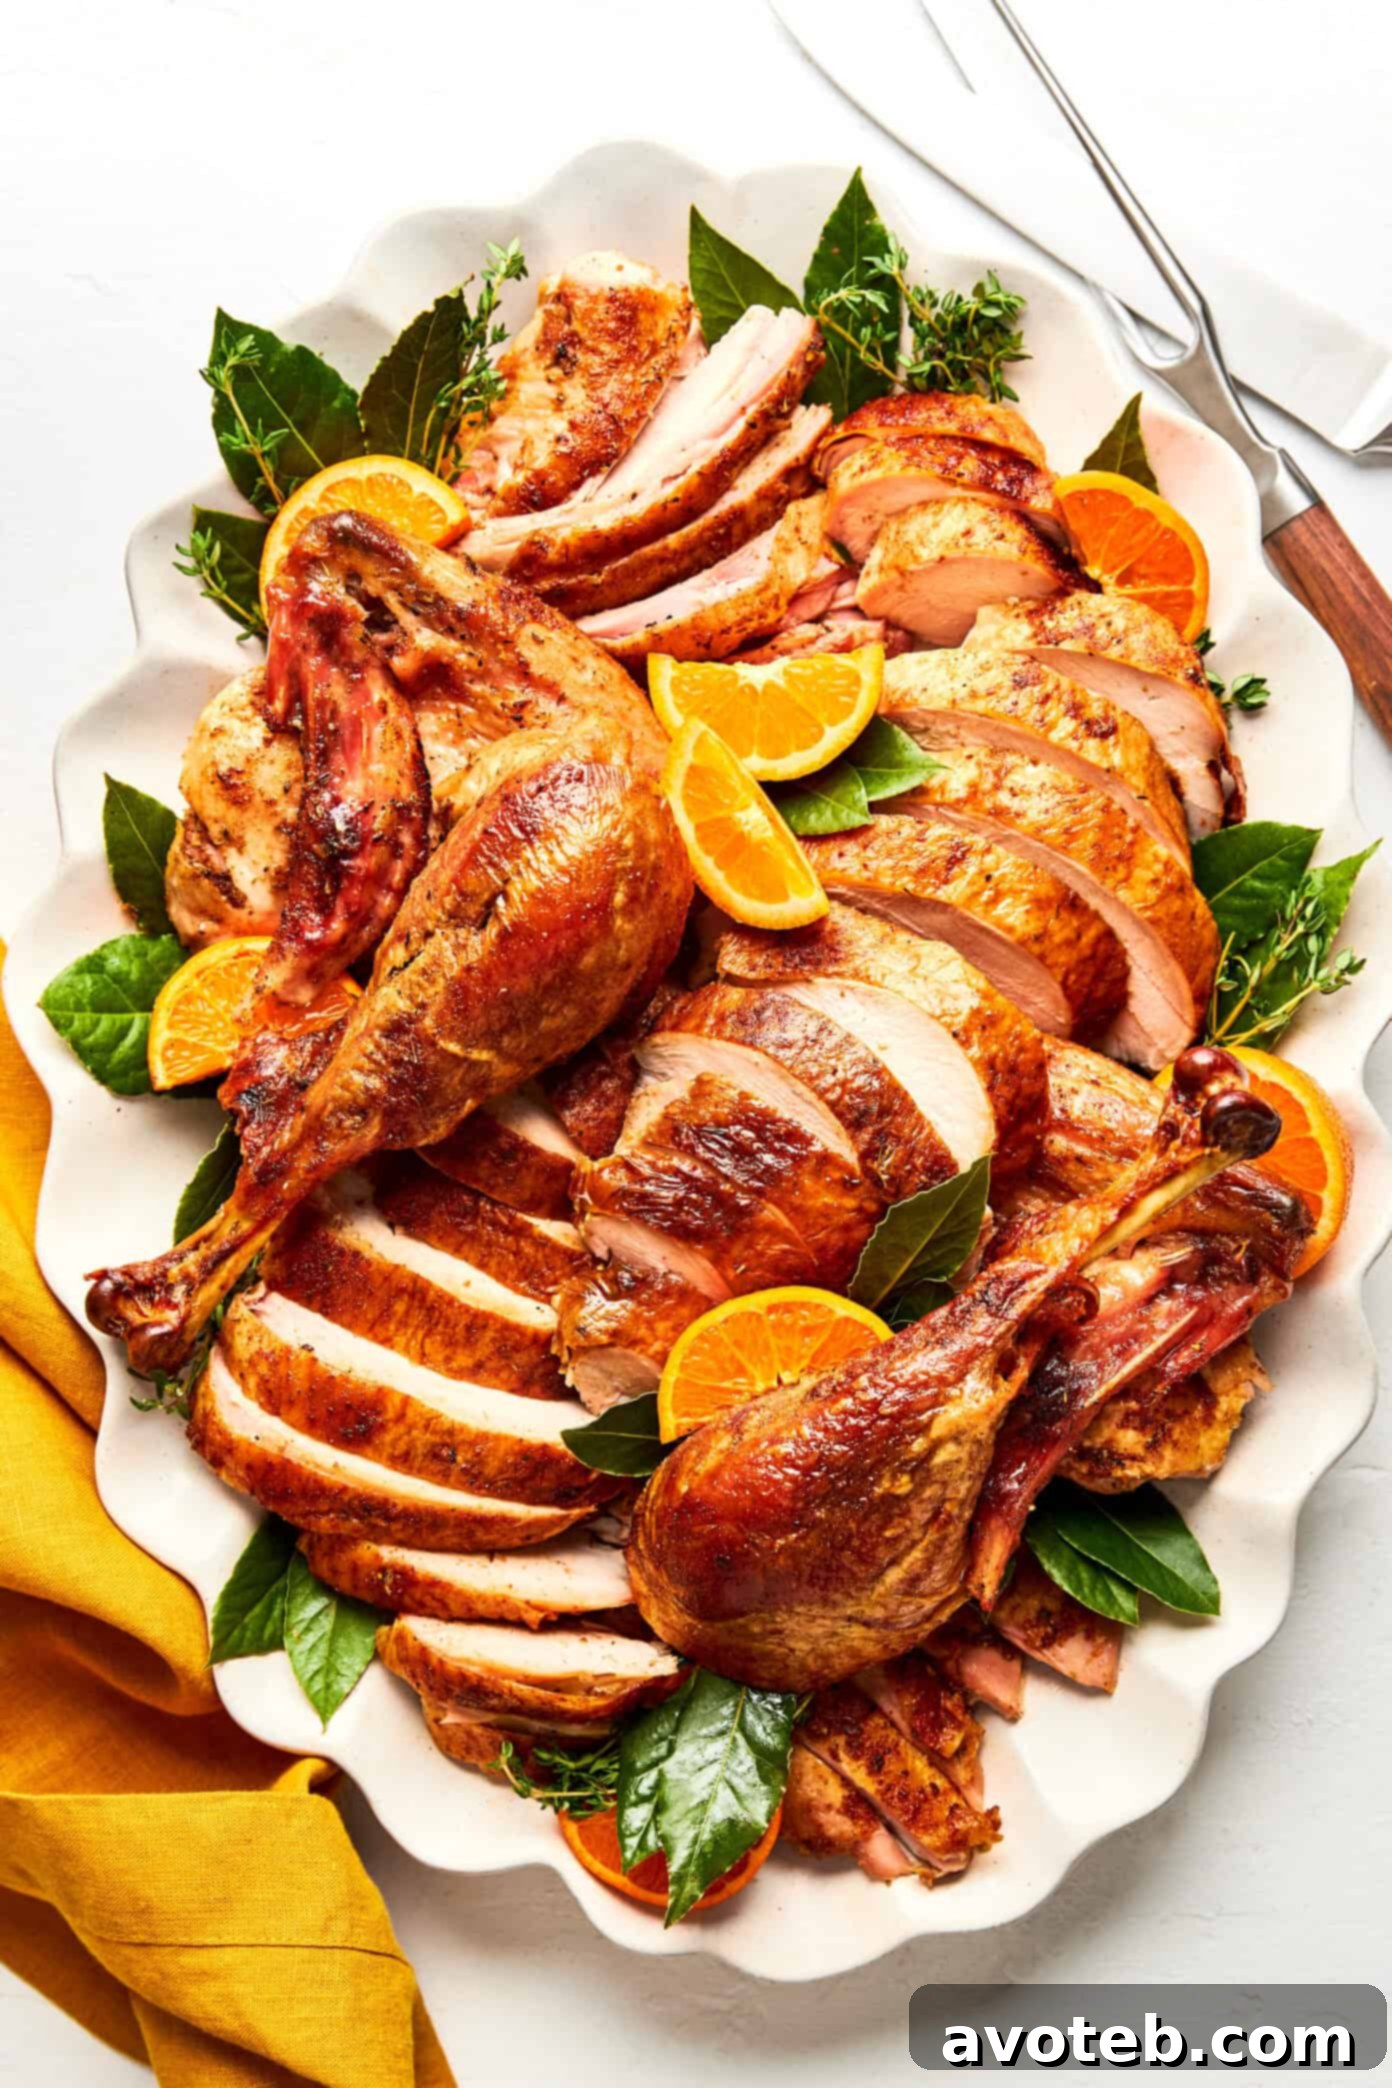
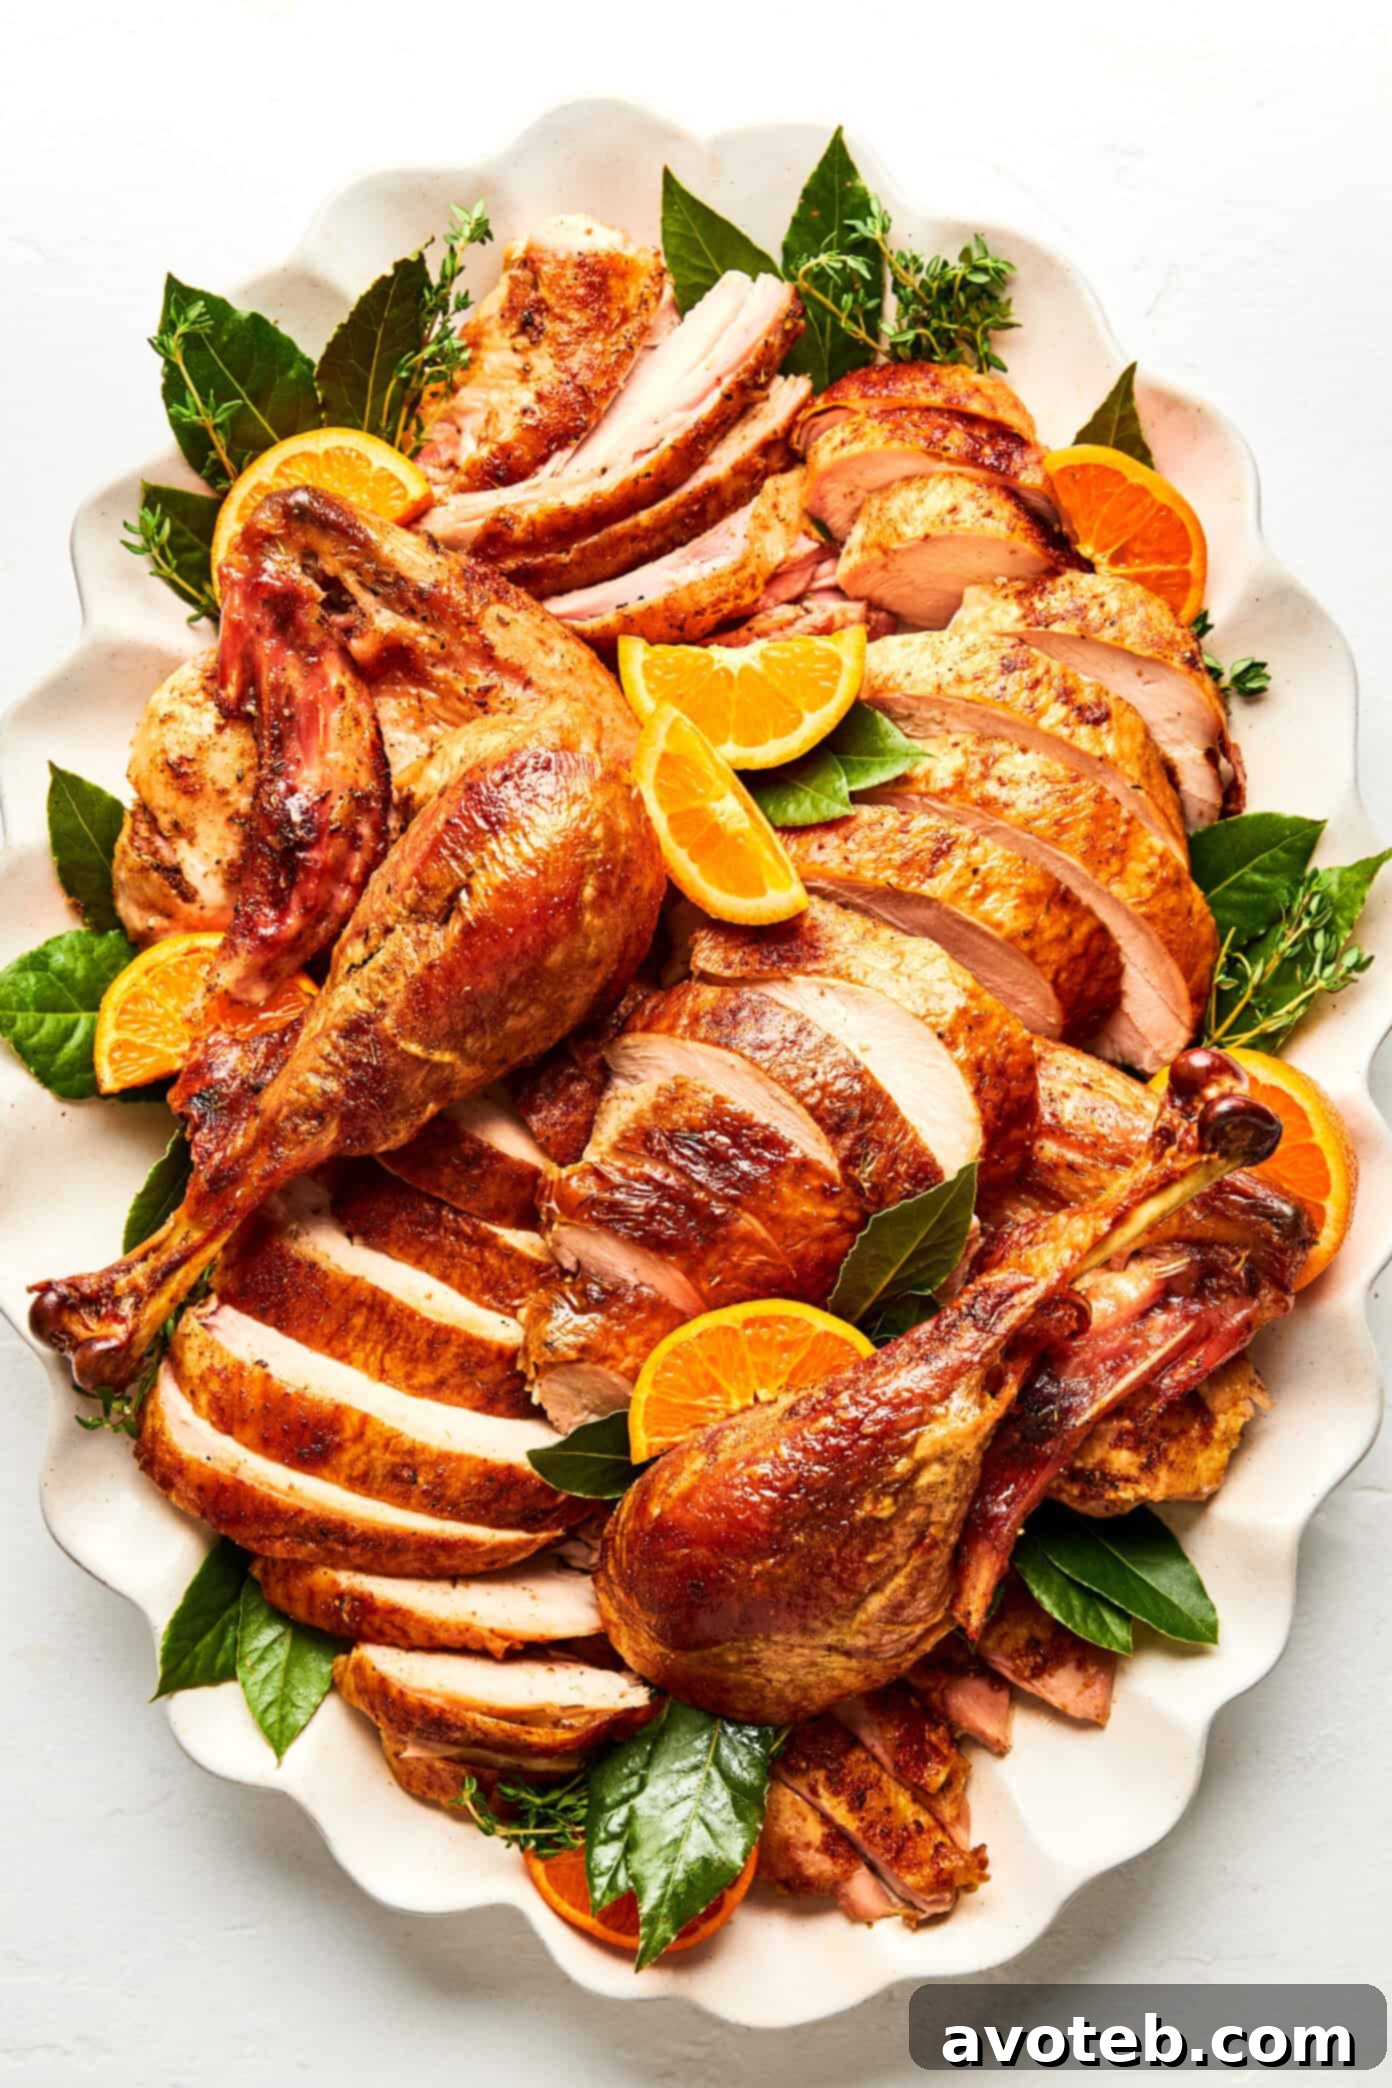
- Arrange on the Platter for a Stunning Presentation: The final step is to assemble your masterpiece. Arrange the beautifully sliced breast meat in the center of your serving platter, fanning out the slices or overlapping them slightly. Then, artfully place the carved thigh meat, drumsticks, and wings around or beside the breast slices. For an added touch of flavor and moisture, generously drizzle the carved turkey with any accumulated pan juices or gravy. Garnish with fresh herbs like rosemary or sage, or citrus wedges for a pop of color, to complete your professional-looking holiday centerpiece. Serve immediately and enjoy the fruits of your labor!
Essential Turkey Carving Tips and Tricks for a Stress-Free Experience
Beyond the basic cuts, a few expert tips can elevate your turkey carving game from good to absolutely outstanding. These simple tricks will ensure your carving experience is smooth, efficient, and results in the most tender, delicious turkey possible:
- Always Let the Turkey Rest: This is arguably the most critical step after roasting. Once your turkey is out of the oven, cover it loosely with foil and let it rest for at least 20-30 minutes, or even up to 45 minutes for a larger bird. This resting period allows the juices to redistribute evenly throughout the meat, preventing them from gushing out when you make the first cut. The result? A far more tender, moist, and flavorful turkey, and less mess on your cutting board.
- Invest in a Super Sharp Knife: A sharp knife makes all the difference. A long carving knife (typically 10-12 inches) with a thin blade, or a high-quality chef’s knife, will glide through the meat effortlessly. A dull blade, on the other hand, will tear the meat and skin, making the process frustrating and the presentation less appealing. Sharpen your knife just before you begin carving for optimal results.
- Find the Joints—Don’t Fight the Bones: The turkey’s anatomy is designed for easy disassembly once cooked. Instead of forcing your knife through bone, always seek out the natural joints where different sections of the bird connect. These joints are soft cartilage once cooked and will separate cleanly with minimal effort. If you feel resistance, reposition your knife slightly and try again. This technique preserves more meat and makes carving much easier.
- Remove the Wishbone First (Optional but Highly Recommended): While not strictly necessary, removing the wishbone before you start carving the breast can significantly simplify the process. To do this, locate the wishbone at the neck end of the turkey. Use a small paring knife to cut along both sides of the bone, then pull it out. This creates a clear path, making it much easier to slice down the breastbone and remove the breast meat in one large, beautiful piece.
- Carve on a Sturdy Cutting Board with a Well: Stability is key for safe and efficient carving. Use a large, heavy-duty cutting board that won’t slip around. Bonus points if your board features a juice groove or “well” around the perimeter. This channel will effectively catch any delicious pan juices, preventing them from spilling onto your countertop and allowing you to collect them for drizzling over the carved meat or adding to your gravy.
- Always Slice the Breast Across the Grain: This is a golden rule for achieving tender turkey slices. The “grain” refers to the direction of the muscle fibers. Slicing against these fibers shortens them, resulting in meat that is far more tender and easier to chew. If you slice with the grain, the muscle fibers remain long and stringy, leading to tough, unappetizing pieces of meat.
- Utilize a Carving Fork or Tongs for Stability: A sturdy carving fork or a pair of large tongs can be incredibly helpful for holding the turkey steady as you carve. This provides a secure grip, preventing the bird from shifting and ensuring your cuts are precise and safe. Avoid pressing down too hard, as this can compress and damage the meat.
- Arrange Strategically on the Platter for Visual Appeal: Presentation matters! Once carved, arrange your turkey pieces artfully on a large serving platter. Place the breast slices neatly in the center, fanned out or slightly overlapping. Surround them with the dark meat (thighs and drumsticks) and wings. Garnish with fresh herbs, citrus slices, or fresh cranberries to add a vibrant splash of color and a festive touch.
Frequently Asked Questions About Turkey Carving
Absolutely! Carving your turkey up to an hour before serving is perfectly acceptable and can significantly reduce last-minute kitchen stress. To keep it warm and moist, arrange the carved meat on an oven-safe platter, cover it loosely with foil, and warm it gently in a low oven (around 200°F or 95°C). Adding a splash of warm chicken or turkey broth or pan juices before covering can also help prevent the meat from drying out.
Preventing torn skin starts with allowing the turkey to rest adequately after roasting. This allows the skin to firm up slightly. Additionally, always use a very sharp knife and employ long, smooth slicing motions rather than a sawing back-and-forth action. A sharp knife ensures clean cuts, while gentle, deliberate strokes minimize the risk of tearing the beautifully crisp skin.
Do not discard the turkey carcass! It is a treasure trove of flavor. Save the bones, along with any leftover drippings and vegetable scraps (like onion skins, carrot peels, and celery ends), to make an incredibly rich and flavorful turkey stock. Simply simmer them in a large pot with water for several hours. This homemade stock is perfect for enhancing soups, gravies, stews, ramen, or any dish that benefits from a deep, savory base.
Yes, absolutely! The anatomical structure of a chicken, duck, or any other whole roasted poultry is essentially the same as a turkey, just on a smaller scale. You can apply all the same principles—resting the bird, using a sharp knife, finding the joints, and slicing against the grain—to carve smaller birds with equal success. It’s excellent practice for your big holiday turkey!
For a smooth carving experience, you’ll need a few key tools: a sturdy carving knife (10-12 inches), a carving fork or tongs to stabilize the bird, and a large, stable cutting board, preferably one with a juice groove. A knife sharpener is also highly recommended to ensure your blade is at its best. Kitchen shears can be useful for separating wings or trimming small pieces.
To ensure your beautifully carved turkey stays warm throughout the meal, arrange it on a heated platter or serving dish. You can warm the platter in a low oven (around 150-200°F or 65-95°C) or with hot water before placing the meat on it. Covering the platter loosely with foil also helps retain heat. Some hosts also choose to serve the dark meat and white meat on separate platters, placing them near warming elements if available.
Print Recipe
How To Carve A Turkey
- Author: Ali
Prep Time: 15 mins
Cook Time: 0 mins
Total Time: 15 mins
Yield: 1 turkey 1x
Description
Learn how to carve a turkey step-by-step with this comprehensive guide and accompanying video. Discover the basic cuts, how to expertly slice against the grain for maximum tenderness, and essential tips for creating a beautiful and appetizing serving platter for your holiday meal.
Ingredients
Scale
- 1 whole roasted turkey (ensure it has rested for at least 20 minutes)
- Optional garnishes: fresh herbs (such as sage, rosemary, thyme, parsley, bay leaves), citrus wedges (lemon or oranges), fresh cranberries, or pan juices/gravy for drizzling.
Instructions
-
Rest and Prepare: First, ensure your cooked turkey has rested for at least 20-30 minutes to allow the juices to redistribute for maximum tenderness. Place the turkey breast-side up on a large, stable cutting board, preferably one with a juice groove. Have a sharp carving knife and carving fork (or tongs) ready, along with a separate platter for the carved meat.
-
Remove the Legs and Thighs: Using your carving knife, make a cut along the natural seam where the leg and thigh meet the turkey’s body. Gently pull the entire leg outward, away from the carcass, until the hip joint is exposed. Carefully cut through this joint to separate the leg-and-thigh piece. Repeat this process on the other side. Always aim to cut through the joint, not the bone, for clean removal.
-
Detach the Wings: Now, locate where each wing connects to the turkey’s body. Gently pull the wing outward and make a clean cut through the joint using your knife or kitchen shears. If desired, trim off the wing tips for a neater presentation on your serving platter. Set the wings aside.
-
Carve the Breast Meat: Find the breastbone running down the center of the turkey. Make a long, vertical cut down one side of the breastbone, following the curve of the rib cage to carefully separate one breast half from the carcass in one large piece. Place this breast piece skin-side up on your cutting board. Slice the meat crosswise (against the grain) into uniform ¼-inch thick slices. Repeat for the other breast half and arrange the slices on your serving platter.
-
Separate Thighs and Drumsticks: Take each leg-and-thigh piece and lay it on your cutting board. Locate the joint between the thigh and the drumstick. Slice through this joint to separate them cleanly. For the thigh meat, you can slice it parallel to the bone. The drumstick can be served whole, or you may carve the meat off the bone if preferred. Add these pieces to your serving platter.
-
Arrange and Serve: Once all the turkey is carved, arrange the slices of breast meat neatly in the center of your platter, fanning them out or overlapping them slightly. Place the thigh meat, drumsticks, and wings around the breast. Drizzle with warm pan juices or gravy, if desired, and garnish with fresh herbs or citrus wedges for an inviting presentation. Serve immediately and enjoy your perfectly carved turkey!