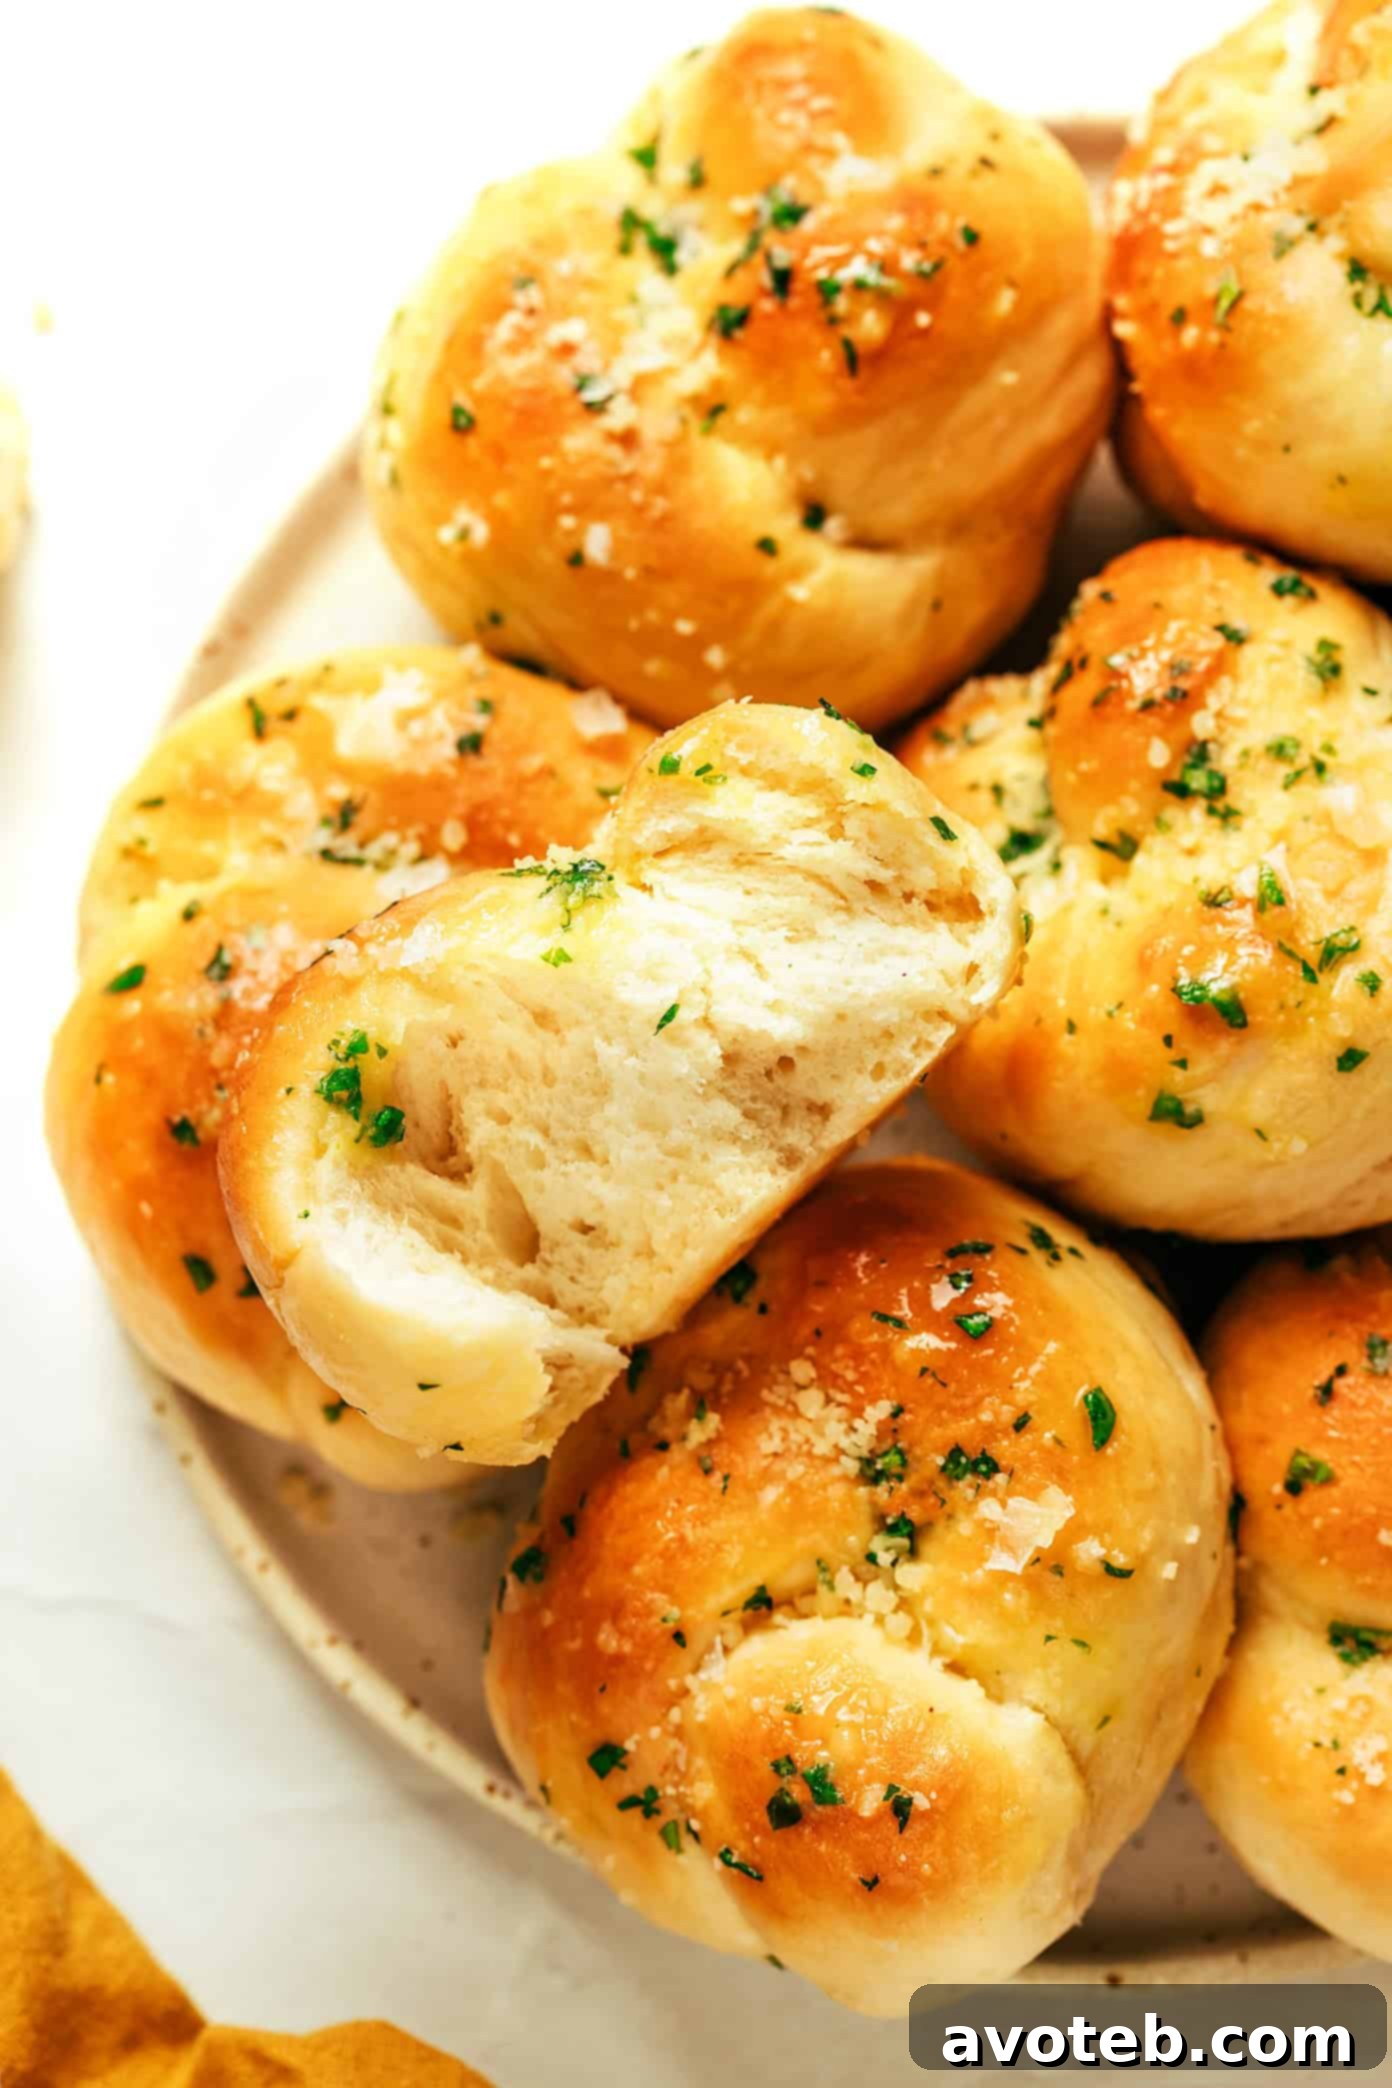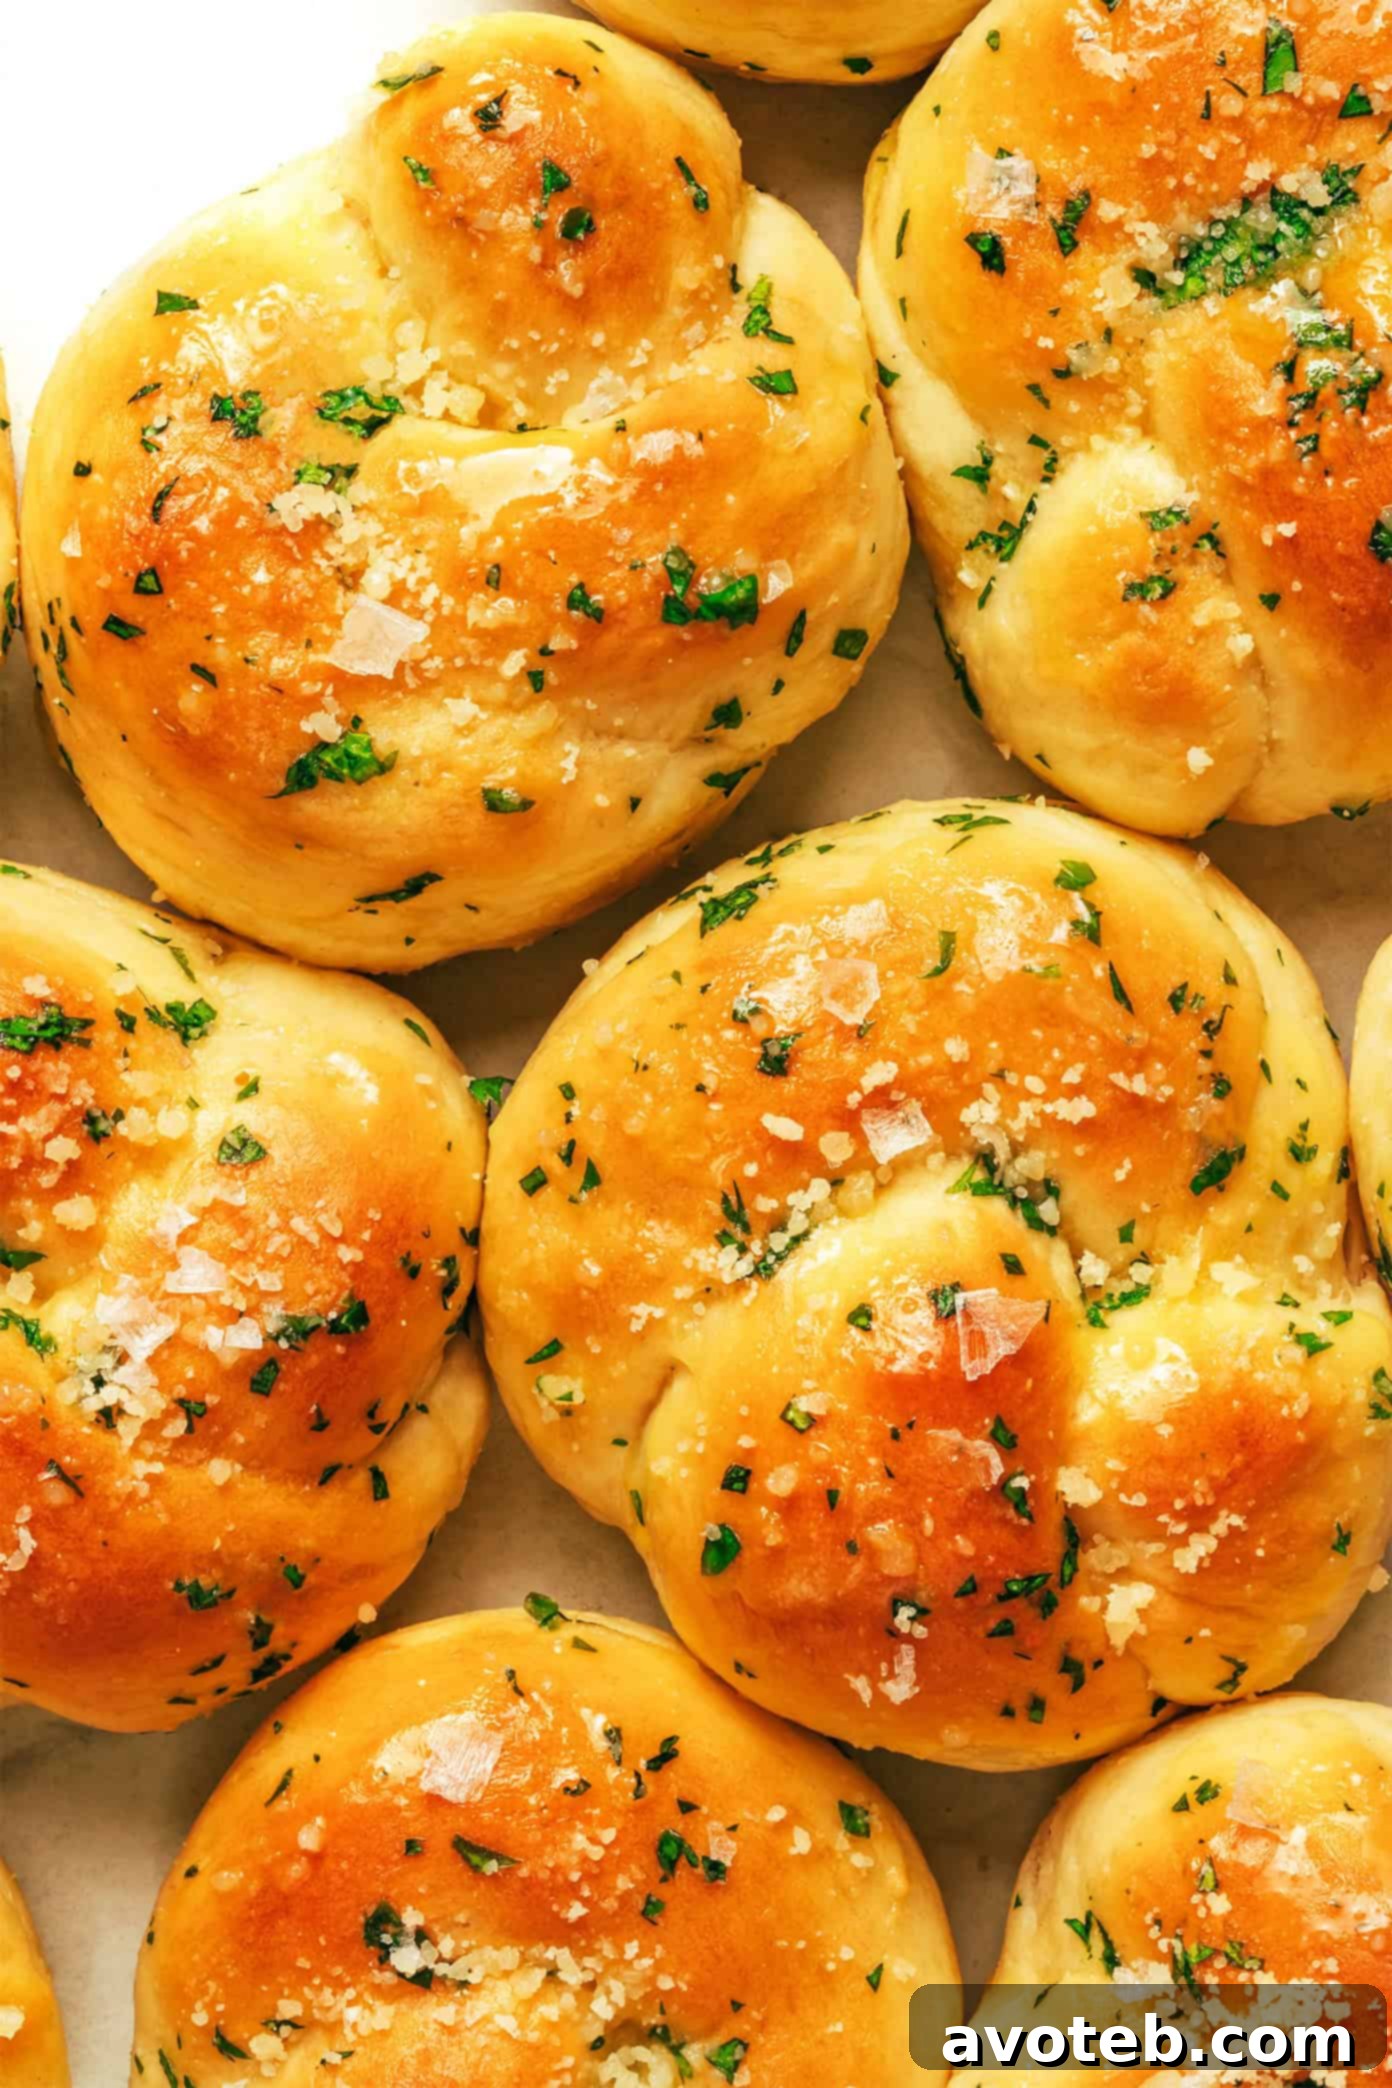
Discover the ultimate homemade garlic knots recipe – incredibly easy to make, finished with irresistible garlic butter, and sprinkled with Parmesan for a truly exceptional treat.
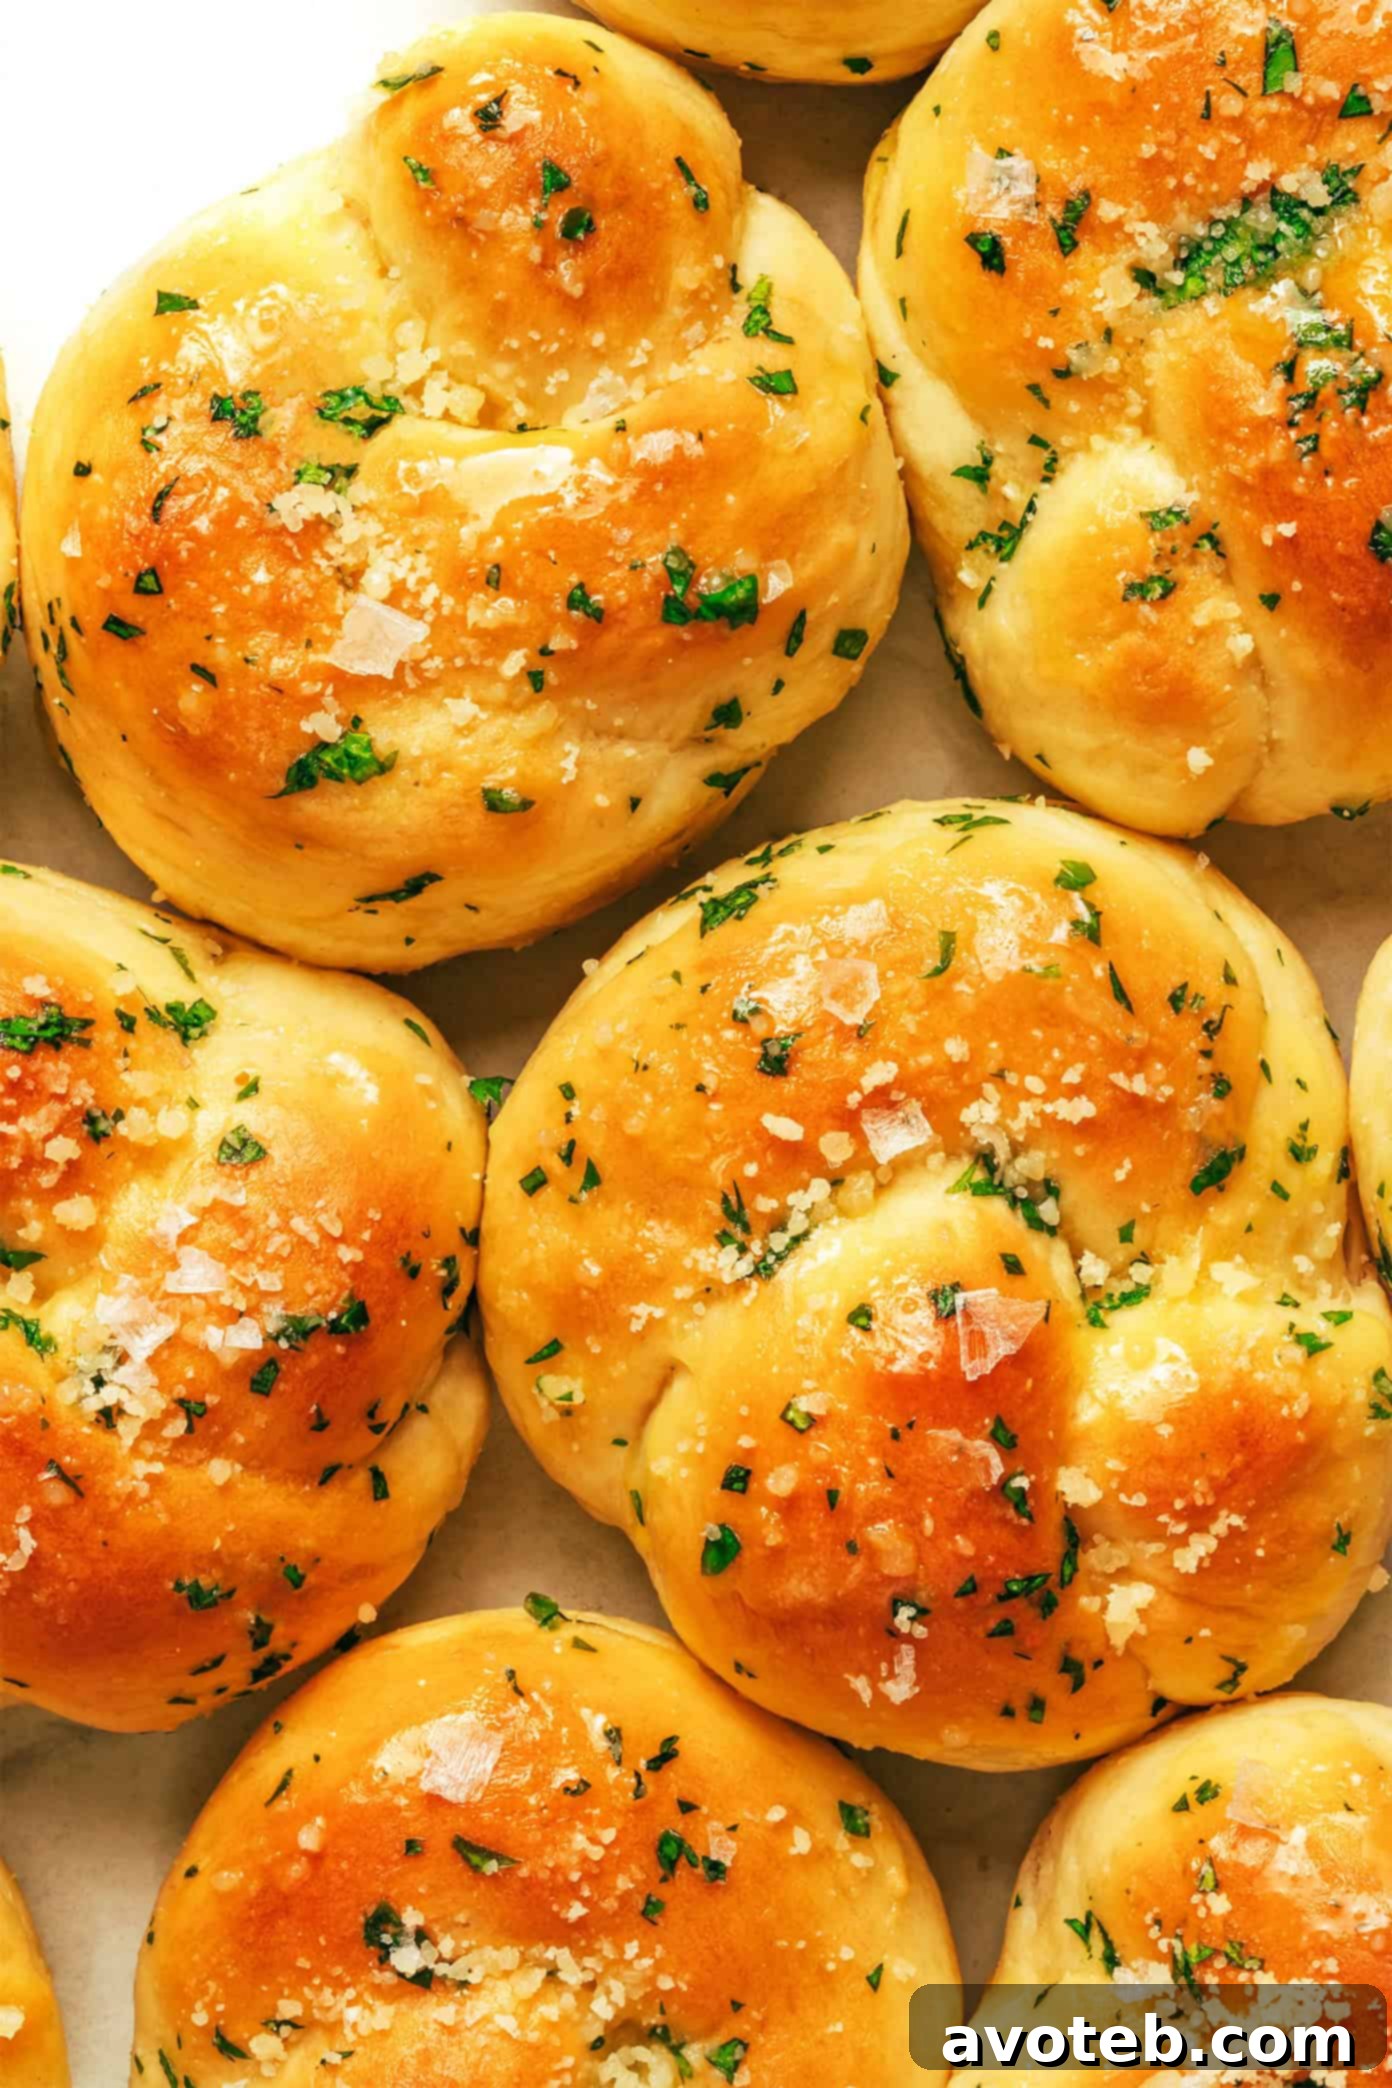
There’s simply no denying it: life just feels a little brighter with warm, buttery garlic knots pulled fresh from the oven. Few aromas can rival the comforting scent of baking bread infused with garlic, transforming any kitchen into a haven of delicious anticipation. Whether you’re a seasoned baker or just starting your journey into homemade delights, these garlic knots are designed for simplicity and maximum flavor, guaranteed to become a cherished recipe in your culinary repertoire. They bring a touch of bakery-quality indulgence right to your dining table, without any of the hassle typically associated with yeasted doughs. Imagine tearing into a soft, pillowy knot, each bite bursting with savory garlic and rich butter – it’s an experience that truly elevates any meal or gathering. This recipe isn’t just about food; it’s about creating moments of warmth and sharing pure comfort with those you love.
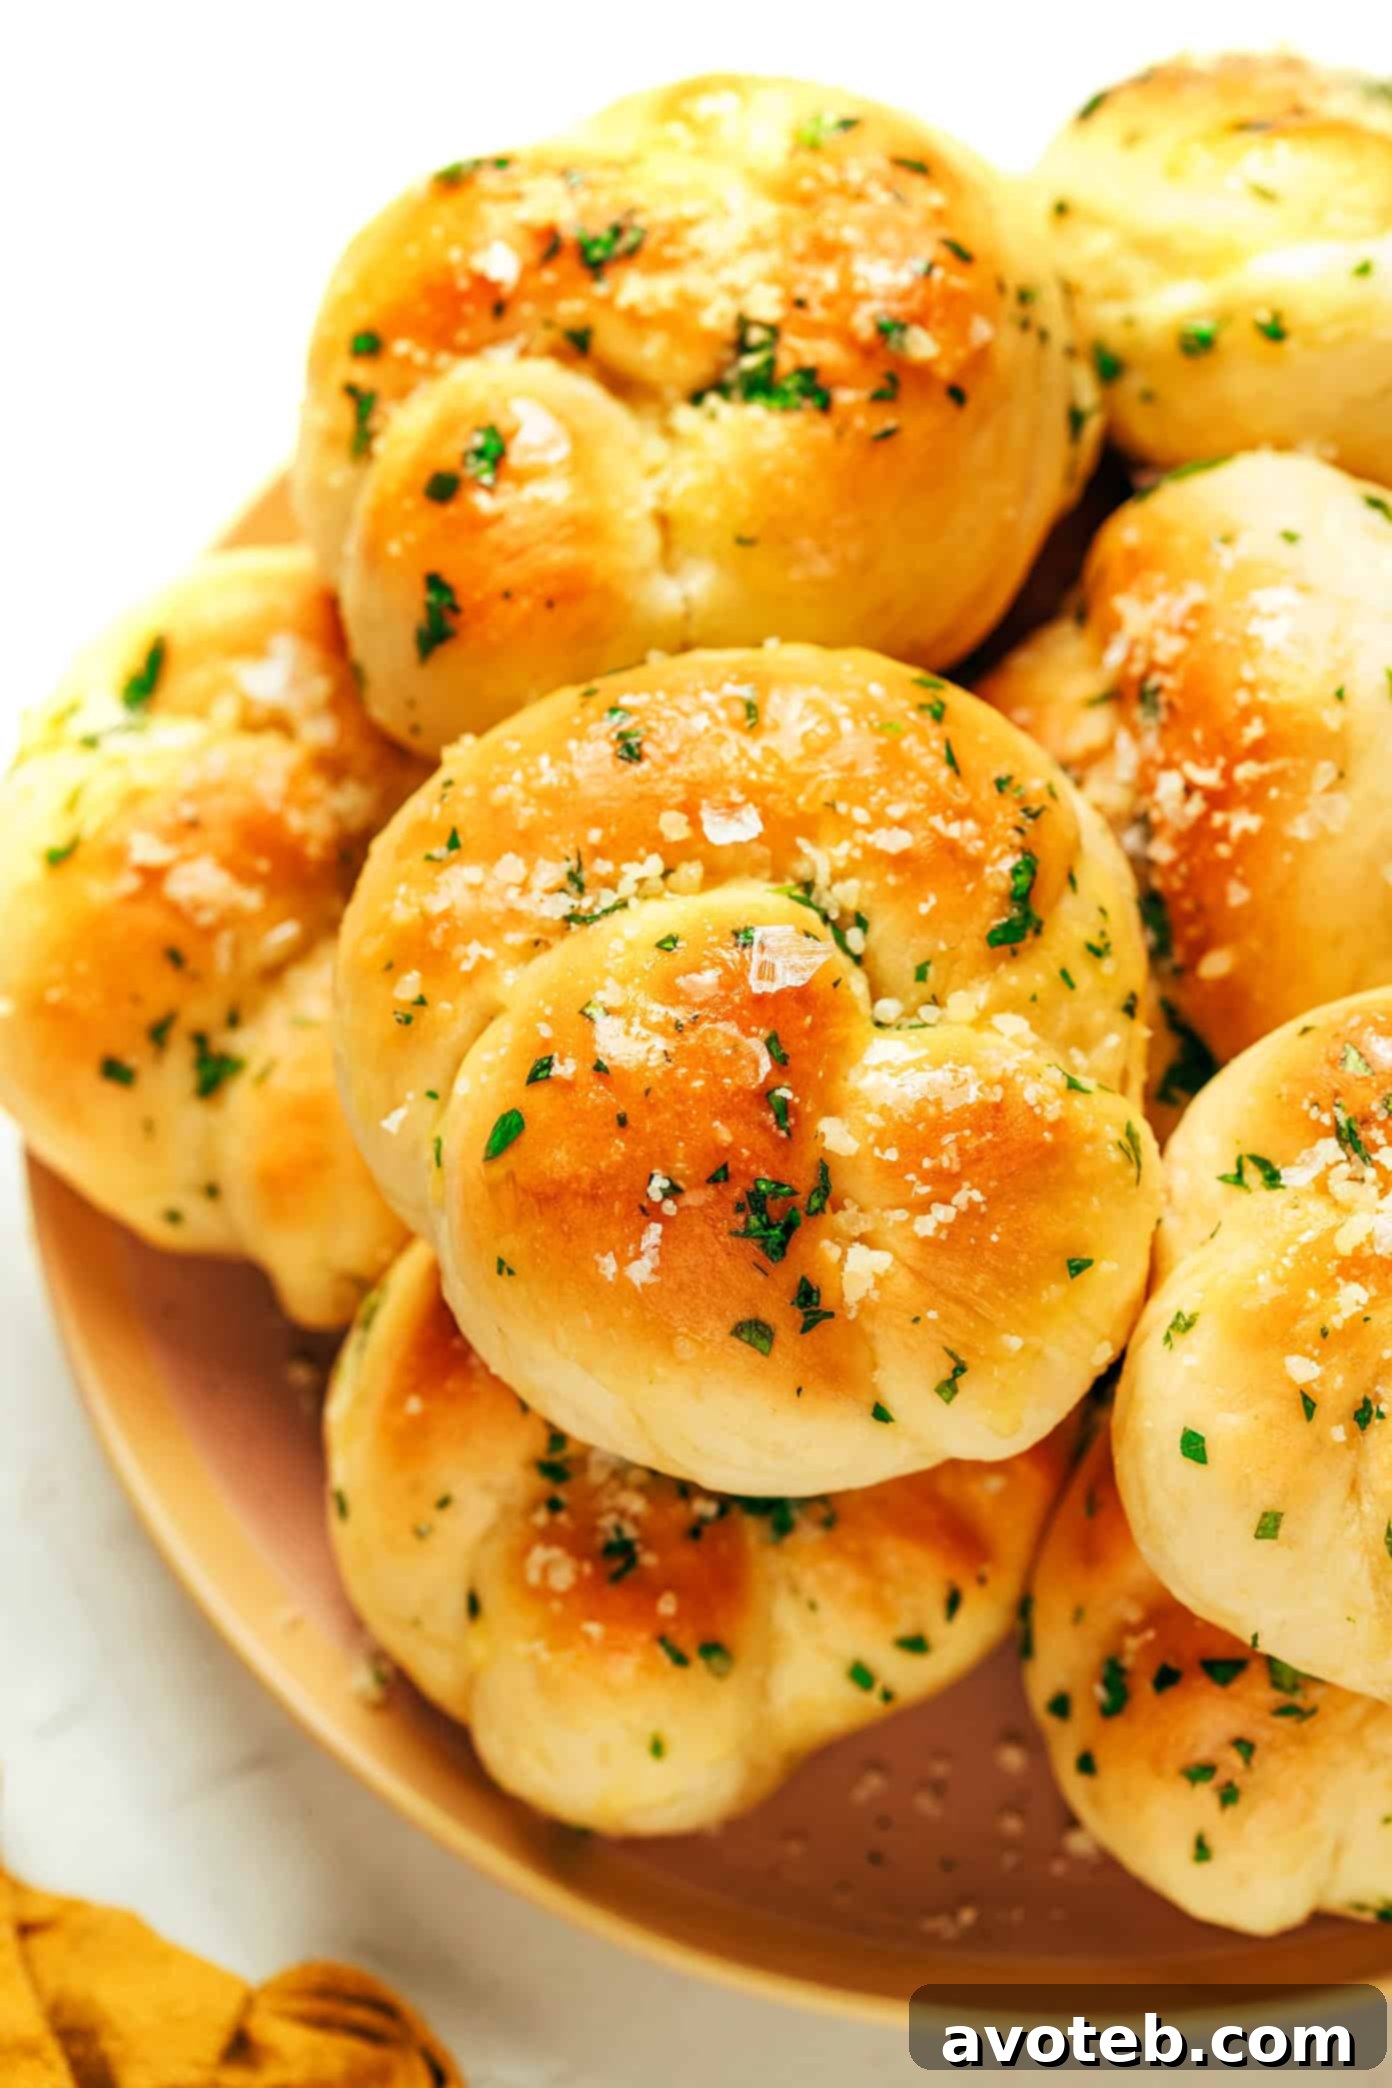
For years, my secret weapon for these crowd-pleasing garlic knots has been a foundational recipe: my trusty 1-Hour Soft and Buttery Dinner Rolls. It provides the perfect canvas for these savory delights, offering an ideal balance of tenderness and chewiness. The transformation into garlic knots is simple yet magical: just before serving, each knot receives a generous brush of extra garlic butter, followed by a sprinkle of finely grated Parmesan cheese and a finishing touch of flaky sea salt. The result is consistently spectacular, and I can confidently say that these rolls never fail to captivate. Friends, family, and even new acquaintances consistently rave about them, often declaring them the star of the show. Their versatility is unmatched, making them suitable for almost any occasion. Picture them as a standout appetizer for a festive holiday feast, a comforting accompaniment to a hearty soup or vibrant salad on a quiet weeknight, or perfectly paired with marinara sauce for dipping during game day get-togethers. No matter the setting, these homemade garlic knots are pretty much guaranteed to vanish quickly, often before you even realize it.
What truly sets this particular recipe apart, making it a genuine favorite, is its remarkable ease and efficiency. Forget about recipes that demand hours of patient waiting for multiple lengthy rises. This streamlined approach allows you to achieve beautifully fluffy and incredibly flavorful garlic knots without the extended time commitment. You only need a handful of everyday ingredients that you likely already have in your pantry, and you’ll be well on your way to baking success. The quick rise times are a game-changer, making homemade bread a realistic option even on busy schedules. So, the next time that irresistible craving for a batch of soft, buttery, homemade garlic knots strikes, don’t hesitate. Give this exceptionally easy and utterly delicious recipe a try – you’ll be rewarded with a warm, aromatic treat that tastes like it came from your favorite Italian bakery, but with the added satisfaction of having made it yourself.
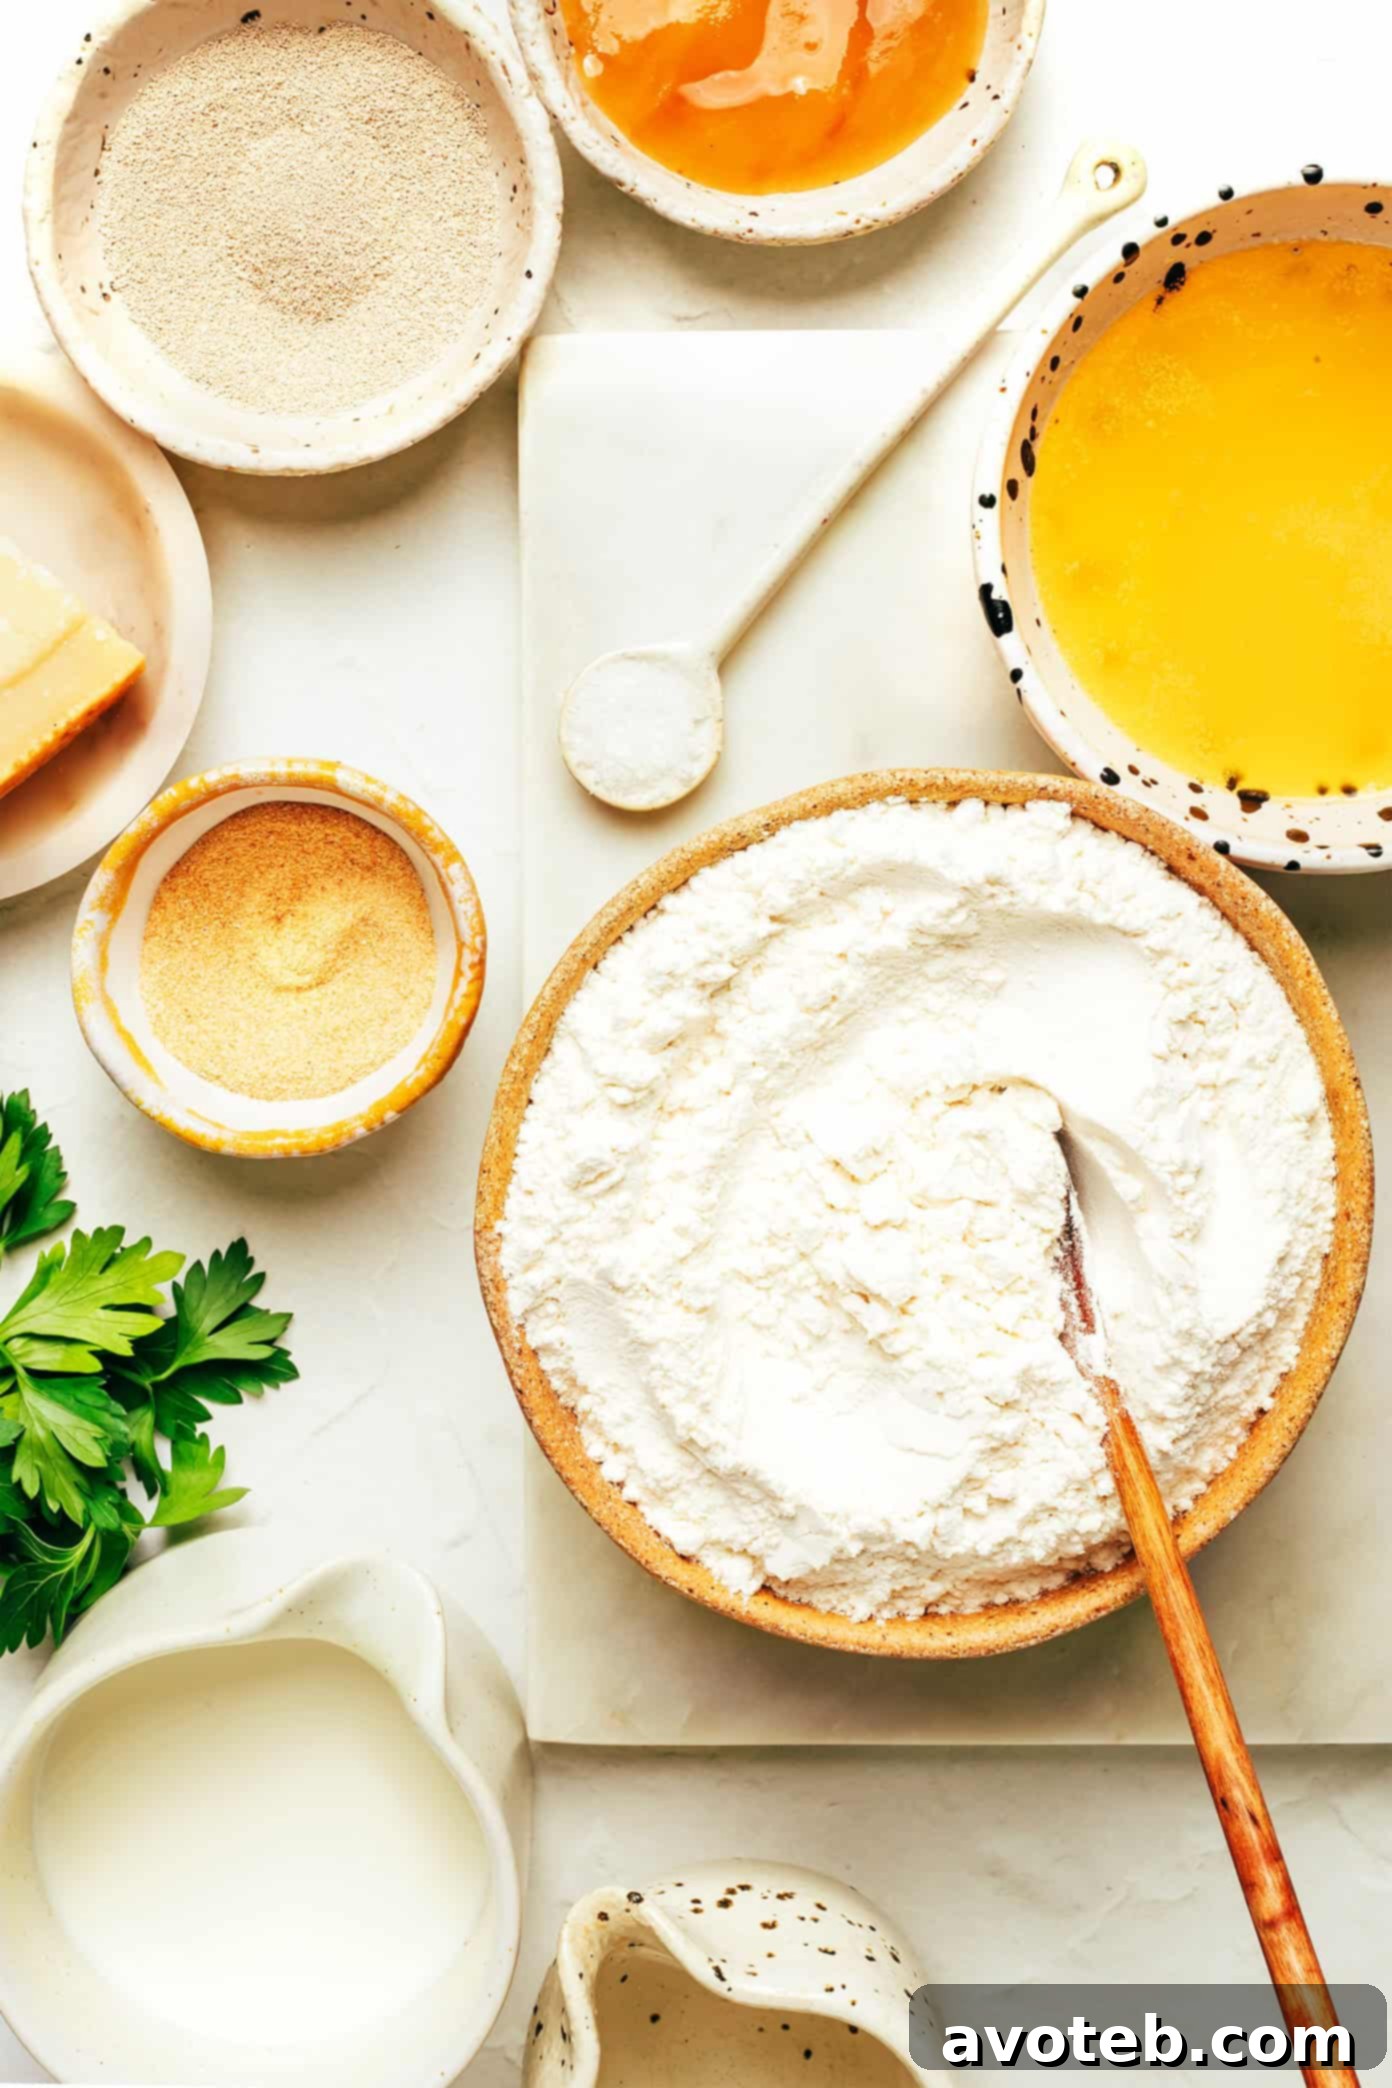
Essential Ingredients for Perfect Garlic Knots
Crafting the perfect batch of homemade garlic knots begins with understanding the role each ingredient plays. Here’s a closer look at the components you’ll need to achieve that signature fluffy texture and rich, savory flavor:
- Butter: This golden ingredient is foundational, contributing a luxurious buttery flavor and crucial moisture to the dough itself, ensuring the knots are tender and never dry. Moreover, melted butter forms the base for our irresistible garlic butter topping, which is generously brushed on after baking, imparting a glossy finish and an extra layer of savory goodness. Using good quality salted butter is recommended, but unsalted works fine if you prefer to control the salt content more precisely.
- Honey: Beyond providing a very subtle hint of sweetness that perfectly balances the savory notes, honey plays a vital role in activating the active-dry yeast. It provides the yeast with the necessary food source to thrive, initiating the fermentation process that helps our garlic knots rise beautifully. While sugar can be substituted, honey adds a unique depth of flavor and contributes to a lovely golden-brown crust.
- Active-Dry Yeast: This living microorganism is the magic behind our perfectly pillowy and fluffy garlic knots. Active-dry yeast requires activation (or “blooming”) in warm liquid before being incorporated into the dough. It feeds on sugars and produces carbon dioxide, creating the airy pockets that give the knots their desirable light texture. Please note that this recipe specifically calls for 1 tablespoon of yeast. Standard packets typically contain 2.25 teaspoons, so you will likely need to purchase two packets to ensure you have enough for this recipe. Always check the expiration date to guarantee your yeast is fresh and active.
- All-Purpose Flour: My preferred choice for these garlic knots is traditional all-purpose flour. Its protein content strikes the ideal balance, resulting in knots that are wonderfully soft yet possess a satisfying chewiness. Using the right amount of flour is key to achieving the perfect dough consistency – not too sticky, not too stiff. While some recipes call for bread flour, all-purpose is excellent for a softer crumb, which is what we aim for in these tender knots.
- Milk and Water: This thoughtful combination of liquids is crucial for creating moist and tender rolls. The milk, with its fat content, adds richness and contributes to a softer crumb and a slightly richer flavor profile. The water ensures adequate hydration of the flour and proper activation of the yeast. Maintaining the correct temperature for this liquid mixture is paramount for yeast activity, as detailed in our tips section.
- Fine Sea Salt: Salt is more than just a seasoning; it’s an essential ingredient in bread making. Fine sea salt enhances the natural flavors of the dough, balancing the sweetness from the honey and the richness of the butter. A sprinkle of flaky sea salt on top after baking provides a delightful textural contrast and an extra pop of savory crunch, elevating the overall experience.
- Garlic Powder: For sheer convenience without compromising on flavor, garlic powder is our hero here. Over the years, I’ve tested this recipe with both fresh garlic and garlic powder, and honestly, the difference in the final taste is negligible for the effort saved. Opting for garlic powder ensures a consistent, well-distributed garlic flavor throughout the dough and topping, making the preparation process quick and straightforward. It’s an easy win for deliciousness!
- Garlic Butter Topping: Once the freshly baked rolls emerge from the oven, they are transformed by a simple yet potent mix of melted butter, additional garlic powder, and finely-chopped fresh parsley. This topping infuses the warm knots with an incredible aroma and flavor, soaking into the tender crumb. The parsley adds a fresh, herbaceous note and a vibrant splash of color.
- Optional Toppings (Highly Recommended): To truly finish these garlic knots with a flourish, I wholeheartedly recommend a final dusting. A generous sprinkle of freshly-grated Parmesan cheese adds a nutty, salty, and umami-rich layer that complements the garlic beautifully. Coupled with a pinch of flaky sea salt for textural crunch, these toppings complete the savory masterpiece. Truly delish!
Expert Tips for Baking Flawless Garlic Knots
While the step-by-step instructions in the recipe below are straightforward, these additional tips will help ensure your homemade garlic knots turn out absolutely perfect every single time:
- Verify Your Yeast’s Freshness: This is arguably the most critical factor for successful yeast-based dough. Expired or inactive yeast is the most common reason dough fails to rise. Always take a moment to double-check the expiration date on your yeast packets, especially if they’ve been stored in your pantry for a while. To test its viability, once you’ve added the yeast to the warm liquid mixture, it should begin to foam and bubble within 5 minutes, indicating it’s active and alive. If you don’t see this foamy activity, your yeast is likely dead, and it’s best to discard that batch and start over with fresh yeast to avoid disappointment.
- Precision with Liquid Temperature: The temperature of your liquid ingredients – water, melted butter, milk, and honey – is absolutely crucial for yeast activation. It must fall within the ideal range of 100-110°F (38-43°C). If the mixture is too hot, it will unfortunately kill the delicate yeast organisms, preventing your dough from rising. Conversely, if the mixture is too cool, the yeast may not activate sufficiently, leading to a slow or nonexistent rise. While the liquid should feel warm but not hot to the touch, investing in a reliable cooking thermometer (like an instant-read thermometer) is highly recommended to ensure accuracy and eliminate guesswork. This small step makes a huge difference.
- Respect the Rise Times: Even with this quick-rise recipe, the designated resting and rising periods are non-negotiable for achieving that coveted soft and fluffy texture. During these times, the yeast works its magic, fermenting the sugars and producing carbon dioxide gas, which creates the airy pockets within the dough. Rushing this process or skipping it altogether will result in dense, heavy knots. Allow the dough the full time to expand and develop its internal structure for optimal results.
- Tie Your Knots Gently: When it comes to forming the individual knots, aim for a gentle touch. Tying them too tightly will restrict their ability to rise and expand during the second proofing and baking, leading to a denser texture. Keep the knots fairly loose, allowing ample space for the dough to puff up. You have creative freedom with the ends: you can either leave them sticking out for a more rustic look or carefully tuck them underneath the knot, as we’ve done in the beautiful photographs accompanying this recipe, for a neater appearance.
- Bake on Parchment Paper: For a fuss-free baking experience and effortless cleanup, always line your baking sheet with parchment paper. Parchment paper not only prevents the garlic knots from sticking to the pan but also promotes more even browning on the bottom. It also makes transferring the finished knots much easier and saves you from scrubbing sticky residue later.
- Don’t Strive for Perfection: When dividing and shaping your dough into 15 or 16 individual garlic knots, resist the urge to make them all perfectly identical in size and shape. A little charming imperfection is part of the homemade appeal! The slight variations in size won’t detract from their incredible taste. Focus on enjoying the process and creating delicious, rustic garlic knots that are sure to be devoured, regardless of their uniformity.
- Measure Flour Accurately: While the recipe provides a range for flour (3.5 to 4 cups), the exact amount can vary based on humidity and how packed your flour is. Always measure flour by spooning it into your measuring cup and then leveling it off with a straight edge, rather than scooping directly from the bag, which can compact it and lead to using too much flour. Adding flour gradually, especially in the final stages of mixing, helps you achieve the perfect slightly sticky, yet manageable, dough consistency.

Creative Variations for Your Garlic Knots
While the classic garlic knot recipe is undoubtedly a masterpiece on its own, it also serves as an excellent base for culinary creativity. Feel free to experiment with these delicious variations to customize your next batch of homemade garlic knots:
- Infuse with Different Herbs: Elevate the aromatic profile of your garlic butter by adding a selection of fresh, finely-chopped herbs. Rosemary lends a fragrant, earthy note that pairs beautifully with garlic, especially for a more rustic feel. Fresh basil brings a sweet, peppery, and distinctly Italian flavor. Oregano offers a bold, savory, and slightly peppery taste that enhances the classic garlic bread essence. Mix and match to discover your favorite herbal combinations!
- Top with Pesto Perfection: For a vibrant and herbaceous twist, consider swapping out the traditional garlic butter for a generous brushing of your favorite basil pesto. Apply the pesto immediately after the knots come out of the oven, allowing its fresh, nutty, and garlicky flavors to melt and meld into the warm, tender bread. This variation adds a gorgeous green hue and an irresistible burst of flavor that’s perfect for summer gatherings or when you want an extra layer of gourmet appeal.
- Sprinkle with Everything Bagel Seasoning: For a savory, crunchy, and aromatic explosion, sprinkle a generous amount of everything bagel seasoning over the garlic butter-brushed knots. The combination of sesame seeds, poppy seeds, dried garlic, dried onion, and flaky salt adds an incredible depth of flavor and textural interest that will make these knots truly unforgettable. It’s a simple addition that delivers a powerful punch of savory goodness.
- Indulge in Cheese-Stuffed Knots: Take your garlic knots to the next level of indulgence by stuffing them with a delectable melting cheese. Before tying each rope of dough into a knot, simply tuck a small cube of mozzarella, provolone, or even a sharp cheddar into the center. As the knots bake, the cheese will melt into a gooey, savory surprise, creating pockets of warm, cheesy goodness within the soft bread. This variation is guaranteed to be a hit with cheese lovers and adds an exciting element of discovery to each bite.
Explore More Easy Bread Recipes
If you’ve enjoyed the simplicity and deliciousness of these garlic knots, you’re in for a treat! There’s a whole world of easy homemade bread waiting to be discovered. Here are a few more of my all-time favorite, accessible bread recipes that promise great results with minimal fuss:
- 1-Hour Soft and Buttery Dinner Rolls: The very foundation of our garlic knots, these dinner rolls are a standalone marvel – incredibly soft, rich, and ready in just an hour, making them perfect for any meal.
- No Knead Bread: Experience the magic of artisan-quality bread with virtually no effort. This recipe delivers a wonderfully crusty exterior and a chewy interior, requiring almost no hands-on time.
- Homemade Buttermilk Biscuits: Flaky, tender, and impossibly buttery, these biscuits are a Southern classic that’s surprisingly simple to master and perfect for breakfast, brunch, or alongside a hearty stew.
- Honey Beer Bread: A wonderfully moist and flavorful quick bread that comes together with just a few ingredients, offering a subtle sweetness and the unique depth of your favorite beer.
Garlic Knots
Author: Ali
Prep Time: 1 hour
Cook Time: 15 mins
Total Time: 1 hour 15 mins
Yield: 15–16 servings 1x
Description
This incredibly easy homemade garlic knots recipe yields fluffy, buttery knots, perfectly topped with savory garlic butter and a sprinkle of Parmesan cheese. A true crowd-pleaser for any occasion, ready in just over an hour!
Ingredients
Scale
For the Garlic Knots:
- 1 cup warm water
- 2 tablespoons melted butter
- 1/2 cup warm milk
- 2 tablespoons honey
- 1 tablespoon active-dry yeast
- 3 1/2 to 4 cups all-purpose flour
- 1 teaspoon fine sea salt
- 1/2 teaspoon garlic powder
- Optional toppings: freshly-grated Parmesan cheese, flaky sea salt
For the Garlic Butter Topping:
- 4 tablespoons salted butter, melted
- 1 tablespoon finely-chopped fresh parsley
- 1/2 teaspoon garlic powder
Instructions
- Prepare and Heat the Liquids. In a microwave-safe bowl, combine the water and melted butter, stirring gently until fully incorporated. Next, add the milk and honey to the mixture and stir until everything is well combined. Microwave this liquid mixture (or warm it gently in a small saucepan on the stovetop) for approximately 1 minute. Give it another good stir. Continue heating the mixture in short 15-second intervals, stirring after each, until it reaches the ideal temperature of 100-110°F (38-43°C). It should feel pleasantly warm to the touch, but never hot. This precise temperature is crucial for activating the yeast without killing it.
- Activate the Yeast. Carefully pour the prepared warm liquid mixture into the bowl of a stand mixer equipped with a dough hook. Evenly sprinkle the active-dry yeast over the surface of the liquid. Give it a quick, gentle stir with a fork to ensure the yeast is moistened. Now, allow the yeast to rest and activate undisturbed for 5 minutes. During this time, you should observe the mixture becoming noticeably foamy and bubbly, which is a clear sign that your yeast is alive and ready to work its magic.
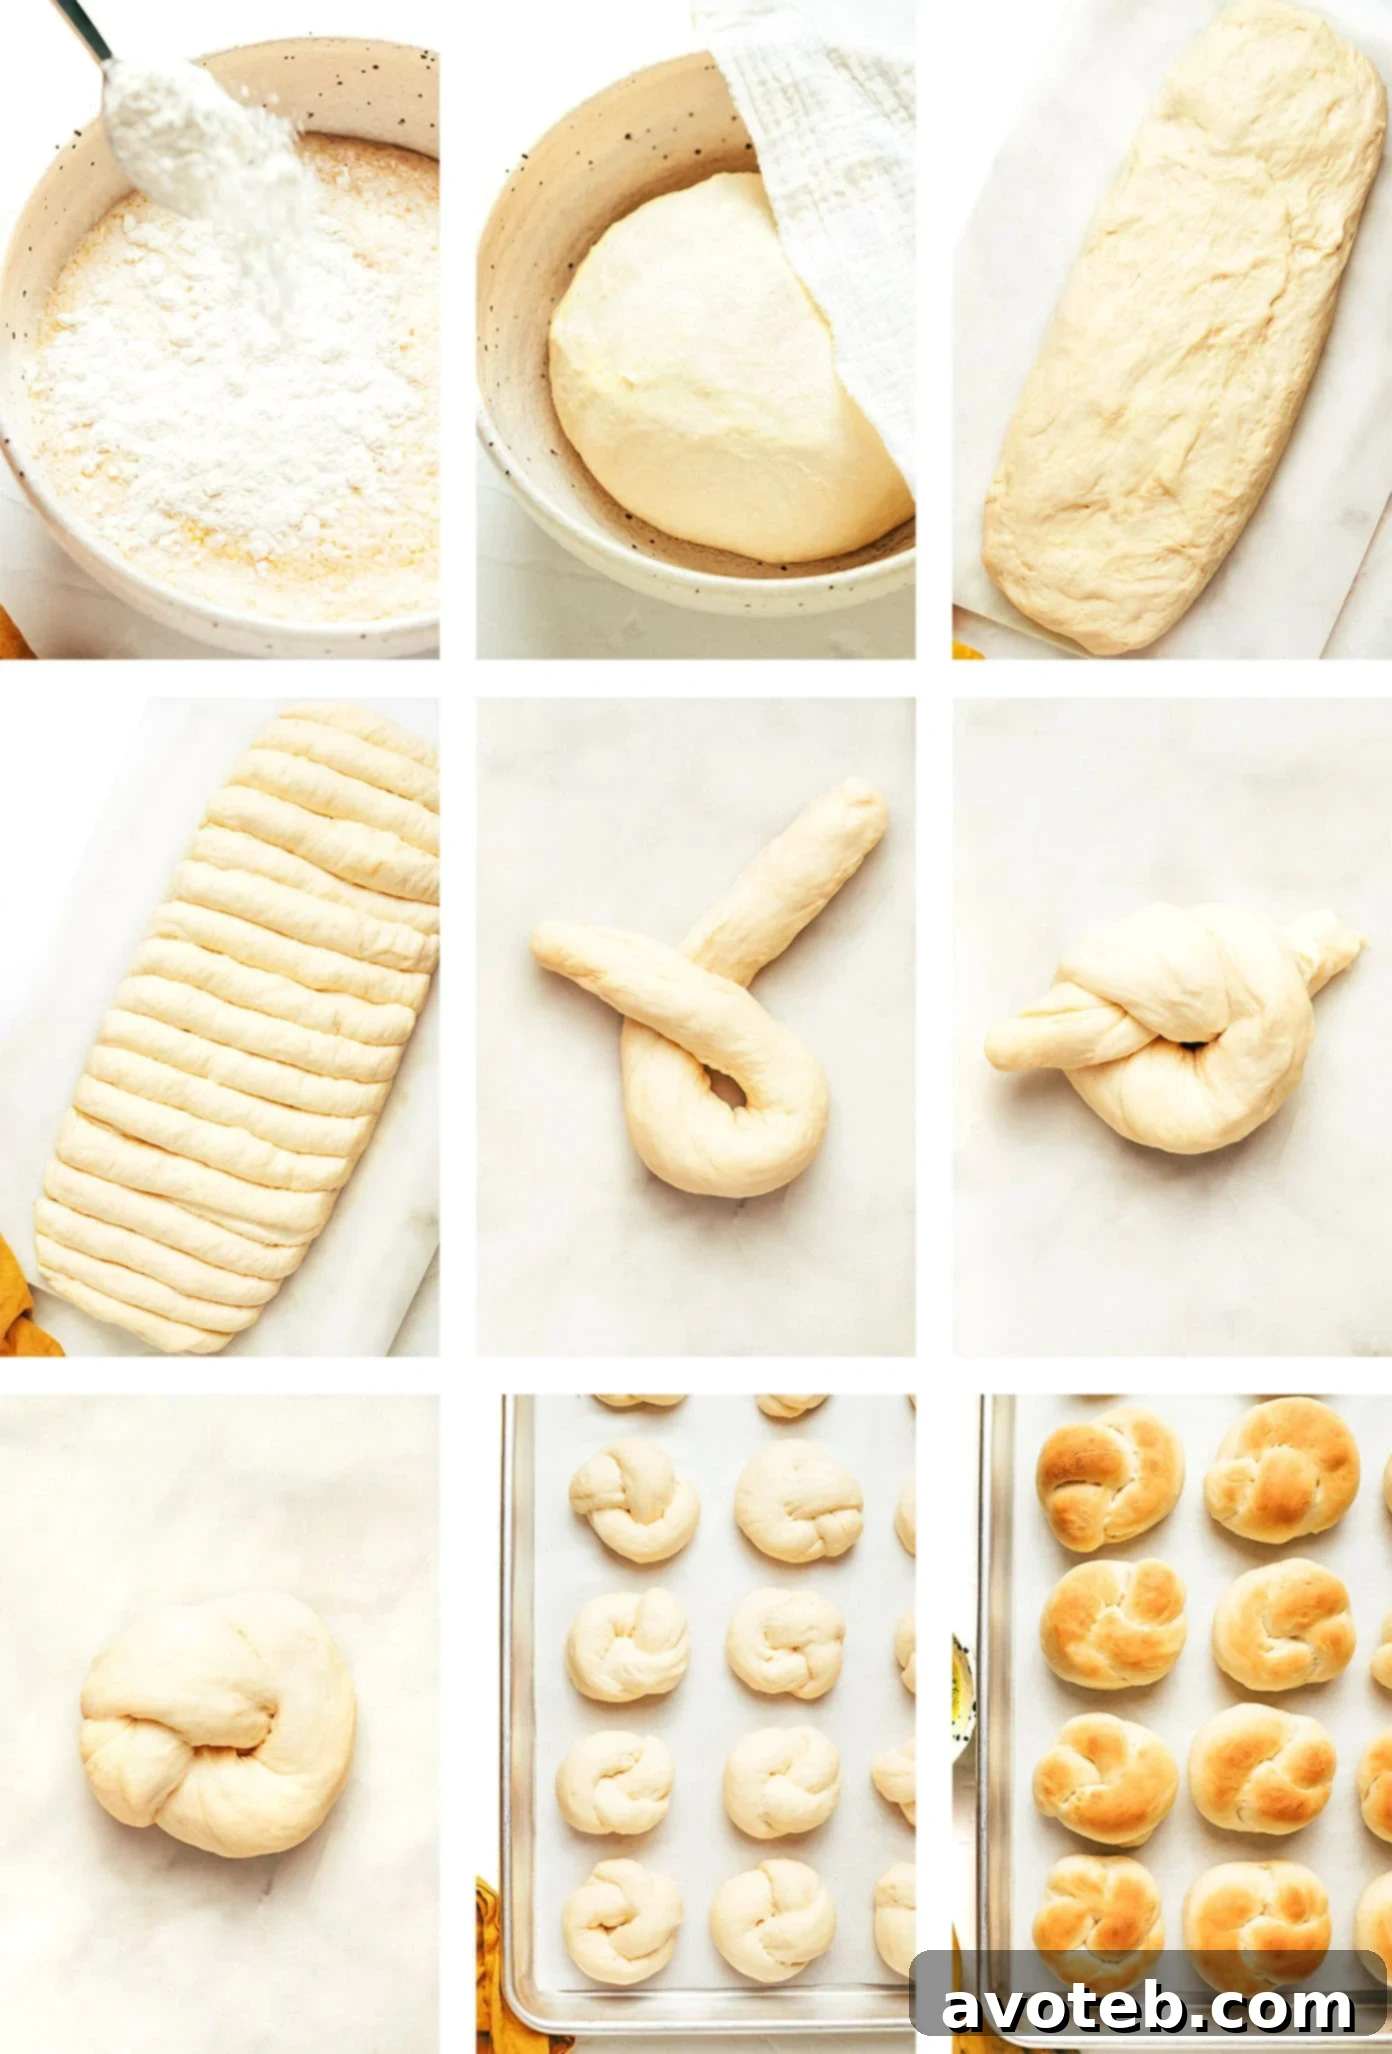
- Combine Dry Ingredients and Knead. To the foamy yeast mixture, add 3 1/2 cups of the all-purpose flour (reserving the remaining flour for adjustments), along with the fine sea salt and garlic powder. Attach the dough hook to your stand mixer and begin mixing on medium-low speed until all the ingredients are thoroughly combined and a rough dough forms. Observe the dough’s consistency: if it appears excessively sticky and clings stubbornly to the sides of the bowl, add the remaining flour gradually, about 1/4 cup at a time, until the dough cleanly pulls away from the bowl and feels only slightly tacky to the touch. Be careful not to exceed a total of 4 cups of flour. Once the optimal consistency is achieved, continue mixing on low speed for another 4-5 minutes until the dough becomes smooth and elastic. Finally, remove the dough from the bowl, gently form it into a neat ball with your hands, and transfer it to a lightly greased bowl.
- First Rise. Cover the bowl containing the dough loosely with a clean, damp kitchen towel or a damp paper towel. Allow the dough to rest and rise in a warm, draft-free spot for a brief but essential 15 minutes. This initial rise helps to relax the gluten and begin the fermentation process, contributing to a lighter, airier final product.
- Preheat Oven and Prepare Baking Sheet. While the dough is undergoing its first rise, take this opportunity to prepare your baking environment. Preheat your oven to 400°F (200°C). Line a large baking sheet with parchment paper, which will prevent sticking and ensure easy cleanup. Set the prepared baking sheet aside.
- Form the Garlic Knots. Gently remove the risen dough from the bowl. Using your hands, carefully form the dough into a log approximately 16 inches in length, striving for as even a width as possible along its entire length (refer to the accompanying photos for visual guidance). With a bench scraper or a sharp knife, slice the dough log into 15 or 16 evenly-sized pieces. Take each piece of dough and roll it out into a thin rope, about 8 inches long. Then, skillfully tie each rope into a knot. Arrange the formed knots on the prepared baking sheet, leaving some space between them for expansion. You can choose to either tuck the ends of the knot neatly underneath or leave them sticking out for a more rustic appearance. Once all knots are formed and placed, loosely cover them again with a kitchen towel and allow them to undergo a second, crucial rise for another 15 minutes.
- Bake the Knots. After the second rise, remove the kitchen towel from the knots. Transfer the baking sheet to the preheated oven and bake for approximately 15 minutes. The garlic knots are perfectly done when their tops are lightly golden brown and they are cooked through, feeling springy to the touch. While the knots are baking, take a moment to prepare the flavorful garlic butter topping: in a small bowl, whisk together the melted butter, finely-chopped fresh parsley, and garlic powder until well combined.
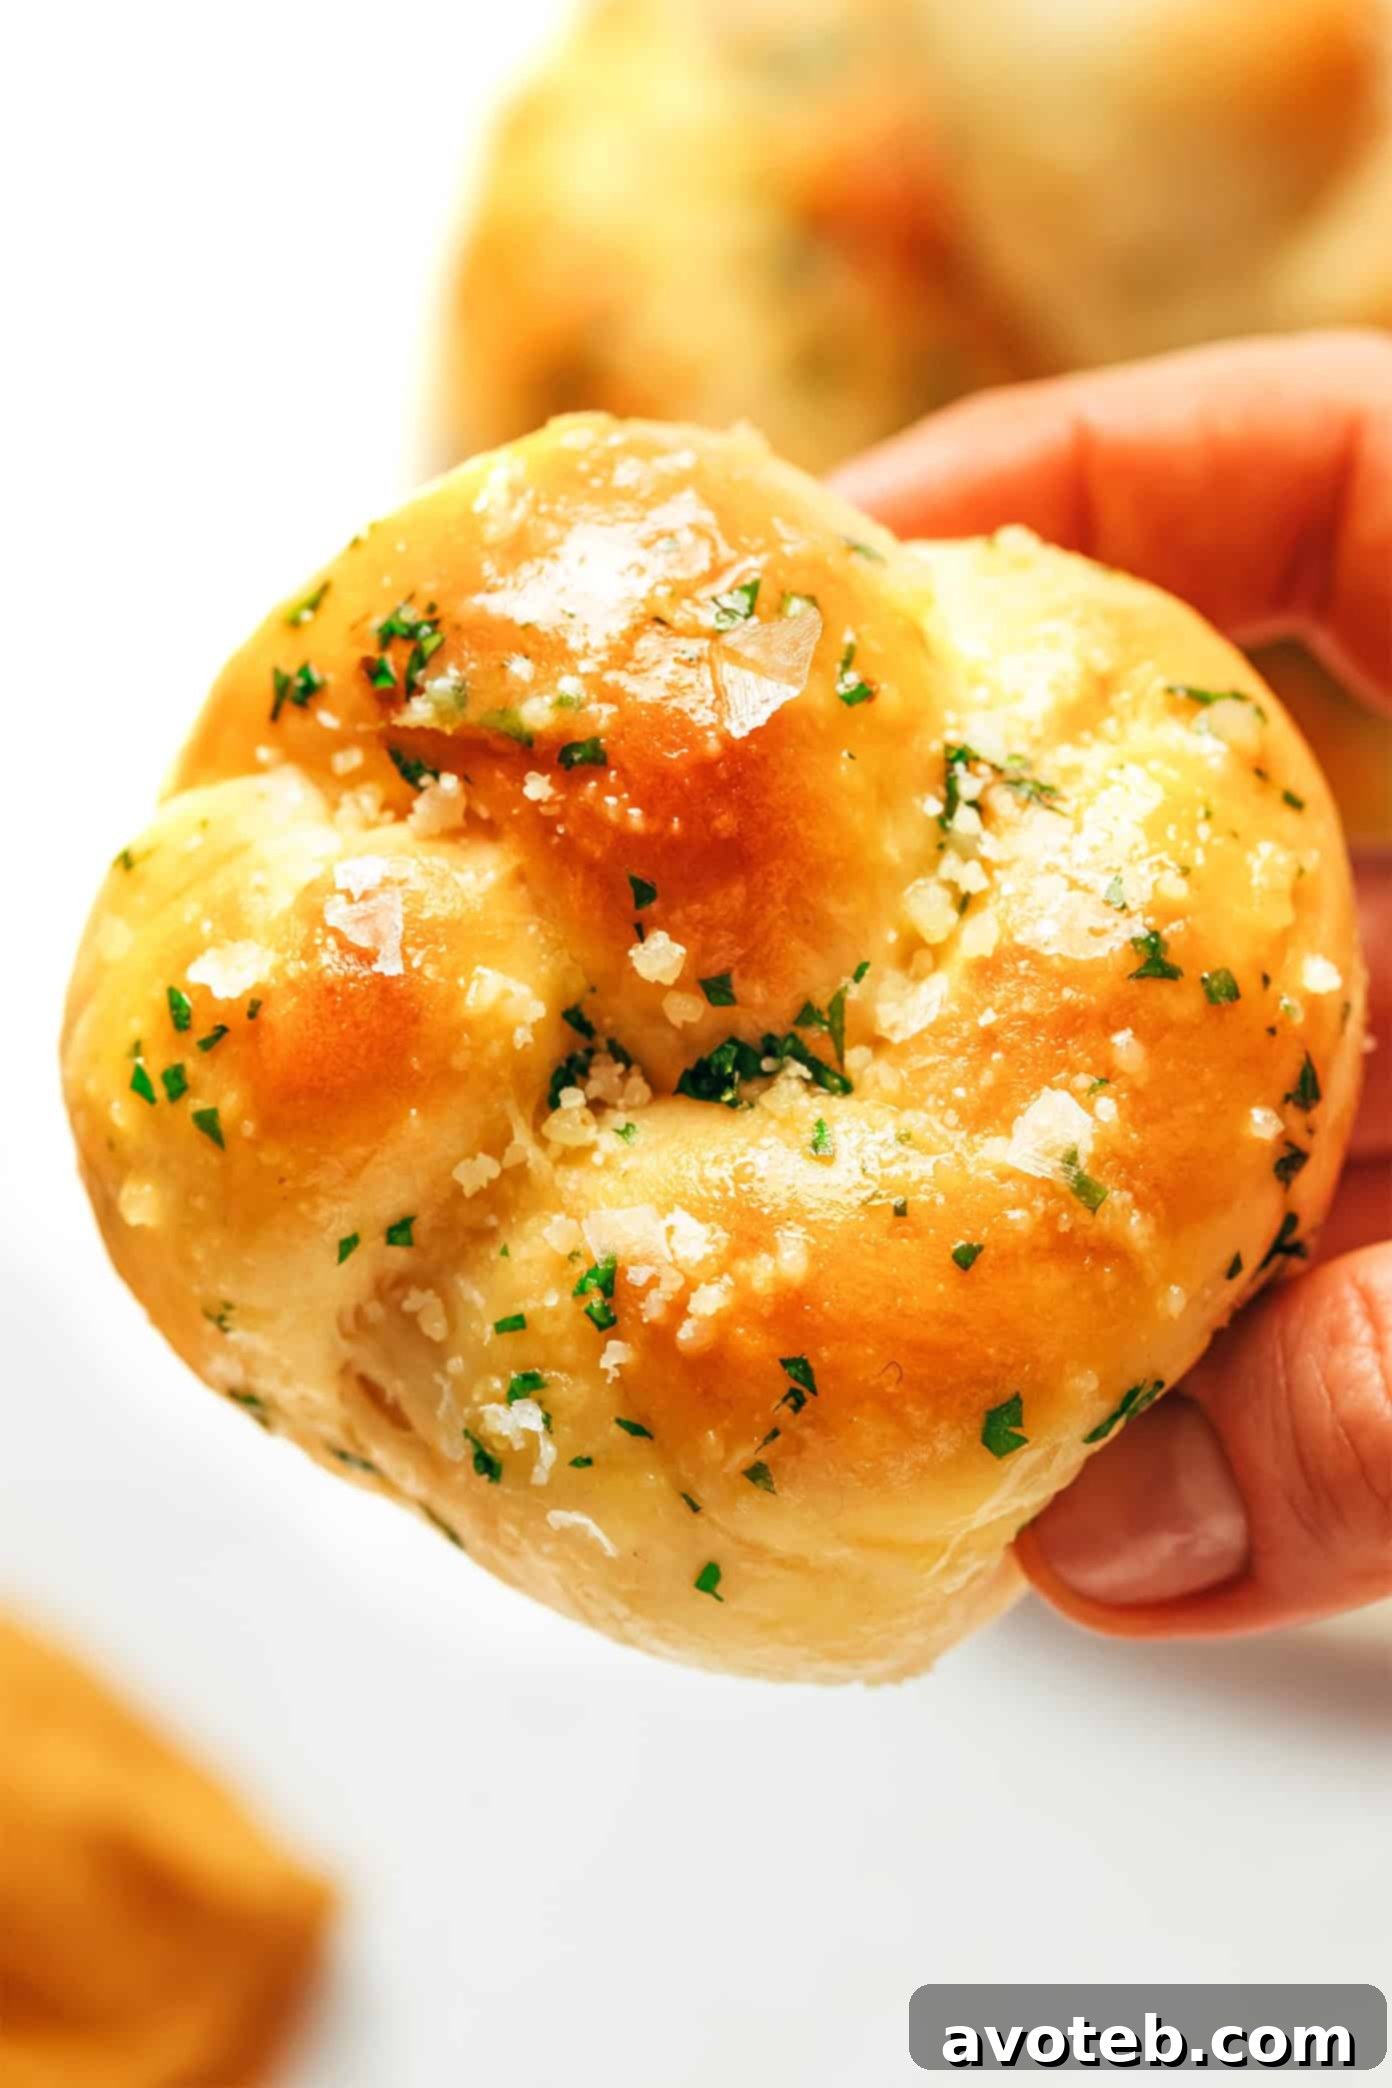
- Brush with Garlic Butter and Finish. As soon as the fragrant garlic knots emerge from the oven, immediately transfer the hot baking sheet to a wire rack. While they are still warm, generously brush each roll with the freshly prepared garlic butter mixture. The warm bread will readily absorb the butter, infusing it with incredible flavor. For the perfect finishing touch, liberally sprinkle each garlic knot with freshly-grated Parmesan cheese and a delicate pinch of flaky sea salt. The cheese will slightly melt onto the warm knots, creating an irresistible savory crust.
- Serve and Enjoy. Serve your homemade garlic knots warm, allowing their rich aroma to entice everyone. These are best enjoyed fresh out of the oven, when they are at their most tender, buttery, and utterly delicious. Get ready for them to disappear quickly!
Equipment
Flaky Sea Salt
Buy Now →
Parchment Paper
Buy Now →
Pastry Brush
Buy Now →