
Sweet Touches: Crafting Irresistible Gumdrop Placeholders for Any Occasion
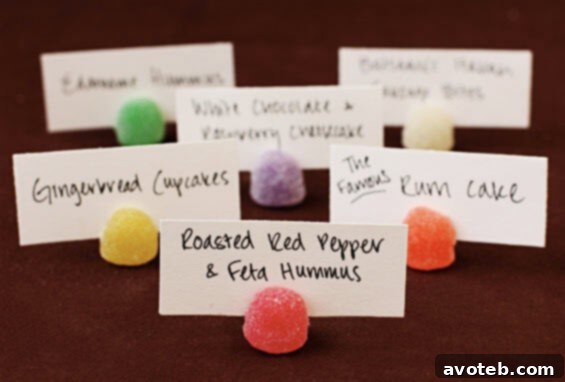
There’s something truly magical about hosting an event. Whether it’s a cozy family dinner or a grand holiday feast, the little details often make the biggest impact. As someone who enjoys both culinary creations and crafting, I’ve always found immense joy in adding a personal, handmade touch to my gatherings. This past holiday season, while preparing for my annual Christmas party, I stumbled upon a delightful and incredibly simple idea that quickly became the star of my buffet table: handmade gumdrop placeholders.
If you’re like me, you appreciate thoughtful details that elevate an ordinary meal into an unforgettable experience. From carefully curated menus to beautifully set tables, every element contributes to the overall ambiance. And when it comes to buffet-style dining, clear and charming labels for your dishes or personalized place cards for your guests are not just practical, but they also serve as delightful conversation starters. My secret ingredient for adding this festive flair? A handful of colorful gumdrops!
The inspiration for these sweet little creations actually came from leftover gumdrops I had after making a whimsical wreath, much like this charming design. Seeing their vibrant colors and playful shapes, I instantly envisioned them repurposed into something equally festive for my Christmas party. The result was a collection of unique, edible placeholders that garnered countless compliments from my friends. What’s even better? They took mere minutes to assemble, required only two main ingredients, and a few common household supplies. This makes them not just an adorable craft, but also an incredibly inexpensive and accessible project for anyone looking to add a touch of handmade charm to their next celebration. Get ready to impress your guests with these simple, sweet, and surprisingly sturdy gumdrop placeholders!
Why Choose Gumdrop Placeholders?
Beyond their undeniable charm, gumdrop placeholders offer a unique blend of practicality and whimsy. They instantly infuse any table setting with a festive spirit, thanks to their bright colors and sugary appeal. Unlike traditional place cards, these edible alternatives bring a playful element that delights both children and adults. They are incredibly versatile, perfect not just for individual guest names, but also as elegant labels for your buffet dishes, indicating everything from “Grandma’s Secret Stuffing” to “Vegetarian Lasagna.” Their homemade nature also allows for complete customization, letting you tailor them to any theme or color scheme. Imagine pastel gumdrops for a baby shower or autumnal shades for a fall harvest dinner. The possibilities are truly endless, making them a go-to solution for hosts who love to add a memorable, personalized touch without breaking the bank or spending hours on intricate crafts.
How To Make Gumdrop Placeholders: A Step-by-Step Guide
Creating these delightful gumdrop placeholders is a breeze, perfect for even the most novice crafter. Here’s everything you’ll need and how to put it all together.
Essential Supplies:
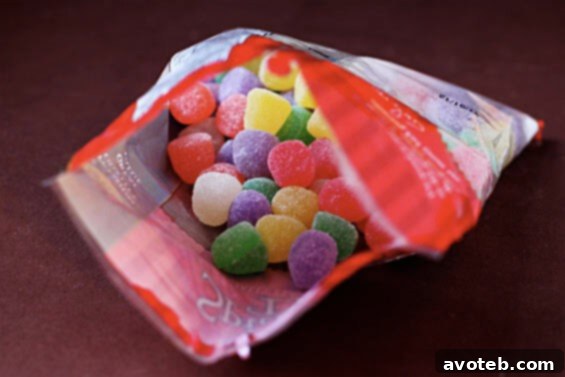
- Gumdrops: Opt for fresh, soft gumdrops, as they will be easier to cut and will hold the paper more securely. Larger gumdrops generally work better for stability. You can find them in a wide array of colors, allowing you to match your party’s theme. Consider jelly candies if gumdrops aren’t readily available, but ensure they have a firm enough texture to hold a slot.
- Cardstock Paper: This is crucial for creating sturdy labels. Regular printer paper is too flimsy. Look for medium to heavy-weight cardstock (around 65-80 lb) in your preferred plain colors or explore the vibrant and patterned options available in the scrapbook aisle for an extra touch of flair.
- Scissors or Paper Cutter: For precise, clean cuts, a paper cutter is ideal, especially if you’re making many placeholders. However, sharp scissors will work perfectly fine for smaller batches. The goal is neat, uniform paper strips.
- Pen/Marker: Choose a pen or marker that contrasts well with your cardstock color for maximum legibility. Fine-tip markers offer crisp writing, while metallic or glitter pens can add a festive sparkle. Ensure the ink won’t smudge easily.
- A Sharp, Thin Knife: This is the key tool for creating the slot in your gumdrops. A paring knife, an X-Acto knife, or a craft knife with a thin blade works best. Safety is paramount here, so ensure the knife is sharp enough to cut cleanly without requiring excessive force.
- Optional: Ruler and Cutting Mat: A ruler will help you measure your cardstock accurately, ensuring all your labels are uniform. A cutting mat protects your work surface when using a craft knife.
- Optional: Paper Punches: For adding decorative edges or shapes to your labels.
Method:
Let’s get crafting! Follow these simple steps to bring your sweet placeholders to life.
Step 1: Prepare Your Paper Labels
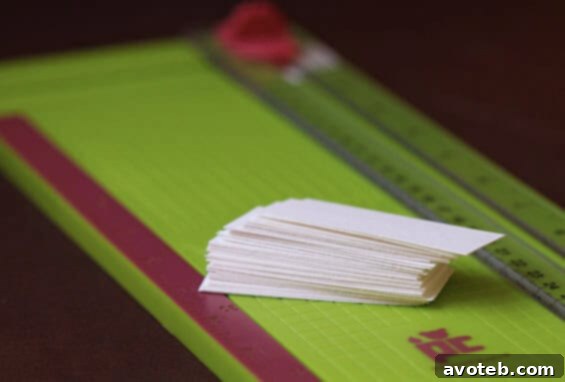
Begin by preparing your cardstock paper. Decide on your desired size and shape for the labels. For example, I found that 1-inch by 2.5-inch rectangles worked perfectly for my event, providing enough space for names or dish titles without being too bulky. Using a paper cutter ensures uniform sizes and clean, straight edges, which contributes to a professional finish. If using scissors, take your time to cut neatly.
Once your paper strips are cut, it’s time to add your messages. Whether you’re writing guest names, food titles, or charming little quotes, write clearly and legibly. Remember to leave a small margin at the bottom of each piece of paper – this space will be inserted into the gumdrop, so you want to ensure your text isn’t obscured. Consider using stencils or printing text for a very polished look, especially if you have many labels to make. Experiment with different fonts and colors to match your party theme.
Step 2: Prepare the Gumdrops for Display
This step requires a little precision and care. Take your sharp, thin knife and carefully make an incision about halfway through the gumdrop, starting from the top. The depth of the cut should be sufficient to hold your cardstock securely without slicing the gumdrop completely in half. For optimal viewing, especially for guests looking down at the table, make the cut at a slight angle towards you. This will cause the paper label to lean back slightly, making the text easier to read from a distance.
Safety Tip: Always cut on a stable surface, away from your body. A small cutting board can provide a safe and stable base for this task. If the gumdrops are particularly sticky, you can lightly dust your knife with powdered sugar or oil it with a tiny amount of vegetable oil to prevent sticking and ensure a cleaner cut.

Step 3: Assemble Your Placeholders
With both your paper labels and gumdrops prepared, it’s time for assembly. Grip a piece of your prepared paper on both sides, using both hands. Carefully and gently slide the bottom edge of the paper into the cut slot of the gumdrop. Take care not to force it, as this could tear the paper or split the gumdrop. The stickiness of the gumdrop will naturally help hold the paper in place. Adjust the paper until it stands upright and is perfectly centered.
Repeat this process for as many gumdrop placeholders as you need. You’ll be surprised at how quickly you can create a charming set for your entire table. Once assembled, arrange them at each place setting or strategically among your buffet dishes for a touch of sweet organization.
Ali’s Tip for Enhanced Customization:
To add an extra layer of visual interest and personalization to your placeholders, consider using decorative paper punches. You could use a punch to create a unique shape on one side of your paper label – perhaps a festive star for Christmas, a heart for Valentine’s, or a leaf for an autumn theme. Alternatively, use a corner punch to give all four corners of each paper label a neat, decorative border or shape. These small details can significantly elevate the overall aesthetic, making your handmade placeholders even more special and tailored to your specific event.
Creative Variations and Occasions
While gumdrop placeholders are a holiday hit, their versatility extends far beyond Christmas. Imagine using vibrant, multi-colored gumdrops for a whimsical birthday party, or soft pastels for a baby shower. You could even use black and orange gumdrops for a playful Halloween gathering! These aren’t just for names; they can also be mini message holders, small signs for a dessert bar, or even charming little party favors if individually wrapped. For an extra sparkle, dust your gumdrops with edible glitter before assembly, or tie a tiny ribbon around the base of each. Explore different candies too – while gumdrops are ideal for their texture, other firm jelly candies might offer interesting alternatives. The key is creativity and having fun with the process!
Tips for Success and Longevity
- Make a Test Run: If it’s your first time, try making one or two placeholders in advance to get a feel for the cutting and assembly.
- Prepare Ahead: These can be made a day or two in advance. Store them in an airtight container at room temperature to prevent the gumdrops from drying out or becoming too soft. Avoid refrigeration, as it can cause condensation and make the gumdrops sticky.
- Keep Away from Heat: Gumdrops will melt or soften significantly if exposed to direct sunlight or warm temperatures, so keep them in a cool spot until serving.
- Involve the Kids: Older children can help with cutting the paper and writing the names (under supervision for knife use, of course!). It’s a fun, family-friendly activity.
- Consider Allergies: If using them as edible favors, be mindful of common food allergies.
Conclusion: A Sweet Addition to Your Celebrations
These sweet gumdrop placeholders are more than just a craft; they’re a testament to the idea that thoughtful, handmade details can transform any gathering into a truly special occasion. They embody the spirit of hospitality by adding a personalized touch, guiding guests to their seats, or elegantly labeling your culinary creations. Easy to make, budget-friendly, and undeniably charming, they offer a delightful way to infuse your parties with personality and warmth.
So, the next time you’re planning an event, don’t overlook the power of these little edible accents. They’re a fantastic conversation starter, a feast for the eyes, and a testament to your creativity. Give this simple tutorial a try and watch as your guests light up with delight at this unexpected and adorable detail. Happy crafting, and may your celebrations be as sweet and memorable as these charming gumdrop creations!