

Unlock the Secret to Ultra-Crispy Chicken Milanese: Your Ultimate Recipe Guide!

Are you ready to elevate your dinner game with chicken that’s unbelievably crispy, incredibly juicy, and bursting with flavor? If you cherish the irresistible crunch of perfectly fried chicken, then this Crispy Chicken Milanese recipe is destined to become a staple in your kitchen. Bookmark it now – you won’t want to lose it! ♡
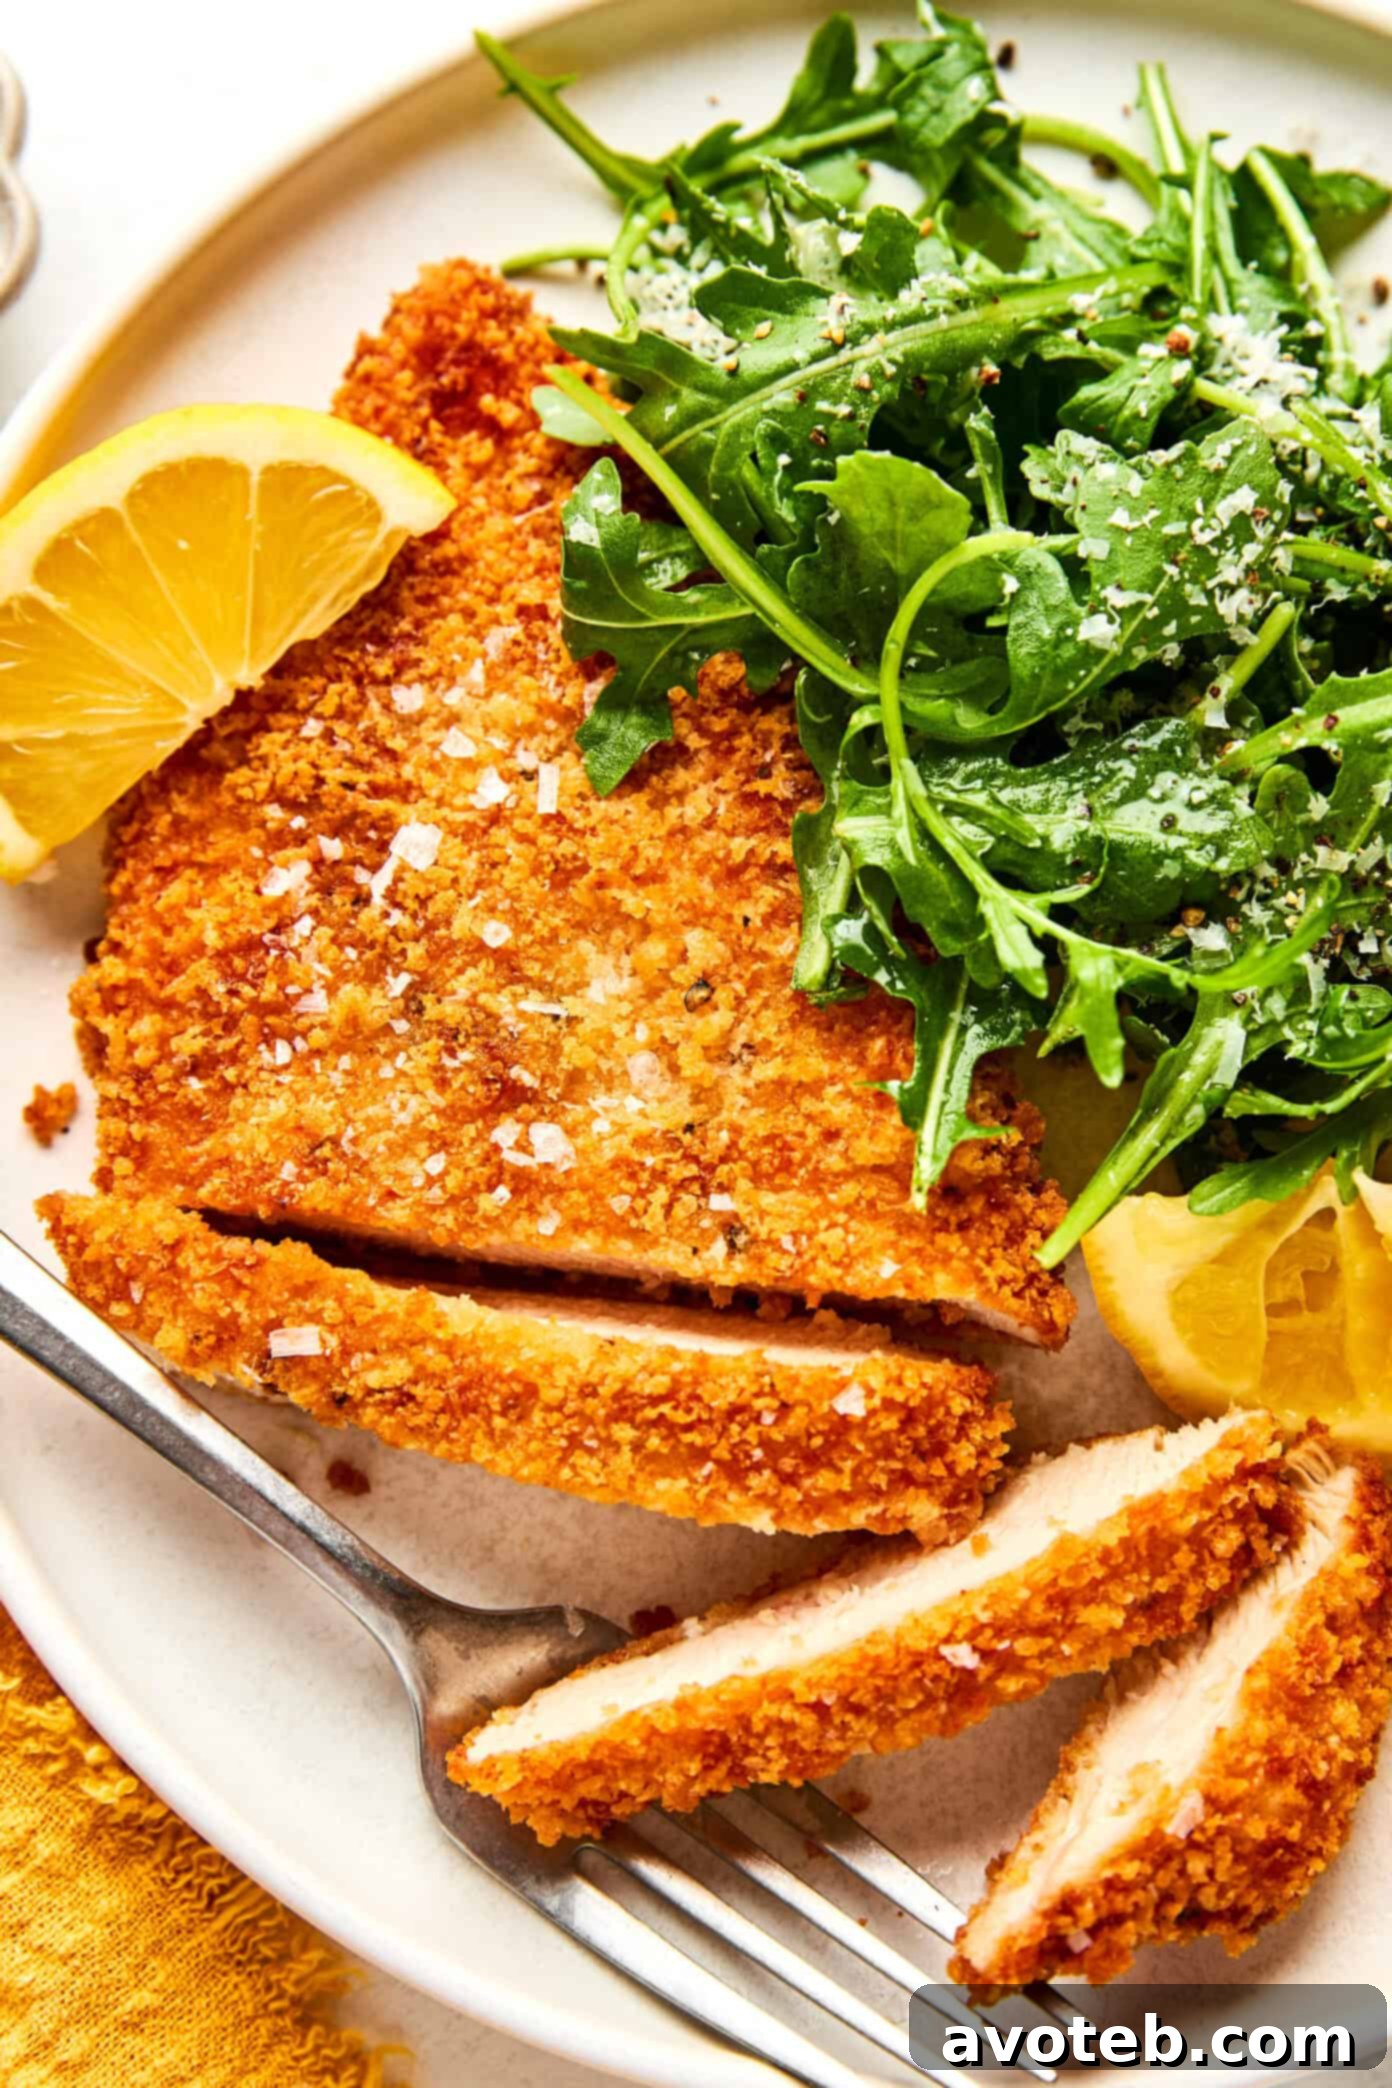
Chicken Milanese has long been a cherished classic, celebrated for its delicate, pounded chicken cutlets enveloped in a golden, crispy crust. After countless hours of experimentation and fine-tuning over the years, I’m thrilled to share a recipe that truly embodies perfection. This isn’t just any Chicken Milanese; it’s a testament to achieving thin, tender, and juicy cutlets encased in a gloriously golden, shatteringly crisp coating that holds its texture from the first bite to the last. Each piece is seasoned with a precise blend of spices, ensuring every mouthful is a symphony of flavor.
While I adore serving this crispy chicken the traditional Italian way, topped with a vibrant, zesty arugula and Parmesan salad dressed simply with lemon and olive oil, its versatility knows no bounds. Feel free to unleash your culinary creativity! Imagine it nestled in a bun for a gourmet sandwich, draped with warm marinara sauce and melted mozzarella for an instant Chicken Parmesan, or drizzled with a quick lemon-butter sauce for an extra bright finish. For those who enjoy a hint of garlic, a generous swipe of homemade aioli is divine. And if you’re feeling adventurous, a touch of hot honey delivers a delightful sweet-spicy kick. Beyond these serving suggestions, I’ve compiled all my expert tips and tricks to guarantee you master the art of pan-frying, ensuring a consistently crispy, flavorful coating every single time.
No matter how you choose to present it, this Crispy Chicken Milanese is a culinary triumph that consistently earns rave reviews. Prepare to impress your family and friends with this ultimate crispy chicken experience!

Mastering Crispy Chicken Milanese: Essential Recipe Tips for Perfection
Achieving restaurant-quality crispy chicken at home is easier than you think when you follow a few fundamental guidelines. These simple yet crucial tips will help you create perfectly golden, wonderfully juicy, and irresistibly crisp cutlets every time you cook this delightful Milanese dish:
- Slice or Pound the Chicken Evenly: The foundation of perfectly cooked Chicken Milanese lies in uniform thickness. Thin, even cutlets ensure that each piece cooks quickly and thoroughly without drying out or having overcooked sections. If your chicken breasts are thick, slice them horizontally into two thinner cutlets, then place them between two sheets of plastic wrap and pound gently with a meat mallet or rolling pin until they are about 1/4 to 1/2 inch thick. This guarantees even cooking and a tender result.
- Don’t Skip Patting the Chicken Dry: Moisture is the enemy of crispiness. Before seasoning, it’s absolutely vital to thoroughly pat your chicken cutlets dry with paper towels. This step removes excess surface moisture, allowing the seasonings to adhere better and, crucially, prevents the breading from becoming soggy or steamy in the hot oil. A dry surface promotes a crispier, more golden crust.
- Press the Breadcrumbs in Firmly: Simply sprinkling breadcrumbs won’t cut it for the ultimate crunch. After dipping your chicken in the egg wash, firmly press the panko-Parmesan mixture onto both sides of each cutlet. Don’t be shy – really ensure every inch is coated and compacted. This creates a solid, uniform crust that adheres well during frying and delivers that satisfying shatter with every bite.
- Maintain the Right Oil Temperature: The temperature of your frying oil is paramount. The sweet spot for Chicken Milanese is around 350°F (175°C). If the oil is too cold, the chicken will absorb too much oil, resulting in a greasy, soggy crust. If it’s too hot, the breading will burn before the chicken has a chance to cook through. Use a kitchen thermometer for precision, or test the oil by dropping a pinch of breadcrumbs in; they should sizzle immediately and turn golden within a minute.
- Fry in Batches: Resist the urge to crowd the pan, no matter how tempting it is to speed up the process. Overcrowding significantly drops the oil’s temperature, leading to less crispy chicken that absorbs more oil. Fry only two pieces at a time, allowing each cutlet ample space to cook evenly and achieve maximum crispiness.
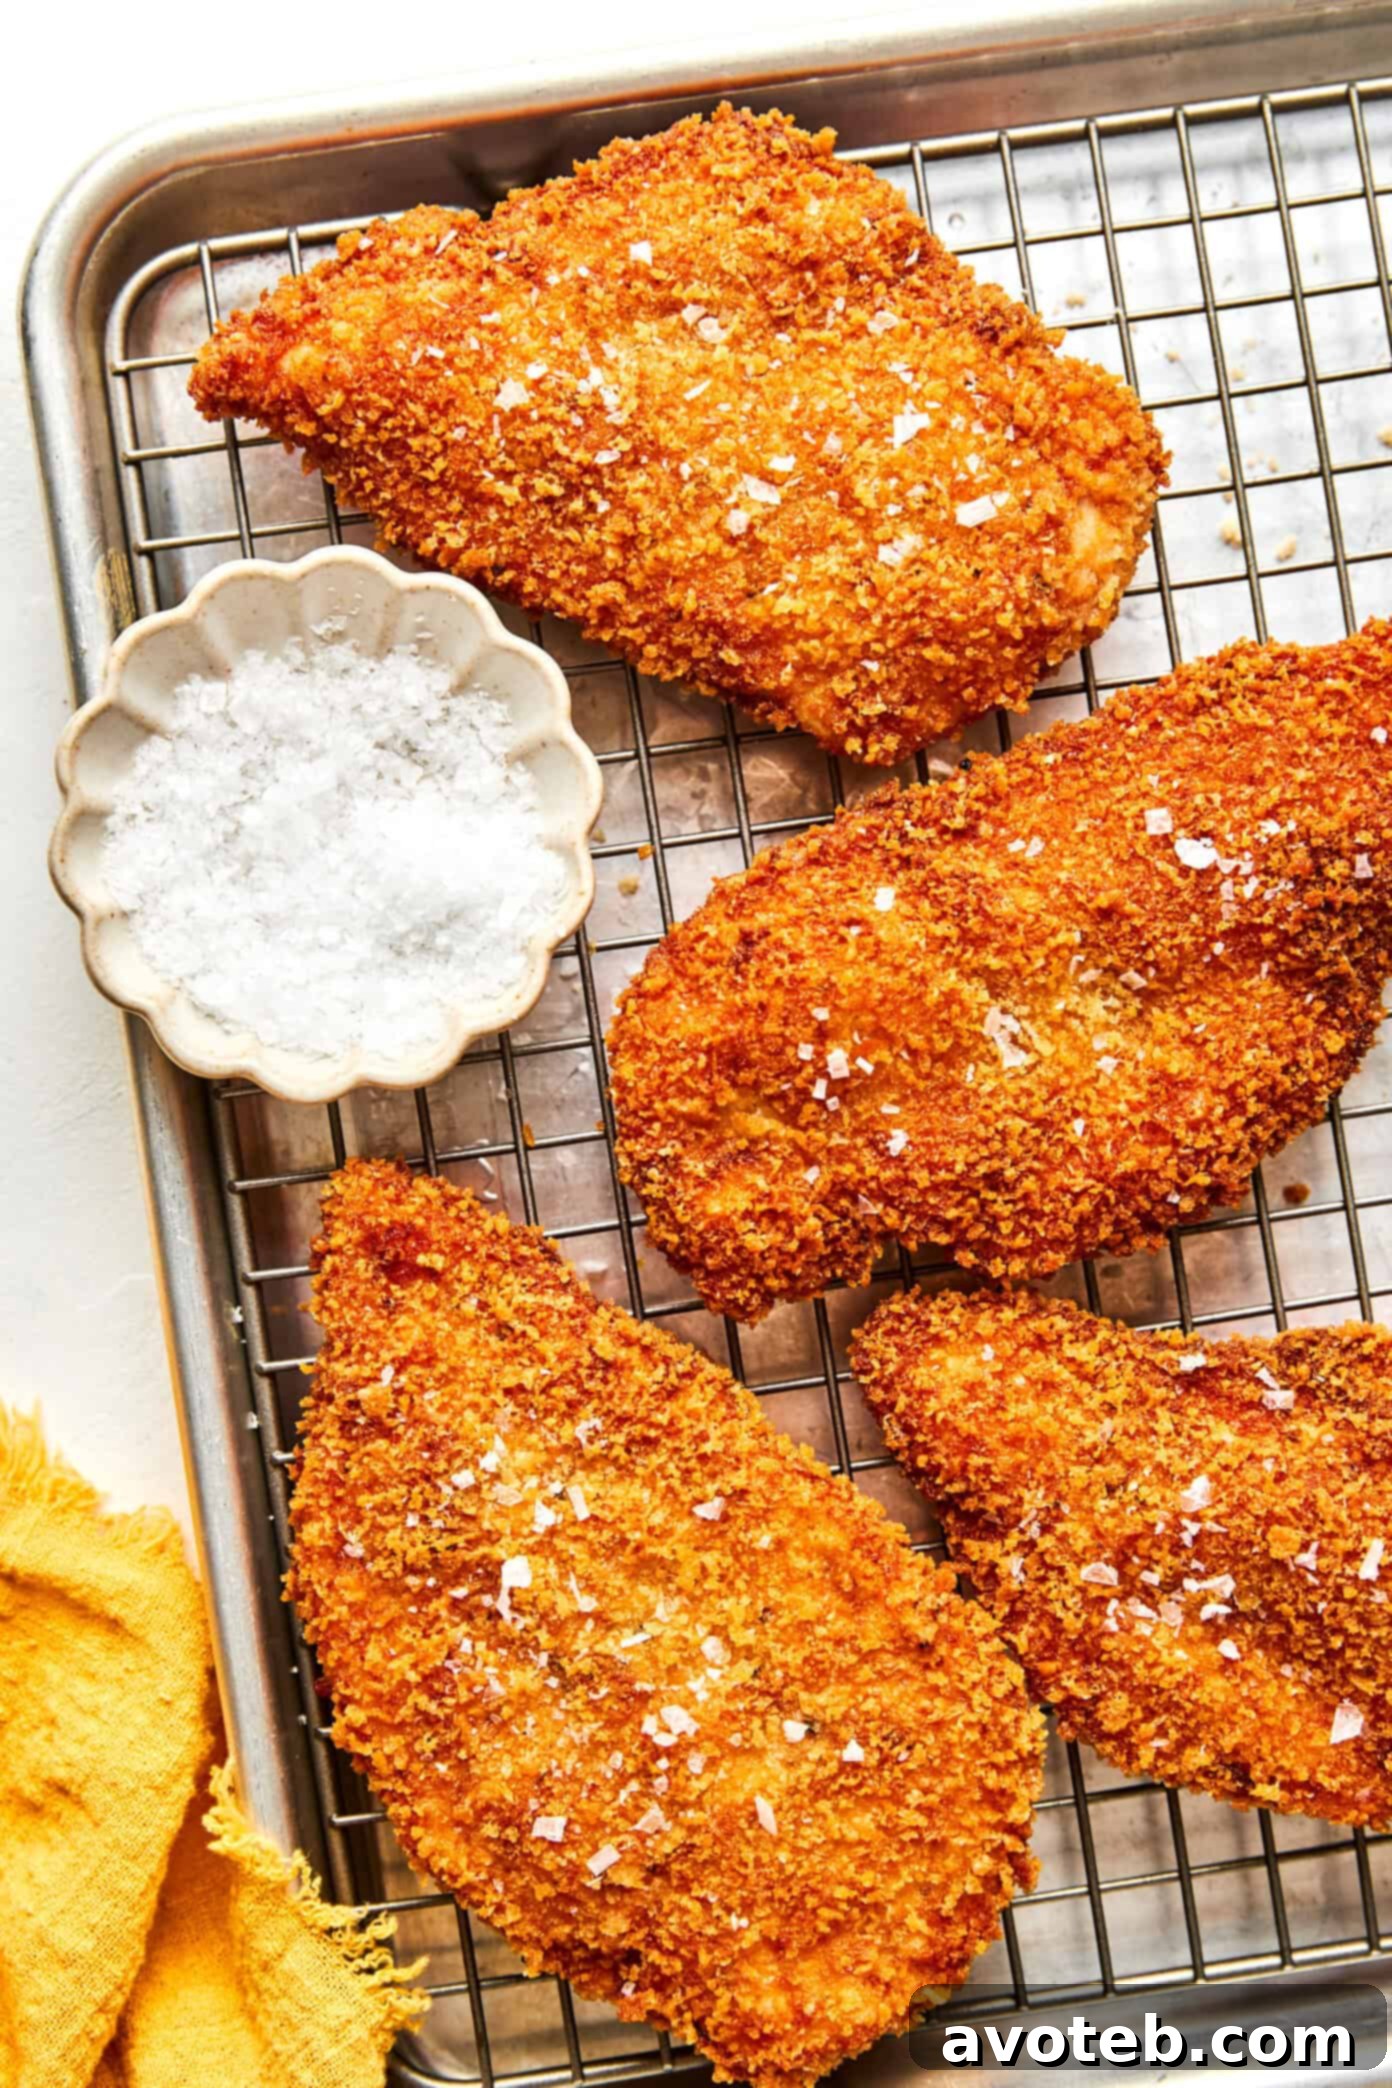
- Use a Wire Rack Instead of Paper Towels: While paper towels might seem like a convenient option for draining excess oil, they trap steam beneath the cooked chicken, causing the underside of your beautifully crispy crust to soften. For truly crispy chicken that stays crisp, transfer the fried cutlets to a wire rack set over a baking sheet. This allows air to circulate around the chicken, preventing steam buildup and preserving that coveted crunch.
- Finish with Flaky Salt and Lemon: This final touch is non-negotiable for maximizing flavor. A light sprinkle of flaky sea salt immediately after frying enhances the savory notes and adds another textural dimension. A generous squeeze of fresh lemon juice over the hot chicken brightens the entire dish, cutting through the richness of the fried coating and making all the flavors truly pop.
Get Creative: Delicious Variations for Your Crispy Chicken Milanese
One of the best qualities of this Crispy Chicken Milanese recipe is its incredible adaptability. Once you’ve mastered the basic technique, feel free to experiment and customize it to suit your cravings or the ingredients you have on hand. Here are some fantastic ways to play around with this dish:
- Infuse with Fresh Herbs or Seasonings: Elevate the flavor profile of your breading by incorporating aromatic additions. Mix finely chopped fresh herbs like parsley, thyme, oregano, or rosemary into your panko-Parmesan mixture. Dried herbs work beautifully too. You can also add a touch of dried onion flakes, a sprinkle of smoked paprika for depth, or a pinch of nutritional yeast for an extra cheesy, umami boost.
- Add a Spicy Kick: For those who love a bit of heat, easily transform your Milanese into a fiery delight. Stir a pinch of cayenne pepper, red chili flakes, or a dash of your favorite spicy seasoning blend directly into the breading mixture. Even a small amount can add a pleasant warmth without overpowering the other flavors.
- Make it Gluten-Free: Don’t let dietary restrictions keep you from enjoying this crispy treat. Simply swap out the all-purpose flour for a good quality gluten-free flour blend (ensure it’s suitable for coating). For the breadcrumbs, use gluten-free panko breadcrumbs, which are widely available and provide excellent crispiness comparable to their traditional counterparts.
- Transform into Chicken Parmesan: This variation is a crowd-pleaser and remarkably easy to achieve. After frying your chicken Milanese cutlets until golden and crisp, place them on a baking sheet. Spoon your favorite warm marinara sauce over each piece, then generously top with slices of fresh mozzarella and a sprinkle of Parmesan cheese. Broil in the oven for a few minutes until the cheese is bubbly and melted and the sauce is heated through. Serve immediately for a hearty Italian-American classic.
- Swap for Chicken Thighs: While chicken breasts are traditional for Milanese, chicken thighs offer a richer flavor and often remain even juicier. If using thighs, opt for boneless, skinless cuts. Just like with breasts, it’s crucial to pound them thin to ensure even cooking and a quicker frying time. This also helps them crisp up beautifully.
- Experiment with Oils: While the recipe suggests neutral oils like grapeseed, avocado, or vegetable oil, you can experiment with a blend. A mix of olive oil and a high-smoke-point oil can add a subtle Mediterranean flavor, just be mindful of the olive oil’s smoke point to prevent burning.
- Bake or Air Fry for a Lighter Option: If you’re looking for a less indulgent version, consider baking or air frying the breaded cutlets. While pan-frying delivers the ultimate crispiness, baking at a high temperature (around 400°F/200°C) or air frying can still yield a wonderfully golden and crisp coating with less oil. Lightly mist the breaded chicken with cooking spray before baking or air frying for best results.
Frequently Asked Questions About Crispy Chicken Milanese
Here are answers to some common questions that arise when preparing this delicious Crispy Chicken Milanese, helping you achieve perfect results every time:
While you can certainly prep parts of this recipe in advance, for the absolute best crispy texture, I highly recommend frying the chicken just before you plan to serve it. You can bread the chicken cutlets a few hours ahead of time and store them refrigerated on a wire rack set over a baking sheet (covered loosely with plastic wrap) until you’re ready to fry. This resting period actually helps the breading adhere better and can contribute to an even crisper crust! However, frying too far in advance will cause the crust to soften.
To bring your leftover chicken Milanese back to its glorious crispy state, avoid the microwave at all costs – it will inevitably lead to a soggy crust. Instead, preheat your oven to 375°F (190°C) or use an air fryer. Place the cutlets on a wire rack set over a baking sheet (or directly in the air fryer basket) and reheat for 10-15 minutes in the oven, or 5-8 minutes in the air fryer, or until warmed through and the crust has regained its crispness. Keep an eye on it to prevent burning.
Absolutely! This recipe is excellent for meal prepping and freezing. You have a couple of options:
- Uncooked & Breaded: For the best results, freeze the breaded but uncooked cutlets. Place them in a single layer on a baking sheet lined with parchment paper and freeze until solid (this prevents them from sticking together). Once frozen, transfer them to a freezer-safe bag or airtight container. When ready to cook, you can fry them straight from frozen, adding a few extra minutes (approximately 5-7 minutes per side) to the cooking time until deeply golden and cooked through.
- Cooked: You can also freeze cooked chicken Milanese, though the texture might not be quite as crispy upon reheating. Allow the cooked cutlets to cool completely, then wrap each individually in plastic wrap and place in a freezer-safe bag or container. Reheat as directed above in the oven or air fryer.
For shallow frying Chicken Milanese, it’s best to use a neutral oil with a high smoke point. Excellent choices include grapeseed oil, avocado oil, vegetable oil, or canola oil. These oils won’t impart any unwanted flavors to your chicken and can withstand the higher temperatures required for proper frying without breaking down or burning. Avoid extra virgin olive oil for frying due to its lower smoke point.

The Ultimate Crispy Chicken Milanese Recipe
- Author: Ali
Prep Time: 20 mins
Cook Time: 15 mins
Total Time: 35 mins
Yield: 4 servings 1x
Description
Discover how to make the most delicious, ultra-crispy Chicken Milanese at home! This perfected recipe features thin, juicy chicken cutlets with a beautifully golden, shatteringly crisp Parmesan-panko crust that stays crunchy. It’s easy to make and incredibly versatile for any meal.
Ingredients
Scale
- 2 large boneless, skinless chicken breasts, sliced horizontally into 4 thin cutlets (or pounded to 1/4-inch thickness)
- 1 teaspoon fine sea salt
- 1 teaspoon garlic powder
- 1 teaspoon onion powder
- 1/2 teaspoon freshly-ground black pepper
- 1/2 teaspoon lemon zest (from about 1/2 a lemon)
- 1/2 teaspoon smoked paprika
- 1/2 cup all-purpose flour (or gluten-free flour blend)
- 2 large eggs
- 1 teaspoon Dijon mustard
- 1 cup panko breadcrumbs (or gluten-free panko)
- 2/3 cup finely grated Parmesan cheese
- 1/2–3/4 cup neutral oil (such as grapeseed, avocado, or vegetable), for shallow frying
- for serving: flaky sea salt and lemon wedges
Instructions
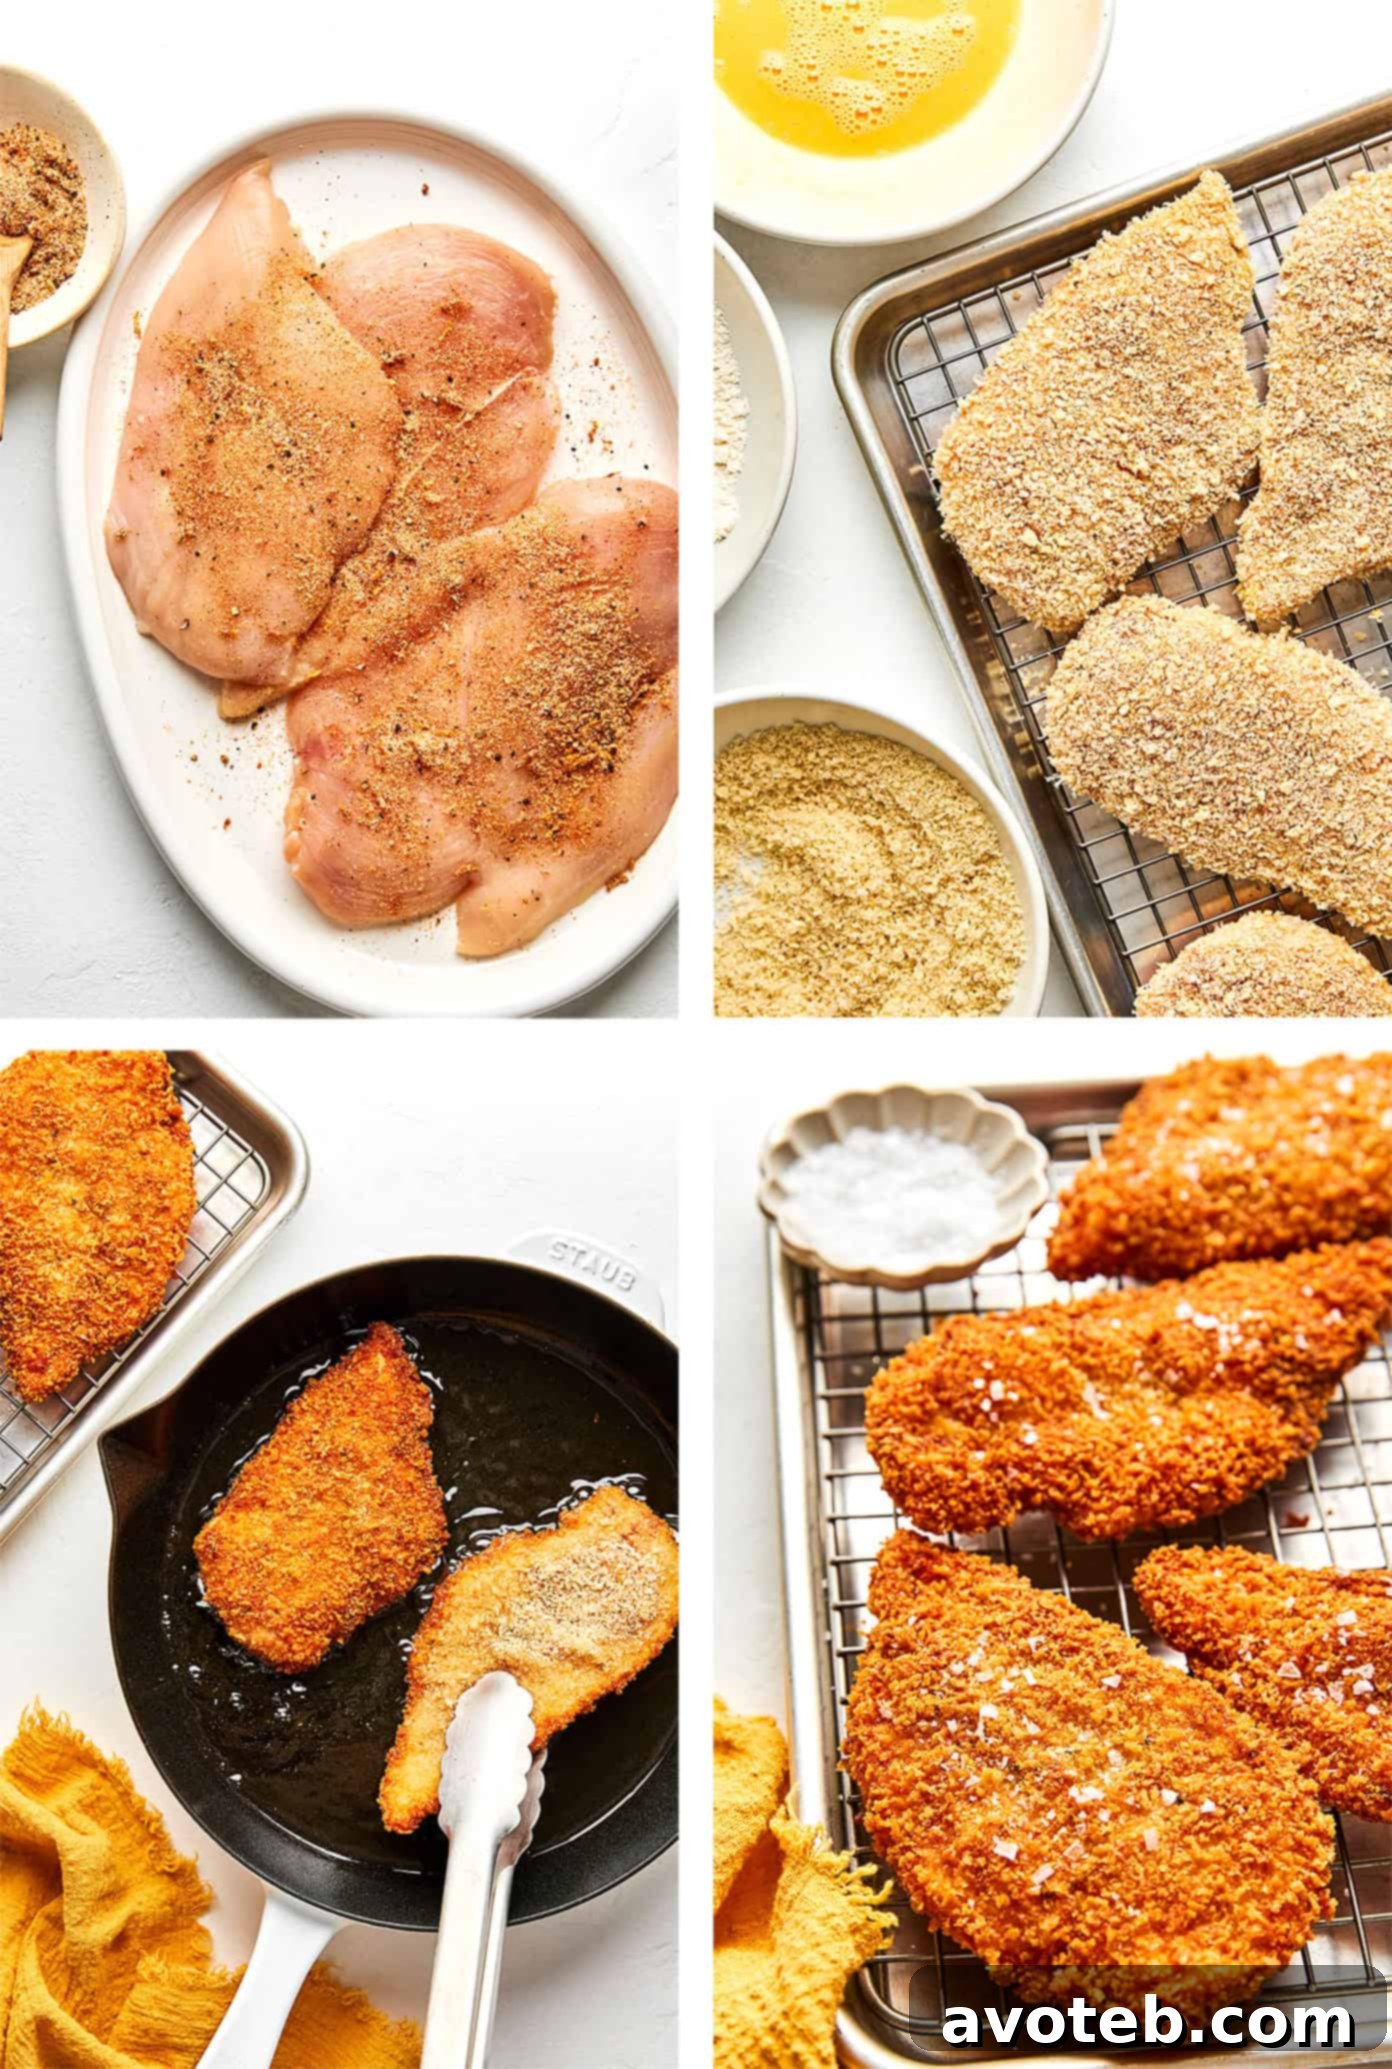
- Prepare and Season the Chicken: Carefully pat the chicken cutlets dry on both sides using paper towels – this is a critical step for a crispy crust! In a small bowl, combine the fine sea salt, garlic powder, onion powder, smoked paprika, black pepper, and lemon zest. Sprinkle this seasoning mixture evenly over both sides of each chicken cutlet, ensuring they are well coated.
- Set Up Your Breading Station: Arrange your breading ingredients in three separate shallow bowls or dishes. In the first bowl, place the all-purpose flour. In the second bowl, whisk together the large eggs and Dijon mustard until the mixture is smooth and fully combined. In the third bowl, combine the panko breadcrumbs and the finely grated Parmesan cheese, mixing well.
- Bread the Chicken for Maximum Crispness: Working with one chicken cutlet at a time, dredge it thoroughly in the flour, shaking off any excess. Next, dip it into the egg mixture, allowing any extra to drip off completely. Finally, transfer the chicken to the panko-Parmesan mixture. Press firmly on both sides of the cutlet to ensure an even and thick coating of breadcrumbs. Once breaded, transfer the cutlet to a wire rack placed over a baking sheet. Repeat with the remaining chicken. Allow the breaded cutlets to rest for 10–15 minutes before frying. This crucial resting period helps the coating adhere firmly to the chicken, preventing it from falling off during frying and contributing significantly to a crispier crust.
- Shallow Fry Until Golden and Cooked: Heat enough neutral oil (approximately ¼ to ½ inch deep, typically ½–¾ cup depending on your skillet size) in a large, heavy-bottomed skillet over medium heat. The oil is ready when it reaches approximately 350°F (175°C) – it should shimmer, and a small pinch of breadcrumbs dropped in should sizzle vigorously and immediately. Working in batches of two to avoid overcrowding the pan (which lowers oil temperature and leads to soggy chicken), carefully place the chicken cutlets into the hot oil. Fry for 3–4 minutes per side, until they are beautifully deeply golden brown and cooked through. The internal temperature of the chicken should reach 165°F (74°C). Once cooked, transfer the crispy cutlets back to the wire rack to drain any excess oil. This ensures the crust remains shatteringly crisp.
- Finish and Serve Immediately: Once all the chicken is fried, sprinkle lightly with flaky sea salt while still warm. Serve the Crispy Chicken Milanese immediately with fresh lemon wedges on the side for squeezing over the top. The bright acidity of the lemon perfectly complements the rich, crispy chicken. Enjoy this irresistible dish!