
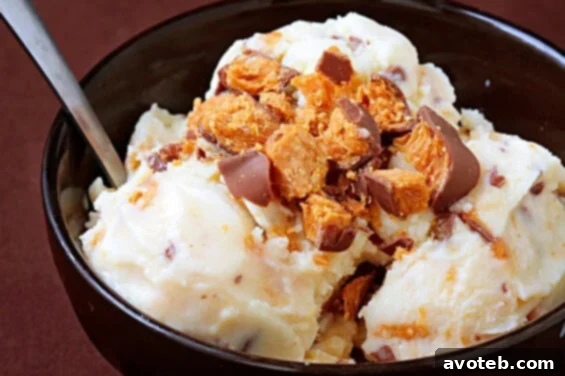
Indulge in Homemade Butterfinger Ice Cream: Your Ultimate Guide to a Crispy, Creamy Delight
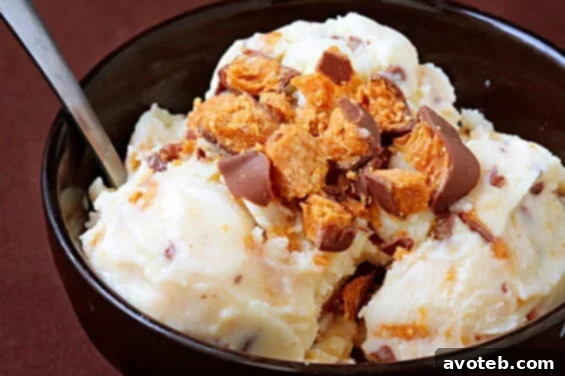
There’s nothing quite like the blissful experience of homemade ice cream, and when you combine that creamy indulgence with the irresistible crunch of a classic candy bar, you create something truly magical. This Butterfinger ice cream recipe is a testament to that magic – a simple yet profoundly satisfying dessert that promises to delight your taste buds with every spoonful. Forget the store-bought varieties; once you taste the fresh, rich flavors and perfectly integrated crispiness of this homemade version, you’ll be hooked.
Imagine a velvety smooth vanilla ice cream base, generously studded with shards of your favorite orange-and-blue-wrapped confection. It’s the perfect treat for a warm summer evening, a festive gathering, or simply a moment of personal indulgence. This recipe marries the classic appeal of a homemade custard-style ice cream with the unique, peanut-buttery crunch of Butterfinger, resulting in an extraordinary frozen dessert that’s impossible to resist.
Our comprehensive guide will walk you through every step of creating this delectable treat, from selecting the finest ingredients to mastering your ice cream maker. We’ll share insider tips for achieving the perfect consistency, integrating those delightful candy pieces, and even suggest creative variations to make this recipe uniquely yours. Get ready to transform ordinary ingredients into an extraordinary dessert that will have everyone asking for seconds!
Why Homemade Butterfinger Ice Cream is a Must-Try
Making ice cream at home offers an unparalleled level of freshness and control over ingredients that simply can’t be matched by commercial options. You control the sugar content, the quality of the dairy, and, most importantly, the generous amount of delicious Butterfinger candy that goes into every batch. This recipe focuses on a rich, custard-style base, which lends itself to an incredibly creamy texture, a hallmark of gourmet ice cream.
The Allure of Butterfinger
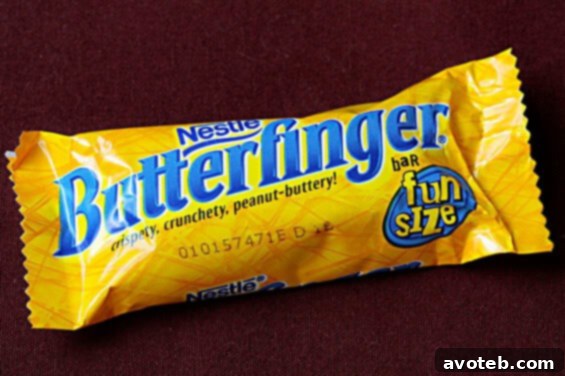
What makes Butterfinger so special in an ice cream? It’s that distinctive crispety, crunchety, peanut-buttery taste and texture. When crumbled into cold ice cream, the candy maintains its delightful crunch, providing a fantastic textural contrast to the smooth, creamy base. It’s a flavor profile that evokes nostalgia and satisfies even the most intense sweet cravings. This recipe embraces that iconic flavor, ensuring every bite is packed with the familiar taste of your favorite candy bar.
Print Recipe
Butterfinger Ice Cream
Prep Time: 5 minutes
Cook Time: 10 minutes
Total Time: 75 minutes
Yield: 4–6 cups ice cream
Description
Get ready for the ultimate frozen treat! This homemade Butterfinger ice cream recipe is incredibly easy to prepare and yields a rich, creamy dessert packed with the delightful crunch of Butterfinger candy bars. It’s a perfect blend of classic vanilla ice cream and your favorite crispy, peanut-buttery chocolate bar.
Ingredients
- 1 cup heavy cream (for rich, luxurious texture)
- 2/3 cup granulated sugar (sweetens the base perfectly)
- 3 large egg yolks (essential for a smooth, custard-style ice cream)
- 1 cup milk (2% works well, but whole milk will provide an even creamier result)
- 1 tsp. pure vanilla extract, preferably high-quality or homemade (enhances overall flavor)
- pinch of salt (balances the sweetness)
- 2 standard-sized Butterfinger bars, thoroughly crumbled (plus extra for topping, if desired, for maximum crunch!)
Instructions
- Prepare the Custard Base: In a medium saucepan, combine the heavy cream, granulated sugar, and egg yolks. Whisk these ingredients together thoroughly until well combined. Place the saucepan over medium heat, stirring constantly with a whisk or rubber spatula. Continue to cook and stir until the mixture thickens slightly and is able to coat the back of a spoon. This process is crucial for a smooth custard texture; avoid boiling to prevent scrambling the eggs. Once thickened, immediately remove the saucepan from the heat.
- Add Flavor and Chill: Whisk in the milk, vanilla extract, and a pinch of salt until all ingredients are fully incorporated. The vanilla adds a classic touch, and the salt helps to balance the sweetness. Transfer the ice cream mixture to an airtight container or cover the saucepan with plastic wrap. Refrigerate for at least an hour, or preferably longer (up to 4 hours or overnight), until the mixture is thoroughly chilled. This chilling step is vital for the best ice cream consistency.
- Churn the Ice Cream: Pour the chilled mixture into your ice cream maker’s frozen bowl and process according to the manufacturer’s instructions. Churning typically takes about 20-30 minutes, depending on your machine. The ice cream should be soft-serve consistency when done.
- Incorporate Butterfingers: About 5 minutes before the ice cream finishes churning (or when it’s nearly at soft-serve consistency), add the thoroughly crumbled Butterfinger pieces directly into the ice cream maker. Allow them to mix in for the remaining churning time, ensuring they are evenly distributed throughout the base.
- Freeze for Firmness: Once churning is complete, transfer the soft ice cream mixture from the ice cream maker into a freezer-safe container. For a firmer, scoopable ice cream, freeze for an additional 2-4 hours, or until it reaches your desired consistency.
- Serve and Enjoy: Scoop out generous portions of your homemade Butterfinger ice cream. For an extra touch of indulgence and crunch, top with additional crumbled Butterfinger pieces if you’d like. Serve immediately and savor every marvelous, sweet, creamy, indulgent, and delicious bite!
Essential Tips for Perfect Homemade Ice Cream
Choosing Your Ice Cream Maker
There are generally two types of home ice cream makers: those with a pre-frozen bowl and those with a built-in compressor. A pre-frozen bowl model is typically more affordable and excellent for occasional use. Just remember to freeze the bowl for at least 12-24 hours beforehand. Compressor models are more expensive but offer the convenience of making multiple batches without re-freezing a bowl. Both types will yield fantastic results for this Butterfinger ice cream recipe, just ensure you follow your specific machine’s instructions.
Ingredients Matter
- Heavy Cream and Milk: Using full-fat dairy is key to a rich, creamy ice cream. While 2% milk works, whole milk elevates the texture significantly. Avoid low-fat alternatives, as they can result in an icy rather than creamy product.
- Egg Yolks: These are crucial for creating a custard base, which gives the ice cream its luxurious, smooth texture and helps prevent large ice crystals from forming. Don’t skip tempering the yolks carefully!
- Vanilla Extract: Use good quality pure vanilla extract. It’s a foundational flavor, and a high-quality extract will make a noticeable difference in the overall taste.
- Butterfinger Bars: For the best results, use standard-sized Butterfinger bars and chop them into small, manageable pieces. You want a good mix of fine crumbs and slightly larger chunks for varying textures. If you’re a true Butterfinger enthusiast, consider using an extra bar for serving as a topping!
The Importance of Chilling
The base must be thoroughly chilled before churning. This isn’t just a suggestion; it’s a critical step. A well-chilled base will churn faster and create a smoother, creamier ice cream. If the base isn’t cold enough, the ice cream maker will struggle to freeze it, leading to a softer, icier texture. Plan ahead and allow at least an hour, or even better, overnight chilling for optimal results.
Achieving the Perfect Consistency
When the ice cream comes out of the maker, it will have a soft-serve consistency. While delicious, it might not be firm enough for perfect scoops. Transferring it to an airtight container and freezing it for an additional 2-4 hours will allow it to harden to a more traditional scoopable texture. This “ripening” period also allows the flavors to meld beautifully.
Variations and Serving Suggestions
Creative Candy Bar Swaps
While Butterfinger is a star, this recipe’s base is incredibly versatile. Feel free to experiment with other favorite (crumbled) candy bars! Some excellent alternatives include Snickers, Heath bar (toffee bits), Reese’s peanut butter cups, or even Oreos for a cookies and cream twist. Each will bring its unique flavor and texture to the creamy vanilla base.
Additional Mix-ins
- Chocolate Chips: A handful of mini chocolate chips or chopped chocolate can add another layer of flavor and texture.
- Caramel Swirl: Swirl in some homemade or store-bought caramel sauce during the last few minutes of churning, or when layering into your freezer container, for a decadent caramel Butterfinger experience.
- Peanut Butter Swirl: For even more peanut butter goodness, gently swirl in some melted creamy peanut butter after churning, before freezing.
How to Serve Your Homemade Butterfinger Ice Cream
- Classic Cones or Bowls: The simplest way is often the best. Serve in waffle cones, sugar cones, or a classic dessert bowl.
- Ice Cream Sundae: Create an epic sundae with whipped cream, hot fudge, caramel sauce, and extra Butterfinger crumbles.
- Milkshakes: Blend a few scoops with milk and a little extra Butterfinger for a thick, luxurious milkshake.
- Dessert Companion: Pair it with a warm brownie, apple pie, or a chocolate chip cookie for an irresistible à la mode experience.
Storing Your Delicious Creation
To keep your homemade Butterfinger ice cream tasting fresh and delicious, store it in an airtight container in the coldest part of your freezer. This helps prevent freezer burn and keeps unwanted odors out. A layer of plastic wrap pressed directly against the surface of the ice cream before sealing the container can also significantly extend its freshness. Enjoy within 1-2 weeks for the best quality, though it often disappears much faster!
Making homemade Butterfinger ice cream is a rewarding culinary adventure that promises a delightful payoff. With its rich, creamy texture and irresistible crunch, it’s a dessert that truly has it all. So, gather your ingredients, fire up your ice cream maker, and prepare to create a frozen masterpiece that will become a beloved favorite in your home. Happy churning!