
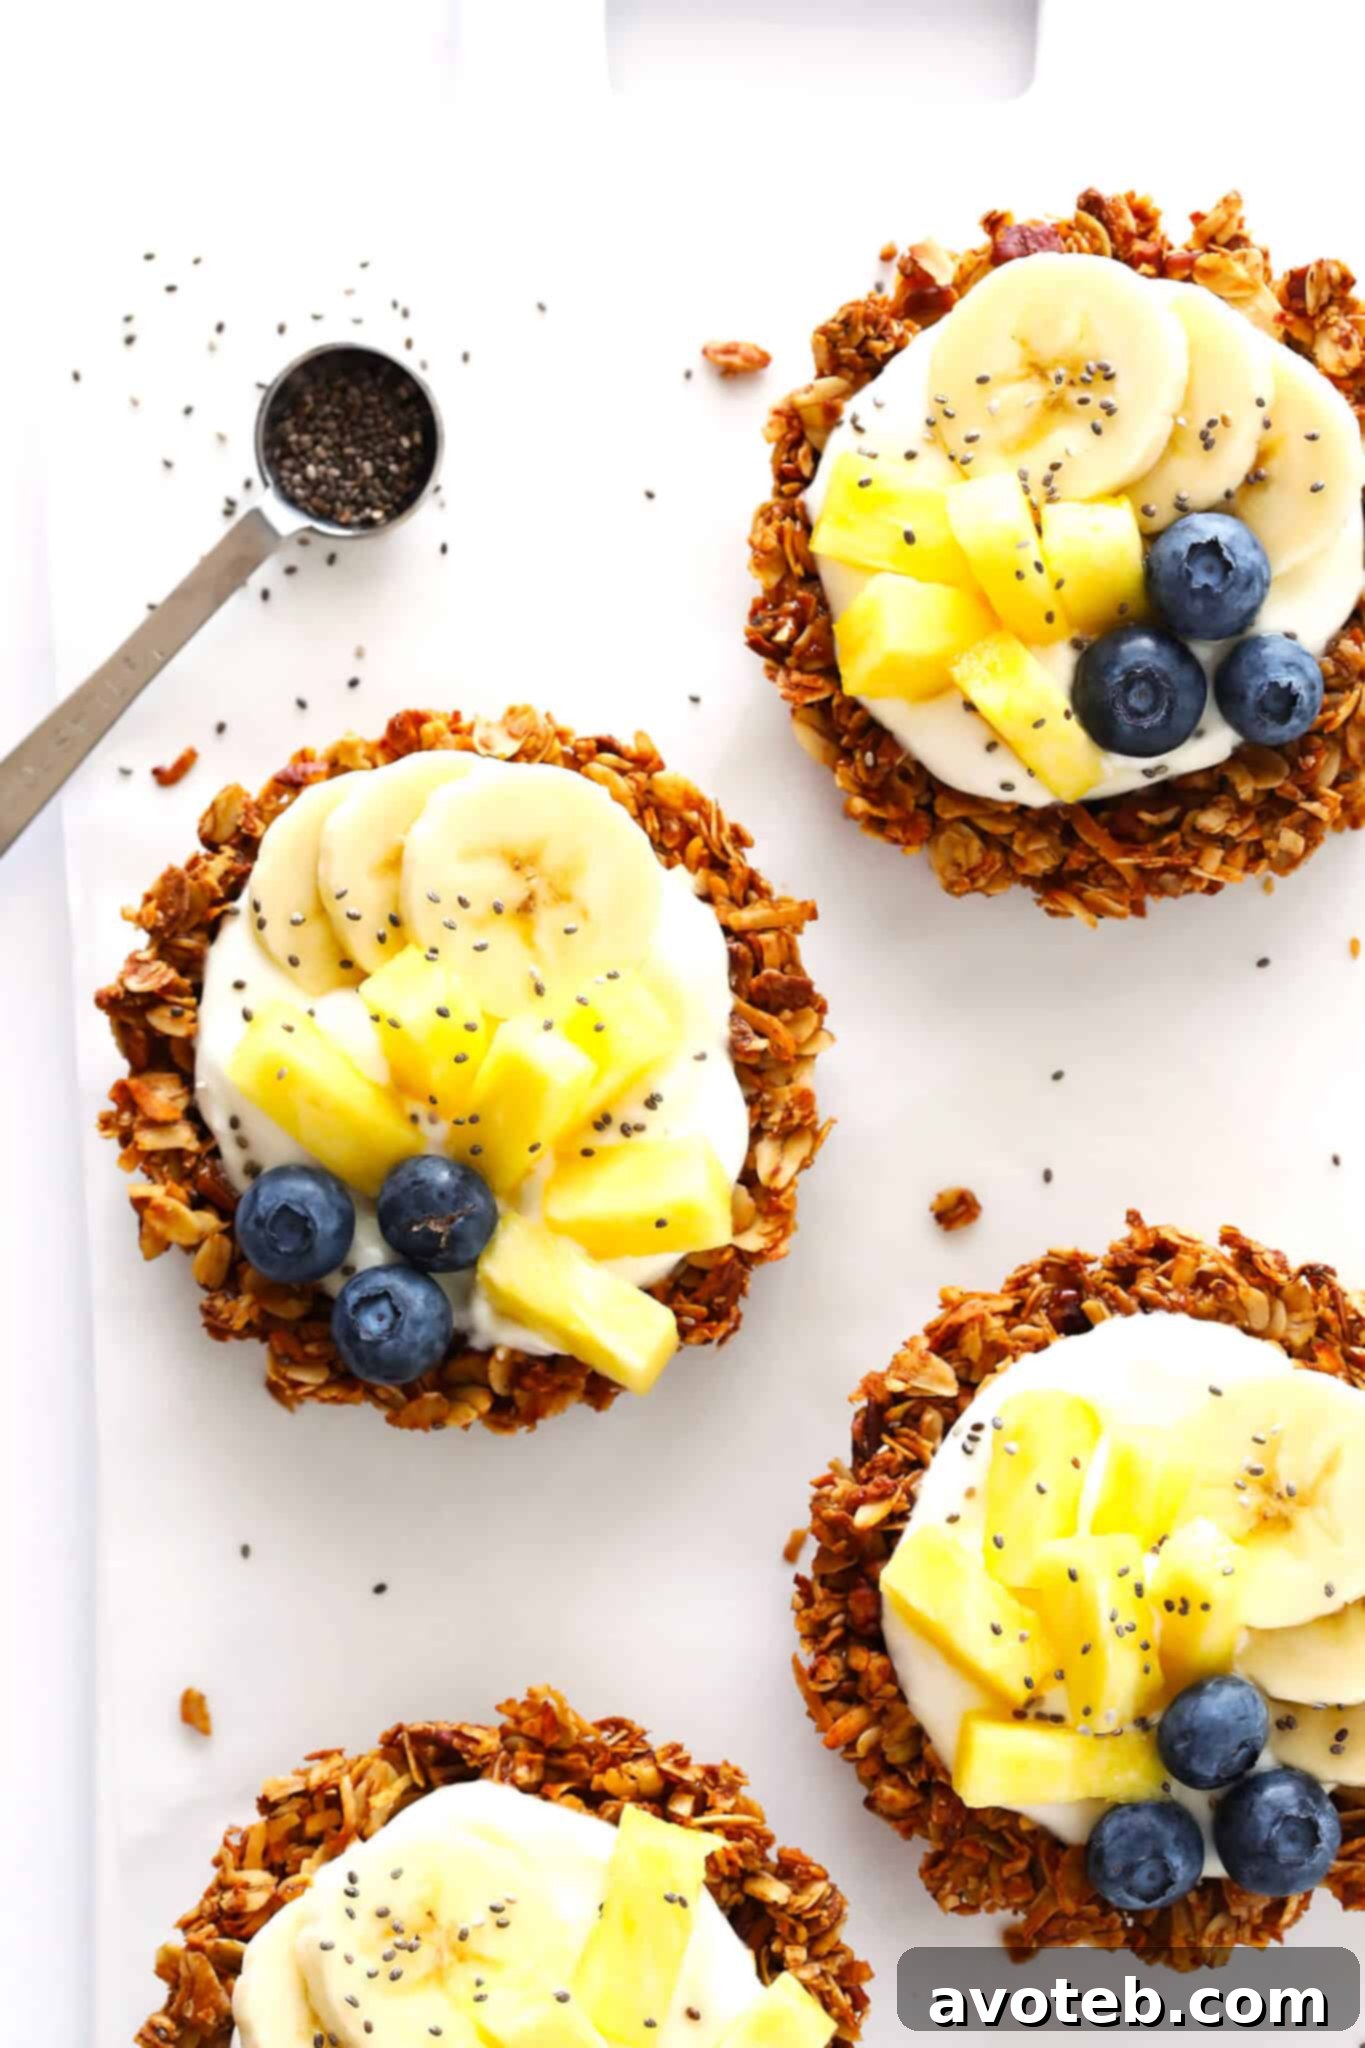
Discover the perfect blend of crunchy granola and wholesome goodness with these delightful Mini Granola Tart Cups! Baked to golden perfection in adorable mini tart pans, these individual cups offer a versatile canvas for your culinary creativity. Whether you fill them with creamy yogurt and fresh berries for a vibrant breakfast, a decadent dessert filling, or any other delicious combination that sparks your fancy, they promise to be both charming and utterly scrumptious. (This post contains affiliate links.)
Welcome to a Deliciously Exciting New Chapter!
Happy Friday, everyone! Before we dive into today’s irresistible recipe, I simply must take a moment to express my profound gratitude. Your overwhelming support and incredibly kind words following our big announcement this week about moving to Barcelona have truly touched Barclay and me. We’ve spent countless hours reading through every single comment here on the blog and across our social media channels, and each message has filled our hearts with immense joy and gratitude. Thank you, thank you, thank you!
Now that the secret is out, I’m thrilled to share so much more about the exciting happenings behind the scenes lately. This journey is just beginning, and I cannot wait to bring you all along with us every step of the way. Your continued presence and engagement here mean the absolute world to me, especially as this blog prepares to reach you from half a world away. It’s an adventure we’re embarking on together, and I cherish your companionship.
Conquering House Projects & Getting Back to the Kitchen
On another celebratory note, Barclay and I have finally reached the finish line with renovating his house, preparing it for the rental market. What we initially thought would be a manageable task turned into an undertaking roughly ten times more extensive and demanding than anticipated. Oh, the joys (and occasional frustrations!) of house projects! I sincerely apologize if my presence here has been a little sporadic lately; life has been a whirlwind of renovations, packing, and planning. But now, with the bulk of the house work behind us, I am absolutely ecstatic to trade my toolbox for my apron and get back into the kitchen. My heart is bursting with new recipe ideas, and I’m especially eager to share them with you while summer produce is still abundant and at its absolute peak.
Summer, for me, always means an endless supply of fresh, vibrant berries. And with berries galore, naturally comes a daily dose of leftover berries for breakfast. While I’ll forever be a loyal fan of a classic granola, yogurt, and berry parfait, this week, I felt inspired to experiment. I wanted to put a fresh spin on my breakfast routine, so I ventured into baking granola into adorable individual “cups.”
The Journey to Perfect Granola Cups
My first attempt involved muffin tins. While the resulting granola cups were undeniably cute, extracting them from the tins proved to be quite a challenge, often leaving them a bit crumbly. Undeterred, I decided to try a second batch, this time utilizing my trusty mini tart pans, specifically the ones with removable bottoms. And oh my goodness, what a game-changer! These pans transformed the entire experience. I am now utterly convinced that these mini granola tart cups are hands-down the cutest, most convenient, and most delicious way to savor granola. They’re perfectly portioned for individual enjoyment, making them ideal for a quick breakfast, a satisfying snack, or even a light dessert. Plus, they bake up beautifully crisp and maintain their structural integrity, delivering that satisfying crunch with every bite. I simply had to share this wonderful discovery with you!
Crafting Your Own Crispy Granola Tart Cups
Creating these delightful granola cups is surprisingly simple and incredibly rewarding. The foundation begins with a straightforward batch of granola, adaptable to your preferred flavors and textures.
Choosing Your Granola Base
For this recipe, I opted for one of my personal favorites, featuring the warm sweetness of maple syrup and the nutty crunch of pecans. However, the beauty of these cups lies in their versatility. You can honestly use almost any granola recipe you love, with one key consideration: ensure that any nuts, dried fruits, or other add-ins are finely chopped. This is crucial for achieving a compact, cohesive granola cup that presses evenly into the tart pans and holds its shape beautifully once baked. Large chunks can make the cups difficult to form and prone to breaking. Think small, uniform pieces for optimal results.
The Art of Pressing and Baking
Once your granola mixture is ready, it’s time to prepare your mini tart pans. Lightly grease each pan to ensure easy release. My preferred method for filling is to first portion the granola mixture evenly among the pans. Then, using the flat bottom of a measuring cup, I firmly and evenly press the granola mixture into the bottoms and up the sides of each tart pan. This firm compression is key to achieving those perfectly formed, sturdy cups that won’t crumble. Next, place the filled tart pans onto a baking tray. This makes them easy to transport in and out of the oven.
Bake the granola cups until they turn a beautiful golden brown and feel wonderfully crispy to the touch. The precise baking time may vary slightly depending on your oven, but generally, you’re looking for that toasted aroma and visible browning. Once baked, it’s paramount to let them cool completely to room temperature while still in their pans. This cooling period is not just for handling; it’s essential for allowing the granola to set and bind together even more firmly, ensuring they pop out of the molds cleanly and maintain their crisp texture. Patience here is a virtue that pays off in perfect granola cups.
Filling Your Granola Masterpieces
With your adorable granola “bowls” now perfectly formed and cooled, the fun truly begins: filling them! Carefully pop each granola cup out of its pan. The removable bottoms of the mini tart pans make this step incredibly simple, allowing you to present them beautifully without fuss. They are now ready to be loaded with your favorite ingredients, transforming them into a personalized culinary delight.
For my cups, I love a simple yet satisfying combination of creamy Greek yogurt, a medley of fresh fruit, a sprinkle of chia seeds for added nutrition, and a generous drizzle of honey. However, the possibilities for fillings are virtually limitless! Consider different types of yogurt – perhaps a vanilla bean yogurt, a dairy-free coconut yogurt, or even a fruit-flavored variety. For fruits, think beyond berries: sliced bananas, kiwi, peaches, or even a mixed fruit compote would be fantastic. Beyond chia seeds, you could add chopped nuts, flax seeds, a dollop of nut butter, or even a sprinkle of chocolate chips for a treat.
If you’re leaning towards a dessert option, imagine a light no-bake cheesecake filling, a simple fruit curd, or a swirl of whipped cream with fresh fruit. The only important note I’d offer is to serve them immediately after filling. Ingredients with high moisture content, such as yogurt or fruit purées, can make the bottoms of the granola cups a bit soggy if left to sit for too long. For optimal crispness and enjoyment, serve and savor promptly.
Make Ahead & Storage Tips
These mini granola tart cups are also fantastic for meal prepping! Feel free to bake a large batch ahead of time to enjoy throughout the week. Once completely cooled, gently transfer the empty granola cups into an airtight ziplock bag or container. Stored properly, they will maintain their delightful crispness for up to 7 days, making them a convenient and healthy grab-and-go option for busy mornings or afternoon snacks. Their individual size makes portion control effortless and ensures a fresh, crispy experience every time. They truly are cute, cute, cute, and utterly delicious. Enjoy, everyone!
Mini Granola Tart Cups
Prep Time: 15 minutes
Cook Time: 20 minutes
Total Time: 35 minutes
Yield: 8 servings 1x
Description
These Mini Granola Tart Cups are a cute and delicious way to serve your granola! Fill them with yogurt and fruit for breakfast, no-bake fillings for dessert, or whatever sounds good.
Ingredients
Scale
- 1/4 cup honey, warmed
- 1/4 cup coconut oil, melted and hot
- 1 teaspoon ground cinnamon
- 1/2 teaspoon vanilla extract
- 1/4 teaspoon salt
- 2 cups old-fashioned oats
- 1 cup finely-chopped nuts (such as pecans, walnuts, or almonds)
- 1/2 cup shredded coconut (sweetened or unsweetened)
- 2 teaspoons chia seeds (optional)
- fillings: Greek yogurt, fresh fruit, chia seeds, etc.
To prevent your screen from going dark while cooking, consider using a cook mode feature on your device.
Instructions
- Preheat oven to 325°F (160°C). Lightly mist 8 mini tart pans with cooking spray.
- In a small mixing bowl, whisk together the warmed honey, melted coconut oil, ground cinnamon, vanilla extract, and salt until thoroughly combined. Set this wet mixture aside.
- In a large mixing bowl, combine the old-fashioned oats, finely-chopped nuts, shredded coconut, and optional chia seeds. Toss until the dry ingredients are evenly mixed. Pour the honey mixture over the dry ingredients and toss again until all the dry ingredients are uniformly coated.
- Divide the granola mixture evenly among the prepared mini tart pans. Using the flat bottom of a measuring cup or your fingers, firmly press the granola mixture into the bottoms and up the sides of each tart pan. Place the filled pans on a baking tray for easier handling.
- Bake for 20-25 minutes, or until the granola is beautifully browned and toasted on top. The edges should appear crisp. Carefully transfer the tart pans to a wire rack and allow them to cool completely to room temperature before attempting to remove the granola cups. This step is crucial for ensuring they set properly and maintain their shape.
- Once cooled, gently remove the granola tarts from their pans. Fill each cup with your desired fillings (such as Greek yogurt, fresh fruit, and additional chia seeds) and serve immediately for the best texture. Alternatively, if preparing ahead, carefully transfer the empty granola cups to an airtight container or ziplock bag and store at room temperature for up to 7 days.
Notes
*If you are making these gluten-free, please ensure all your ingredients, especially the oats, are certified gluten-free to avoid cross-contamination.