
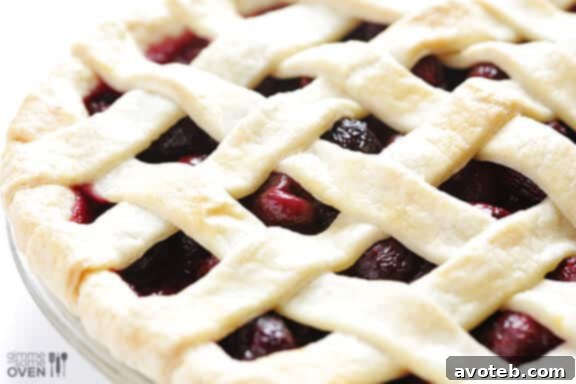
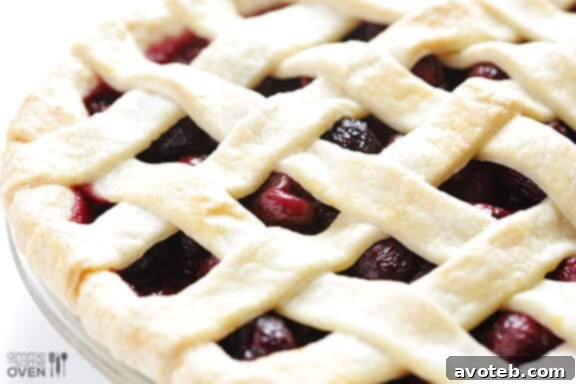
Welcome, fellow bakers and pie enthusiasts! If you’ve ever admired a beautifully woven lattice pie crust and thought it was too complicated to attempt, prepare to be pleasantly surprised. Mastering the art of the lattice crust is not only achievable but also much simpler than you might imagine. This detailed tutorial will demystify the process, guiding you step-by-step to create a stunning top for your next homemade pie.
A lattice pie crust isn’t just about aesthetics; it serves a crucial practical purpose too. The open weave acts as a natural vent, allowing steam to escape during baking. This prevents your delicious fruit fillings from becoming watery and ensures a perfectly set, bubbling pie with a flaky crust. Beyond its functionality, there’s an undeniable charm to a rustic, golden-brown lattice that elevates any pie from a simple dessert to a centerpiece-worthy masterpiece, often making it look like it came straight from a professional bakery. We previously covered the essentials of crafting the perfect pie dough and forming standard double crusts in our comprehensive How To Make A Pie Crust guide, but the intricate yet straightforward lattice technique truly deserves its own spotlight. Once you have your dough strips prepared and chilled, weaving them together takes mere minutes, transforming a basic pie into an elegant, show-stopping dessert.
I promise, with a little patience and these straightforward instructions, you’ll be creating impressive lattice crusts in no time. Forget the intimidation; embrace the creative process. Give it a try – your taste buds (and your appreciative guests) will undoubtedly thank you for the extra effort, which, as you’ll discover, isn’t much effort at all!
Mastering the Lattice Pie Crust: A Comprehensive Visual and Written Guide
For those who prefer to see the process in action, we highly recommend searching for our concise 1-minute video tutorial on “How To Make A Lattice Pie Crust.” It visually complements these written steps, making the weaving technique even easier to grasp. A quick search will provide you with the perfect visual aid to accompany this guide, ensuring every step is crystal clear.
This post contains affiliate links, meaning we may earn a small commission if you make a purchase through our links, at no extra cost to you. We only recommend products we genuinely use and love.
How To Make A Lattice Pie Crust: The Ultimate Step-By-Step Tutorial for Home Bakers
Preparing Your Pie Dough for the Lattice Weave
The foundation of any great pie, especially one with a decorative lattice top, is a perfectly prepared pie dough. Before diving into the weaving, ensure you have a freshly prepared batch of your favorite pie dough, thoroughly chilled and ready to roll. The success and ease of creating your lattice heavily rely on having cold, pliable dough. If your dough is too warm, it will become sticky, difficult to handle, and prone to tearing, leading to unnecessary frustration. After preparing your dough according to your preferred recipe (or our recommended basic pie crust recipe!), divide it into two distinct portions: one for the bottom crust and one slightly larger portion for the lattice top. Roll out the bottom crust and carefully place it into your pie plate, trimming the edges as needed and setting it aside.
Step 1: Rolling and Chilling the Lattice Dough to Perfection
On a lightly floured surface, take the larger portion of dough designated for your lattice top. Roll it out into an even circle or rectangle, aiming for a consistent thickness of approximately 1/8-inch. The shape should be slightly larger than your pie dish to ensure you have ample length for all your strips, especially for accommodating any shrinkage during baking. Once rolled, carefully transfer the dough to a baking sheet lined with parchment paper. This parchment will prevent sticking and make the next step easier. Now, chill this rolled-out dough in the refrigerator for at least 15-20 minutes, or for a quicker firm-up, in the freezer for about 10 minutes. This chilling step is absolutely crucial; it firms up the butter in the dough, making it much easier to cut into clean, defined strips and handle without tearing or stretching out of shape.
Step 2: Precisely Cutting Your Dough Strips for an Even Lattice
Once your rolled-out dough is thoroughly chilled and firm, retrieve it from the refrigerator. Now it’s time for the cutting. The width and total number of strips are entirely up to your personal preference and the size of your pie dish. For a standard 9-inch pie, I typically find that 10 to 12 strips, each approximately 3/4-inch to 1-inch wide, yield a classic and attractive lattice. You can certainly make them wider for a more open, modern look, or thinner for a more delicate and intricate design. Consistency in width is key for a uniform weave.
Recommended Tools For Cutting Pie Dough Strips:
- Pastry Wheel: For those seeking a truly professional finish, a specialized pastry and ravioli wheel offers unparalleled versatility. Many come with interchangeable blades or double wheels that allow you to create either clean, straight edges or decorative scalloped patterns. This small investment can significantly elevate the visual appeal of your pie, adding a refined touch.
- Pizza Wheel/Cutter: Don’t have a dedicated pastry wheel? No problem at all! A standard pizza cutter works just as effectively and efficiently for creating clean, straight lines. It’s a common kitchen tool that gets the job done beautifully and is often readily available.
- Ruler: For optimal consistency in strip width, a kitchen ruler or even a straight edge can be your best friend. Lightly score the dough with the edge of the ruler before making your cuts to ensure perfect uniformity across all your strips. This extra step ensures a symmetrical and pleasing lattice pattern.
Step 3: Laying the Foundation – Placing the Parallel Strips
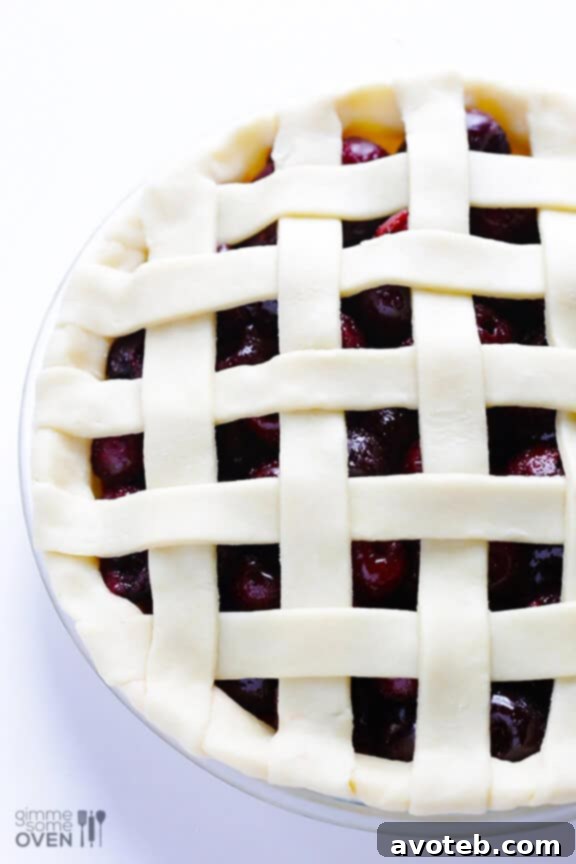
With your delectable pie filling already nestled perfectly into the bottom crust, you’re ready to begin constructing the lattice. Start by laying half of your chilled dough strips parallel to each other across the top of the pie. A good technique is to start with one strip directly in the middle of the pie, then work your way outwards, placing additional strips on either side. Aim for even spacing between each strip. You can place them relatively close together for a tighter, more traditional weave, or further apart for a more open, modern lattice design. Crucially, at this stage, do not press them down onto the filling or the bottom crust; they need to remain easily movable for the upcoming weaving process. These strips will form the base of your woven pattern.
Step 4: The Art of Weaving – Creating the Interlaced Pattern
This is where the true magic of the lattice comes to life! The weaving process is surprisingly simpler than it looks, consistently following an easy “over-under” pattern:
- Initiate with a Perpendicular Strip: Take one of your remaining dough strips, which will be the first strip to weave. Place it perpendicular to the first set of parallel strips, near one edge of the pie, approximately one inch from the edge.
- Lift Alternate Parallel Strips: Gently fold back every other parallel strip (for example, the 2nd, 4th, and 6th strips) that the perpendicular strip will cross over. Fold them back about halfway, creating space.
- Position the First Weave Strip: Lay the perpendicular strip over the unfolded parallel strips and under the strips you just folded back. Ensure it lies flat and straight. Gently unfold the previously folded parallel strips back over this new perpendicular strip. You’ll see your first weave taking shape!
- Repeat for the Next Perpendicular Strip: Now, take your next perpendicular strip. This time, you’ll lift the *other* alternate parallel strips (for example, the 1st, 3rd, and 5th strips) – the ones you left down in the previous step. Lay the new perpendicular strip under these newly lifted strips and over the ones that remained down. Fold the lifted strips back into place. This alternating pattern is what creates the characteristic woven look.
- Continue the Weaving Process: Keep alternating which parallel strips you lift for each new perpendicular strip. Work your way across the pie until all your strips are woven into a beautiful lattice pattern. Throughout this process, aim for a consistent, gentle tension in your weave to prevent the lattice from pulling apart or becoming uneven during baking.
Step 5: Trimming and Crimping the Edges for a Polished Finish
Once your lattice is fully woven and you’re satisfied with the pattern, it’s time to secure it firmly to the bottom crust. Carefully trim any excess dough from the lattice strips, leaving a small, consistent overhang of about 1/2-inch around the entire circumference of the pie plate. Then, meticulously fold this overhang underneath the edge of the bottom crust. This creates a neat, sealed edge. You can then crimp the edges decoratively using your fingers, a fork, or a combination of both techniques. This final sealing step is crucial; it not only adds a beautiful border but also firmly attaches the lattice to the bottom crust, preventing the filling from bubbling out excessively during baking and ensuring your pie holds its shape.
Step 6: The Golden Finish and Essential Pre-Bake Chilling
For that irresistible golden-brown hue, a hint of sparkle, and a delightful textural contrast, consider adding these final flourishes to your lattice pie crust:
- Pastry Brush: Using a soft pastry brush, lightly coat the entire surface of the lattice with an egg wash (typically one egg yolk whisked with a tablespoon of milk or water) or simply a little milk or cream. This wash promotes browning and gives the crust a lovely sheen.
- Sugar Sprinkle: For an extra touch of sweetness and a delightful, crunchy texture, sprinkle a small amount of granulated sugar or coarse turbinado sugar evenly over the washed lattice. This not only enhances flavor but also creates an appealing sparkle.
After these finishing touches, resist the urge to immediately bake! Pop your entire pie back into the freezer for 10-15 minutes or the refrigerator for at least 30 minutes. This final chill is a small but mighty step that makes a significant difference. It helps to firm up the butter in the dough one last time, ensuring a truly flaky crust, minimizing shrinkage during baking, and helping the lattice pattern hold its beautiful shape. It’s a secret to professional-looking results!
Essential Tips for Baking a Perfect Lattice Pie Crust Every Time
The Crucial Role of Dough Temperature: Keep it Cold!
- As we’ve repeatedly emphasized, and as highlighted in our basic pie crust tutorial, chilled dough is absolutely your best friend when it comes to baking pies, especially when working with intricate designs like a lattice. Warm dough quickly becomes sticky, loses its elasticity, tears easily, and is significantly harder to work with, often resulting in a less defined and less attractive lattice pattern. If your dough starts to get too warm during the cutting or weaving process (a common occurrence from the warmth of your hands or a warm kitchen), do not hesitate to pause. Simply pop it back into the refrigerator or even the freezer for a few minutes to firm it up again. A firm, cold dough guarantees clean cuts, a beautiful, stable weave, and ultimately, a wonderfully flaky texture.
Embrace Imperfection and the Rustic Charm of Homemade
- Even the most perfectly woven lattice crust can experience minor shifts or slight imperfections during baking. Furthermore, when you’re baking a juicy fruit pie, it’s often desirable for those delicious fruit juices to bubble up and caramelize beautifully, which might mean a little spillover onto your crust. This is not only completely acceptable but often adds to the pie’s authentic, homemade, and rustic appeal! Don’t stress about achieving absolute flawless symmetry. The true joy and beauty of a homemade pie come from its incredible taste, the aroma filling your kitchen, and the love put into its creation, not necessarily from perfectly precise, machine-like patterns. So, create your beautiful weave with care, then wholeheartedly enjoy every tasty, bubbly, and perfectly imperfect bite.
Experiment with Width, Pattern, and Creativity
- The suggested strip width of 3/4-inch to 1-inch provides an excellent starting point for a classic lattice, but don’t feel confined by it. Feel free to experiment and unleash your creativity! Thinner strips (e.g., 1/2-inch) can create a more delicate, intricate, and refined pattern, offering a sophisticated look. Conversely, wider strips (e.g., 1.5-inch) will result in a bolder, more open, and modern lattice design. You can also explore variations like diagonal weaving for a stunning diamond pattern, or even incorporate strips of varying widths within the same lattice for added visual interest and a unique touch. Baking is an art, so have fun with it!
Preventing a Soggy Bottom Crust in Your Lattice Pie
- While the open lattice design inherently allows for excellent steam release, helping to prevent a watery filling, you still want to ensure your bottom crust remains wonderfully crispy and never soggy. If your pie filling is particularly juicy (common with berries or very ripe fruits), consider an extra preventative measure. Before adding your fruit filling to the bottom crust, sprinkle a thin, even layer of breadcrumbs, crushed cornflakes, or even a small amount of flour or fine semolina onto the bottom. This acts as an effective barrier, absorbing any excess moisture released by the fruit, ensuring your bottom crust stays perfectly flaky and golden.
Explore More Delicious Pie Recipes to Fill Your Lattice!
Now that you’re a master of the lattice pie crust, are you ready to fill it with incredible flavors? Here are some of our most popular and beloved pie recipes, perfect for showcasing your newly acquired lattice weaving skills and delighting everyone at your table:
Irresistible Sweet Cherry Pie Recipe
Flavorful Peach Bourbon Pie Recipe
Decadent French Silk Pie (Chocolate Pie) Recipe
The Ultimate Pecan Pie Recipe
Zesty Key Lime Pie Recipe
Classic Apple Pie Recipe
With these detailed steps, helpful tips, and a dash of confidence, you’re now fully equipped to create a beautiful and utterly delicious lattice pie crust for your next baking adventure. Don’t be intimidated; the reward of slicing into a homemade pie with a stunning, golden lattice top, revealing a perfectly cooked filling, is truly unmatched. It’s a culinary triumph that looks impressive and tastes even better. Happy baking!
Disclaimer: This post contains affiliate links, which means we may receive a small commission if you click on a product link and make a purchase, at no additional cost to you. We only recommend products we personally use and trust.