
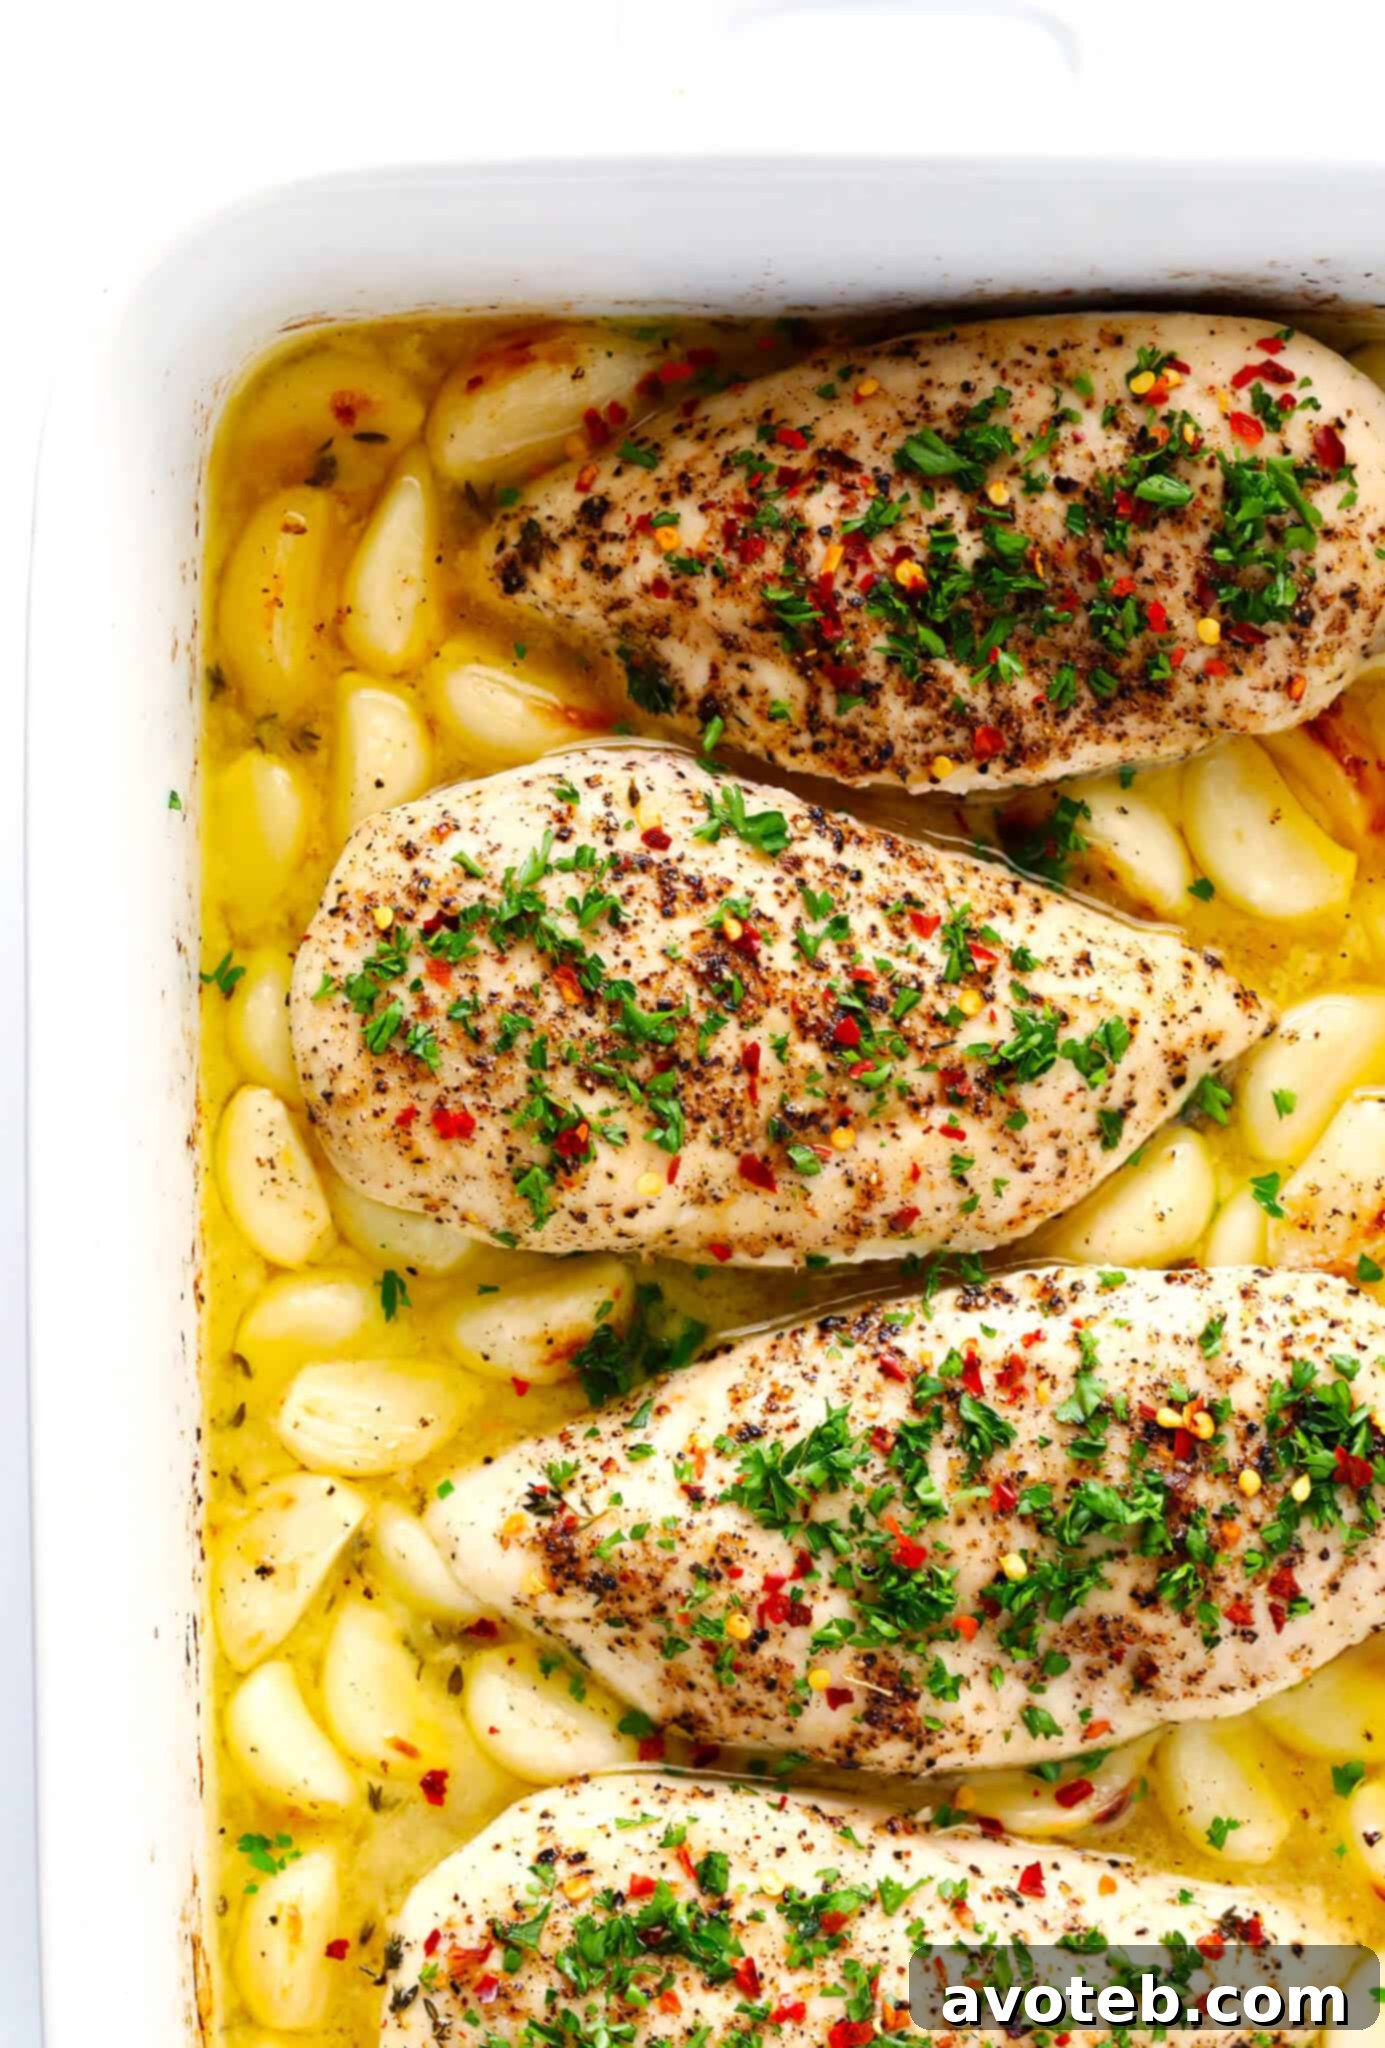
Discover the ultimate Garlic Lovers Baked Chicken recipe! This effortlessly prepared dish features tender chicken baked in a delightful lemon-butter sauce, infused with a generous forty cloves of perfectly roasted garlic. It’s not only incredibly delicious but also naturally gluten-free.
Unleash the Flavor: The Ultimate Garlic Lovers Baked Chicken Recipe
To all my fellow garlic aficionados out there, get ready to experience a recipe that will elevate your culinary world! While our collection boasts fantastic garlic-infused recipes like garlicky salmon, baked shrimp, and spaghetti, it recently dawned on me that we were missing a crucial piece: a show-stopping chicken dish. Chicken consistently ranks as the most requested ingredient on our blog, and for good reason!
Thousands of you have praised my foolproof Baked Chicken Breasts recipe, and many have asked for exciting new variations. This Garlic Lovers Baked Chicken recipe is truly a win-win for everyone who adores both succulent chicken and the rich, aromatic depth of garlic. It’s incredibly quick and simple to prepare, especially if you opt for pre-peeled garlic cloves (a fantastic time-saver!). The chicken is baked to perfection in a luscious lemon-butter sauce, and yes, you heard right—this recipe calls for a fabulous forty cloves of garlic, roasted until sweet and tender. Plus, it’s naturally gluten-free, making it a healthy and delicious choice for many dietary needs.
The Magic of Forty Cloves: Why This Recipe Stands Out
I’ve always been captivated by the classic “Chicken with 40 Cloves of Garlic” recipe, a dish I’ve cherished for years. However, my version streamlines the process by moving everything from stovetop to oven, allowing for a hands-off roasting experience. No more babysitting a skillet! This one-pan wonder means less prep, less cleanup, and still delivers an unbelievably flavorful meal that’s perfect for a weeknight dinner or entertaining guests. The sheer quantity of garlic might seem intimidating at first glance, but trust me, when roasted, garlic transforms into a mild, buttery, and utterly irresistible spread that complements the chicken beautifully, rather than overpowering it.
This recipe isn’t just about the quantity of garlic; it’s about how that garlic is treated. Roasting the cloves brings out their natural sweetness and mellows their pungent edge, resulting in a creamy texture and an incredible depth of flavor that permeates the entire dish. Combined with the bright acidity of lemon and the rich indulgence of butter, it creates a symphony of tastes that will have you coming back for more.
Simple Steps to Culinary Perfection
Let’s dive into how you can recreate this culinary masterpiece in your own kitchen:
1. The Brine: Your Secret to Juiciness
The first step towards achieving incredibly tender and juicy chicken breasts is a quick brine. While you prepare the sauce, simply submerge your chicken breasts in a bowl of saltwater. This simple technique works wonders by allowing the chicken to absorb moisture and salt, which helps it retain its juiciness throughout the baking process. Even a short 15-minute brine can make a remarkable difference, ensuring every bite is moist and flavorful. If your chicken comes pre-brined, you can skip this step, but for standard chicken breasts, it’s highly recommended.
2. Crafting the Heavenly Lemon-Butter Sauce
Next up is the star sauce that brings everything together. In a separate bowl, whisk together dry white wine, melted butter, fresh lemon juice, and fragrant thyme leaves. For this recipe, I highly recommend using high-quality butter, such as Land O Lakes® Salted Butter in Half Sticks. With so few ingredients in this simple sauce, the quality of your butter genuinely impacts the final flavor, adding a rich, creamy depth that inferior butter simply can’t match. The white wine adds a subtle tang, the lemon juice provides a bright, zesty contrast, and fresh thyme infuses the sauce with an earthy, herbaceous note.
3. Assembling and Baking: A Symphony in One Pan
Once your sauce is ready, it’s time to combine it with the star of the show: the forty cloves of garlic! Toss the garlic cloves generously in the lemon-butter sauce until each one is beautifully coated. Then, arrange your brined chicken breasts in a single layer in a large baking dish. Carefully pour the garlic and sauce mixture over and around the chicken. It’s crucial here to nestle the garlic cloves *around* the chicken, rather than directly on top, to prevent them from burning during baking. A quick brush of some reserved sauce over the chicken breasts and a generous seasoning of salt and pepper will prepare the dish for the oven. Roast until the chicken is cooked through and the garlic is incredibly tender and golden. Keep a watchful eye on the garlic to ensure it doesn’t get too dark; a gentle flip can help if needed.
4. The Importance of Resting
After baking, the most challenging part is waiting! Remove the pan from the oven and loosely tent it with aluminum foil. Allowing the chicken to rest for at least 5-10 minutes is a critical step. This resting period allows the juices within the chicken to redistribute, resulting in exceptionally moist and flavorful meat. Skipping this step often leads to dry chicken, as the juices escape when you cut into it too soon.
Serving Suggestions & Creative Variations
Now for the fun part: serving! This Garlic Lovers Baked Chicken is incredibly versatile. Here are a few ideas to inspire you:
- Classic & Simple: A sprinkle of freshly chopped parsley adds a vibrant color and fresh herbaceous note without overwhelming the dish.
- Amp Up the Flavor: For an extra kick, add freshly grated Parmesan cheese and a generous pinch of crushed red pepper flakes. The Parmesan introduces a salty, umami depth, while the pepper flakes provide a delightful warmth. Don’t forget an extra squeeze of fresh lemon juice just before serving to brighten all the flavors.
- Creamy Indulgence: If you desire a richer, more decadent sauce, remove the chicken from the pan after resting and stir in about half a cup of heavy cream into the pan juices. Simmer gently for a minute or two until slightly thickened. This transforms the sauce into a luxurious accompaniment.
- Perfect Pairings: I love serving this chicken over pasta with our family’s favorite artichoke salad and some roasted asparagus. However, it’s equally delightful with fluffy rice, nutty quinoa, creamy mashed potatoes, or even just a warm, crusty bread to sop up every last drop of that incredible lemon-butter sauce. Any seasonal salad or roasted vegetable you have on hand would be a fantastic complement.
- Meal Prep Friendly: This recipe also reheats well, making it excellent for meal prepping. Store the chicken and roasted garlic in an airtight container with plenty of the sauce to keep it moist and flavorful for future meals.
No matter how you choose to serve it, be sure to load up each plate with those tender, sweet cloves of roasted garlic and drizzle generously with several spoonfuls of the heavenly lemon-butter sauce. That sauce is an absolute must-have component of this dish!
And perhaps, just maybe, have a few mints ready after dinner. Enjoy every garlicky bite, everyone!
(This post contains affiliate links, which means I may earn a small commission if you make a purchase through them, at no extra cost to you. Thank you for supporting the brands that make this blog possible!)
Garlic Lovers Baked Chicken
- Prep Time: 12 minutes
- Cook Time: 18 minutes
- Total Time: 30 minutes
- Yield: 4 servings 1x
Description
This Garlic Lovers Baked Chicken recipe is quick and easy to prepare. It’s oven-baked with a delicious lemon-butter sauce and features 40 cloves of garlic roasted to tender perfection. Feel free to serve it with pasta, rice, quinoa, or any side dish that sounds delicious.
Ingredients
- 4 boneless skinless chicken breasts, pounded to even thickness and brined in saltwater (*see easy instructions below)
- 1/3 cup dry white wine
- 4 tablespoons salted butter, melted (I used Land O Lakes® Salted Butter in Half Sticks)
- 2 tablespoons freshly-squeezed lemon juice
- 2 sprigs fresh thyme leaves
- 40 whole cloves garlic
- Kosher salt and freshly-cracked black pepper
- Optional toppings: finely-chopped fresh parsley, freshly-grated Parmesan cheese, crushed red pepper flakes, lemon slices
Instructions
- *To brine your chicken breasts, simply fill a large bowl with 1 quart of warm water and 1/4 cup kosher salt. Stir to combine until most of the salt is absorbed. Add the chicken breasts and let them sit in the mixture to brine for 15 minutes. Alternatively, you can cover the bowl and refrigerate for up to 6 hours. Remove the chicken breasts from the brine, rinse them with cold water, then pat them dry with paper towels. (Again, if your chicken breasts are sold pre-brined in a sodium solution, skip this step.)
- Preheat oven to 450°F (230°C).
- Place the chicken breasts in a single layer in a large baking dish.
- In a separate large bowl, whisk together the white wine, melted butter, lemon juice, and thyme leaves until thoroughly combined. Transfer 1 tablespoon of this mixture to a separate small bowl and set aside. Add the garlic cloves to the large bowl with the remaining butter mixture, and toss until they are evenly coated.
- Pour the garlic and butter mixture into the baking dish with the chicken, spreading the garlic around so that it is nestled around (and not directly on top of) the chicken breasts. Pour the reserved tablespoon of butter mixture evenly over the chicken breasts and brush to coat them evenly. Season the chicken generously with kosher salt and freshly-cracked black pepper.
- Bake for 15-18* minutes, or until the chicken is cooked through and no longer pink in the center. If you use a cooking thermometer to measure the internal temperature at the thickest part of the breast, it should read between 160-170°F (71-77°C). (The FDA recommends 165°F / 74°C.) *For a slightly more browned and crispier top, you can turn the broiler on high for the final 3-5 minutes, carefully broiling the chicken until it reaches the desired doneness and golden-brown color. Keep a very close eye on both the chicken and the garlic cloves during this step to prevent burning.
- Once the chicken is fully cooked, remove the pan from the oven and loosely cover the baking dish with aluminum foil. Allow the chicken to rest for at least 5-10 minutes. This is crucial for retaining juices and tenderness.
- Serve immediately, spooning the extra lemon-butter sauce over the chicken and sprinkling with your desired garnishes.