

Discover the secret to perfectly balanced, irresistible homemade kettle corn with this super-easy stovetop recipe, featuring just 4 simple ingredients.

For years, I was known among my friends as the go-to person for a savory, butter-free nutritional yeast popcorn. It was my signature snack, brought to countless gatherings and movie nights. However, this year marks a new culinary chapter for me: I’ve officially entered my homemade kettle corn era. And honestly, I can’t believe it took me this long! There’s something truly magical about the perfect blend of sweet and salty that kettle corn offers, making it an instant crowd-plepleaser and a personal favorite.
It’s almost embarrassing to admit that I had absolutely no idea how remarkably simple it is to whip up a batch of delicious kettle corn from scratch! This delightful snack, known for its iconic sweet and salty crunch, can be ready in a mere 10 minutes. All you need is a reliable saucepan, a handful of basic pantry staples—popcorn kernels, sugar, salt, and oil—and a little enthusiasm. The simplicity is truly astonishing, transforming ordinary popcorn into an extraordinary treat right in your own kitchen.
Over the past few months, as I’ve refined my technique and experimented with various ingredients, I’ve discovered some subtle yet significant preferences that elevate homemade kettle corn from good to truly exceptional. The type of oil and sugar you choose, along with the precise ratios of salt and sugar, play crucial roles in achieving that perfect flavor balance. Personally, I’m a big fan of refined coconut oil for its neutral flavor profile and its high smoke point, which makes it incredibly versatile for stovetop popcorn. While unrefined coconut oil works too, it imparts a slight coconut flavor that not everyone might prefer. For sweetness, I lean towards turbinado sugar, often called “raw” sugar. Its natural molasses notes create a heavenly pairing with the sea salt, resulting in a depth of flavor that traditional white sugar simply can’t match. In the detailed recipe below, I’ve shared my favorite ingredient ratios and a collection of simple yet effective tips I’ve gathered along the way to ensure your kettle corn is always a resounding success.
Whether you’re aiming to impress your guests with a fun new party snack or simply craving a deliciously sweet and salty treat for a cozy night in, homemade kettle corn is the answer. It’s an engaging and rewarding cooking project that yields incredibly satisfying results. So, grab your saucepan, gather your ingredients, and let’s embark on this delightful journey of making the best homemade kettle corn together. Get ready to experience the irresistible crunch and unforgettable flavor that will undoubtedly make this a new favorite in your snack repertoire!
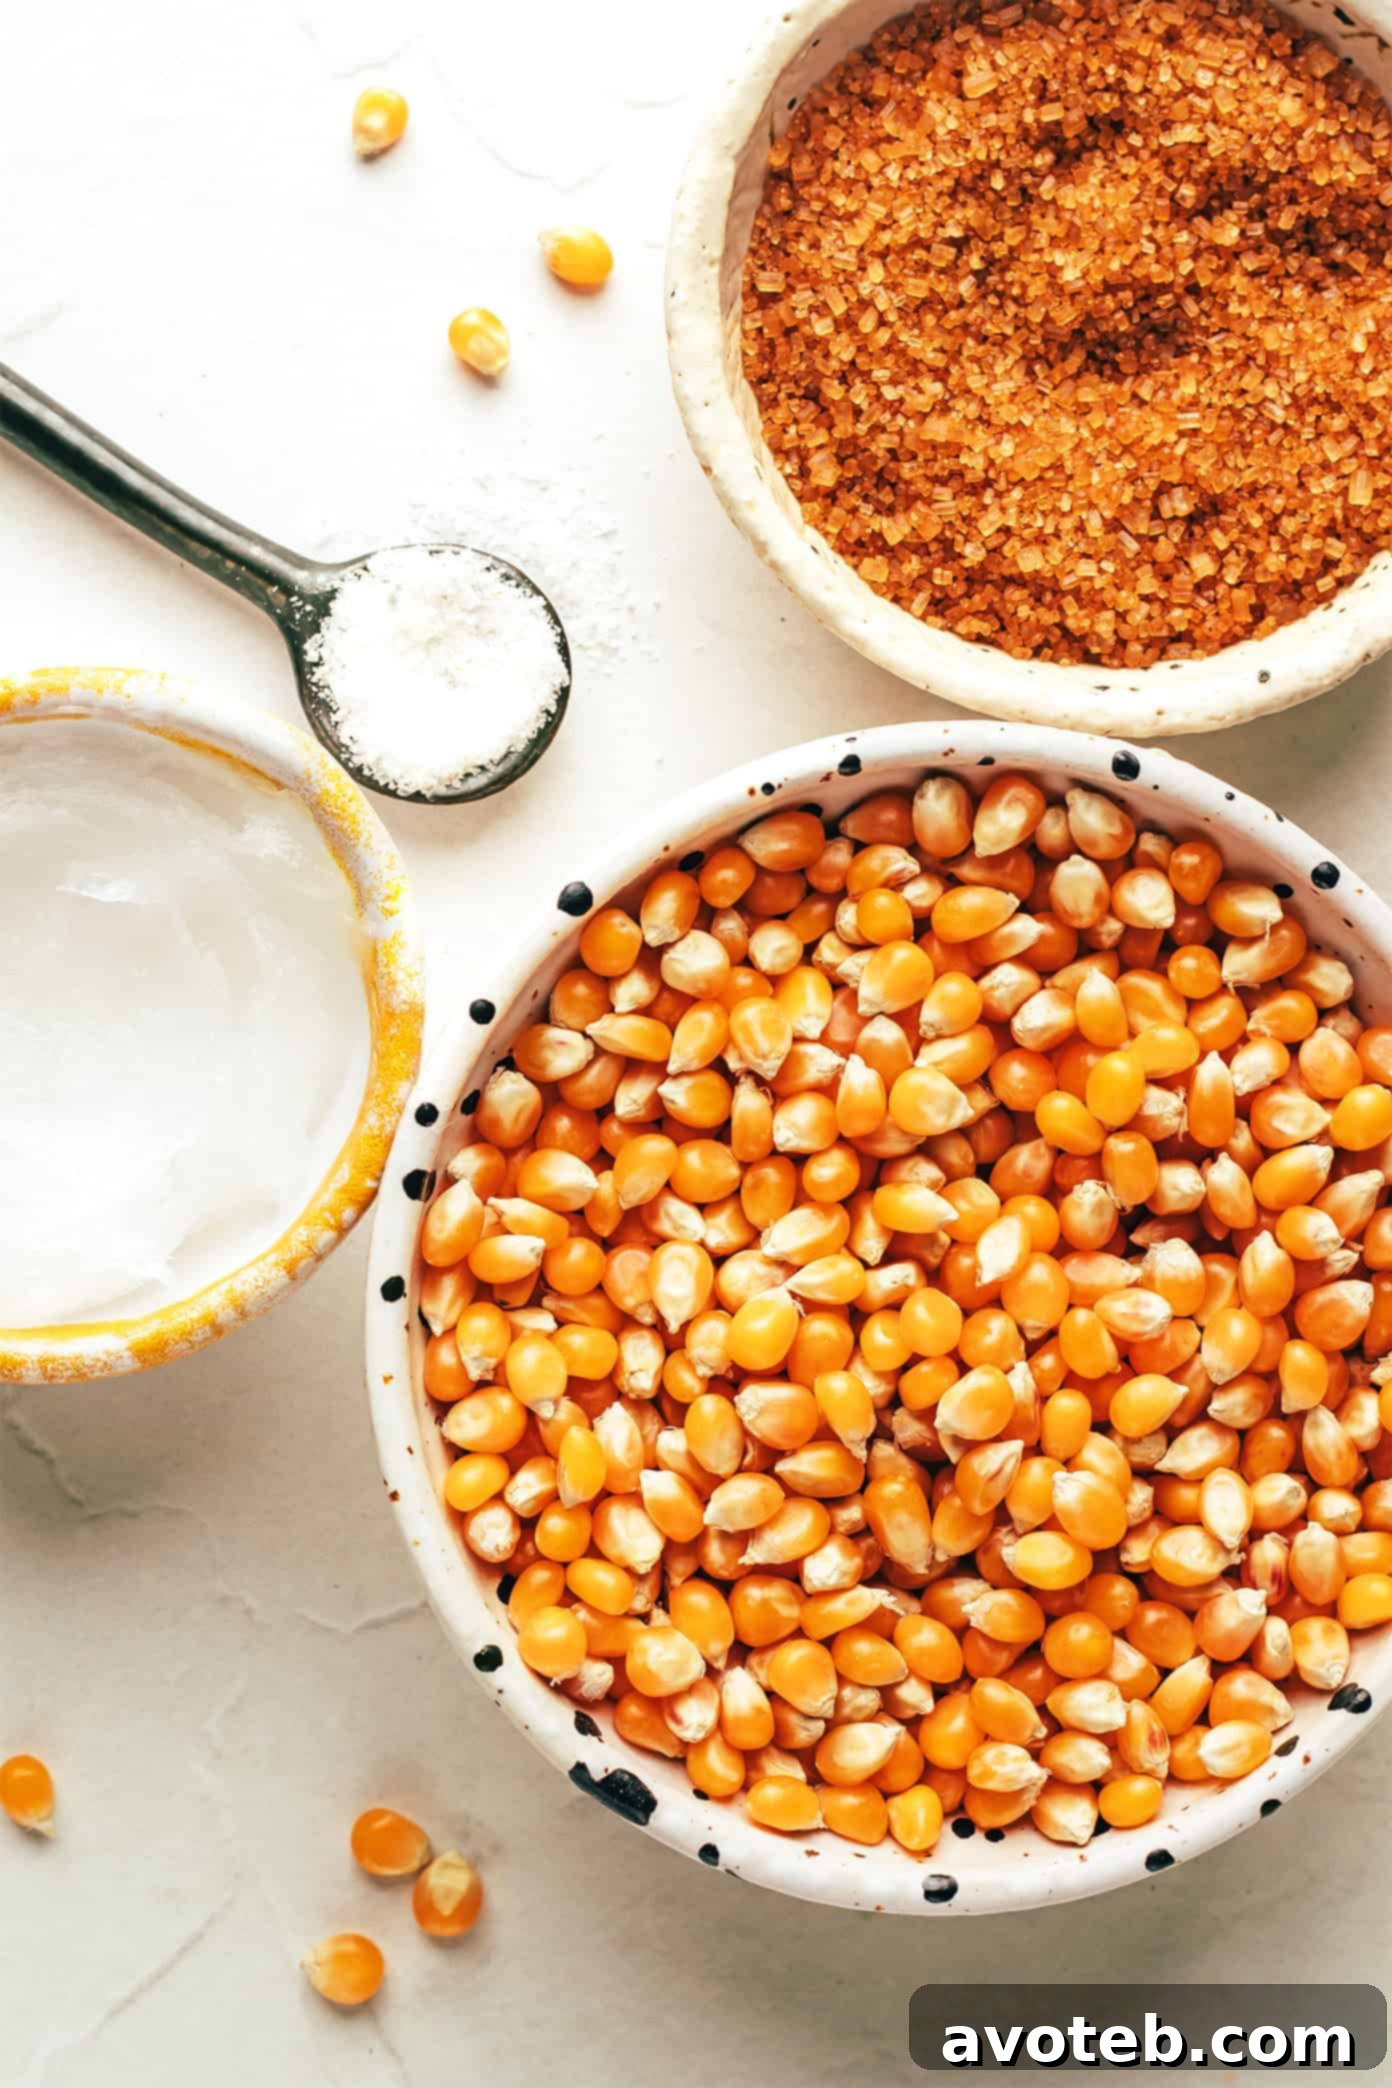
Essential Ingredients for Perfect Homemade Kettle Corn
Crafting the perfect batch of stovetop kettle corn requires just four fundamental ingredients. While simple, the quality and type of each ingredient can significantly impact the final taste and texture. Here’s a closer look at what you’ll need and why these choices matter:
- Popcorn Kernels: The foundation of any great popcorn, kernels are perhaps the most critical ingredient. When making stovetop popcorn, the paramount factor is freshness. Stale kernels will result in a poor pop rate and less fluffy popcorn. Opt for a high-quality brand you trust, ensuring the kernels are well within their expiration date and have been stored in an airtight container to maintain their freshness. Fresh kernels expand beautifully, yielding light, airy, and perfectly spherical popcorn. This particular brand is a personal favorite due to its consistent performance and great taste.
- Refined Coconut Oil: My preferred choice for making stovetop popcorn is refined coconut oil. It stands out because of its remarkably neutral flavor, which means it won’t impart any unwanted coconut taste to your kettle corn, allowing the sweet and salty flavors to shine through. Furthermore, refined coconut oil boasts a very high smoke point, making it incredibly forgiving and suitable for high-heat cooking without burning easily. If you enjoy a subtle hint of coconut, unrefined coconut oil can also be used, though it will slightly alter the flavor profile. Alternatively, other high-heat oils like avocado, grapeseed, or safflower oil can be excellent substitutes, providing similar high-temperature stability.
- Turbinado Sugar: After extensive testing with various types of sugar, I’ve found that turbinado sugar, often labeled as “raw sugar,” delivers the absolute best flavor for kettle corn. Unlike highly processed white sugar, turbinado sugar retains a touch of natural molasses, which adds a wonderful depth and complexity to the sweetness. This subtle molasses note beautifully complements the saltiness, creating that signature irresistible sweet and salty combination that kettle corn is famous for. It’s less refined than traditional white or brown sugars, offering a more nuanced and richer flavor experience.
- Fine Sea Salt: The final crucial ingredient is fine sea salt. A hint of high-quality sea salt is essential to balance and enhance the sweetness of the sugar, creating the iconic sweet and salty contrast that defines kettle corn. Fine sea salt adheres well to the popcorn and sugar coating, ensuring every bite is perfectly seasoned. It brings out the best in the other flavors, elevating this simple snack to gourmet status. Without the right salt, the sweet component can be overwhelming, but with it, the flavors achieve perfect harmony.
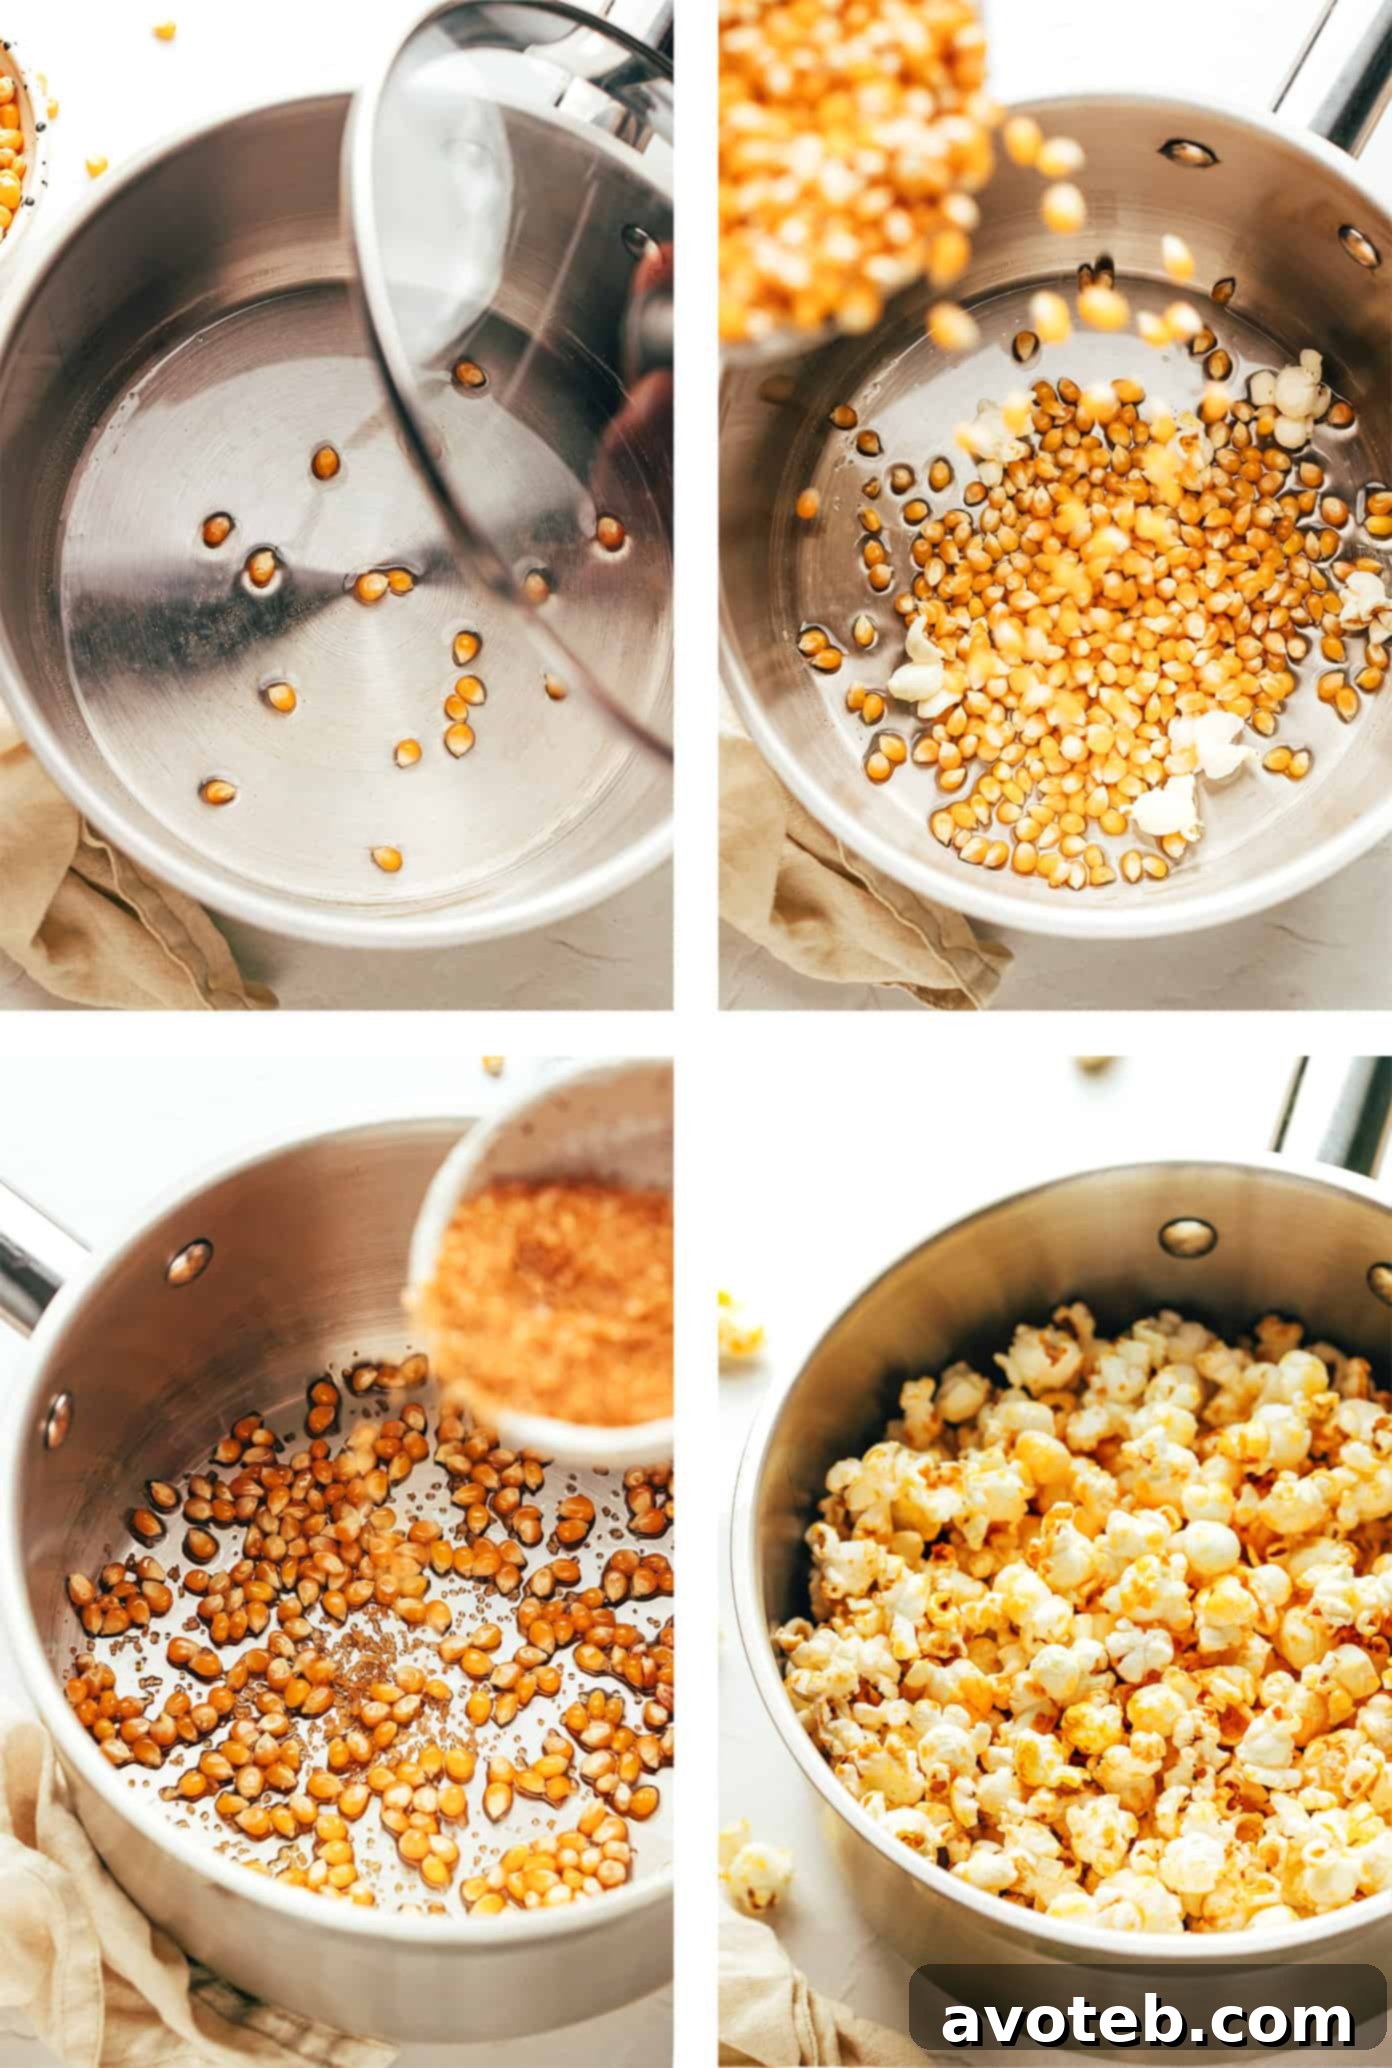
How To Make Homemade Kettle Corn: A Step-by-Step Guide
Creating delicious homemade kettle corn is a straightforward process that yields fantastic results. Below is a detailed overview of each step, designed to guide you through making the perfect sweet and salty snack. Remember to follow the full recipe card instructions for precise measurements and timings.
- Prepare Your Workspace: Before you even start heating the oil, it’s crucial to have your landing zone ready. Line a large sheet pan with parchment paper. This provides a non-stick surface for the hot popcorn to spread out, cool evenly, and prevent clumping. Having this prepared beforehand ensures a smooth transition once the popcorn is ready, avoiding any rushed mishaps.
- Heat the Oil and Test Kernels: Select a large, heavy-bottomed saucepan or a Dutch oven. These types of pots distribute heat more evenly, which is key to preventing burning. Add your refined coconut oil to the pot, along with 2-3 “test” popcorn kernels. Cover the pan with a lid and place it over medium heat. The purpose of the test kernels is to indicate when the oil has reached the optimal temperature for popping. Once these few kernels pop, you’ll know the oil is perfectly heated and ready for the rest of your popcorn. This small step is vital for consistent popping.
- Add Remaining Ingredients: As soon as the test kernels pop, immediately and carefully pour the remaining popcorn kernels and the fine sea salt into the hot oil. Quickly put the lid back on and give the pan a gentle but thorough shake. This helps to evenly coat all the kernels with the hot oil and salt, ensuring consistent seasoning and efficient popping. The goal here is quick action to maintain the oil’s temperature while getting everything coated.
- Pop the Popcorn and Add Sugar: Now, the exciting part! Keep the lid slightly ajar, positioning the opening away from you to allow steam to escape. This prevents the popcorn from becoming soggy. Continue cooking over medium heat, giving the pot a quick and vigorous shake every 5 seconds or so. This constant shaking is critical to prevent popped kernels from burning on the bottom and allows unpopped kernels to fall to the heat source. Listen intently: when the popping *just* starts to slow down—meaning there are noticeable pauses between pops—it’s time to act swiftly. Open the lid, quickly sprinkle in the turbinado sugar, cover the pan again, and give it another good shake to distribute the sugar. Continue shaking until the popping slows to about 1-2 seconds between pops. Remove the pan from the heat immediately to avoid burning the sugar.
- Cool and Separate: Promptly transfer the hot, freshly popped kettle corn onto your prepared parchment-lined sheet pan. Use a wooden spoon or spatula to quickly spread it out into an even layer. While still warm and sticky, gently separate any larger clumps of popcorn to ensure even cooling and prevent them from hardening together. Allowing the kettle corn to cool for 5-10 minutes is crucial; during this time, the sugar coating will crisp up and harden, giving it that delightful crunch. This cooling step also makes it easier to handle and less sticky.
- Serve and Enjoy: Once the kettle corn has cooled sufficiently and the sugar coating has set, it’s ready to be devoured! Break any remaining pieces apart, taste for seasoning, and if you desire an even bolder sweet-salty kick, sprinkle on an extra pinch of fine sea salt. Serve it warm or at room temperature. This homemade kettle corn is perfect for movie nights, parties, or simply as a satisfying snack to enjoy anytime.
How To Store Homemade Kettle Corn for Maximum Freshness
To keep your homemade kettle corn tasting its best, proper storage is key. First and foremost, ensure the kettle corn has cooled completely to room temperature. Storing it while still warm can create condensation, leading to soggy popcorn. Once thoroughly cooled, transfer the kettle corn into an airtight food storage container or a heavy-duty ziplock bag. This prevents air and moisture from compromising its crisp texture. Stored at room temperature, homemade kettle corn can maintain its quality for up to 3 weeks. However, for the absolute best texture and flavor, I find it’s most enjoyable within the first week of preparation. Beyond that, it might lose some of its signature crunch, though it will still be perfectly edible.

Expert Tips for Stovetop Kettle Corn Success
Making kettle corn from scratch is relatively easy, but a few expert tips can make all the difference, ensuring you achieve that perfect, sweet-and-salty crunch every time. Here’s what I’ve learned to guarantee success:
- Always Use Fresh Popcorn Kernels: As emphasized earlier, the freshness of your popcorn kernels is paramount. Stale kernels lead to smaller, denser pops and a higher percentage of unpopped kernels (old maids). Fresh kernels, on the other hand, yield large, fluffy, and perfectly spherical popcorn, which is ideal for a light and airy kettle corn. Always check the expiration date and store kernels in an airtight container away from humidity to preserve their pop-ability.
- Shake, Shake, Shake!: This is arguably the most crucial tip for stovetop popcorn. Throughout the entire cooking process, make sure you are regularly and vigorously shaking the pot. This continuous motion serves two vital purposes: it prevents the popped kernels from settling at the bottom and burning, and it ensures that the unpopped kernels are constantly exposed to the direct heat source, encouraging them to pop efficiently. Hold the pan handle securely with one hand and the lid firmly with the other, shaking back and forth or in a circular motion. This simple technique is the key to minimizing burnt popcorn and maximizing your yield.
- Strategic Sugar Addition: One common pitfall when making kettle corn is adding the sugar too early. If sugar is introduced at the same time as the kernels, it tends to burn before the popcorn has fully popped, resulting in a bitter taste and potentially burnt sugar stuck to the bottom of your pot. The sweet spot for adding sugar is when the popping *just* begins to slow down. This timing allows the sugar to melt and caramelize onto the freshly popped corn without scorching, achieving that delicate, crispy coating we all love. Keep a close eye and ear on your pot, and be ready to add the sugar quickly when the moment is right.
- Maintain Consistent Medium Heat: It might be tempting to crank up the heat to speed up the popping process, but with kettle corn, patience and controlled heat are your best friends. High heat significantly increases the risk of burning the sugar, which can ruin an entire batch. Maintain a consistent medium to medium-high heat on your stovetop. This temperature allows the kernels to pop effectively while giving the sugar enough time to melt and coat the popcorn without burning. If you’re unsure, err on the side of slightly lower heat for your first batch, and adjust as needed. You’ll know after one batch if the heat was just right or too intense.
- Better Under-cooked Than Over-cooked: Knowing when to remove the pan from the heat is critical. The ideal moment is when the popping slows to an interval of approximately 1 to 2 seconds between pops. At this point, most kernels have popped, and the sugar has had a chance to coat them. Waiting too long will inevitably lead to burnt sugar and kernels, imparting a bitter, unpleasant taste. If you’re ever in doubt, it’s always better to remove the popcorn slightly earlier than risk overcooking it. A few unpopped kernels are a small price to pay for perfectly non-burnt, sweet and salty kettle corn.
- Allow Adequate Cooling Time: This tip requires a little restraint, but it’s essential for the best texture. Once your kettle corn is out of the pot and spread on the sheet pan, resist the urge to dive in immediately. Allowing the kettle corn to cool for at least a few minutes—preferably 5 to 10—gives the sugar coating time to cool, harden, and crisp up. This results in that satisfying, non-sticky crunch that defines excellent kettle corn. Skipping this step will leave you with soft, sticky popcorn that’s messy to eat.
- Consider a Transparent Lid: If your pot has a transparent lid, use it! Being able to see the popcorn popping and the sugar melting without lifting the lid can help you perfectly time your steps and observe the process, making it easier to follow the “shake” and “sugar addition” tips.

Delicious Kettle Corn Variations and Flavor Boosts
While classic sweet and salty kettle corn is a triumph in itself, this recipe also provides a fantastic canvas for creative flavor experimentation. Once your kettle corn has popped and is cooling on the baking sheet, while it’s still warm and slightly sticky, is the perfect time to introduce additional ingredients. This ensures they adhere well and infuse the popcorn with extra zest. Here are a few exciting twists you can try:
- Add Spices for an Aromatic Kick: Elevate your kettle corn with a light dusting of your favorite spices. The warmth of cinnamon pairs beautifully with the sweet and salty notes, offering a cozy and inviting flavor. For a more adventurous twist, try everything bagel seasoning for an unexpected savory crunch, rosemary powder for an earthy, aromatic profile, or Tajin for a vibrant, tangy, and subtly spicy kick. Just a small sprinkle goes a long way in transforming the flavor.
- Savory Cheese or Nutritional Yeast Infusion: For those who love a cheesy dimension, sprinkle the warm popcorn with finely grated Parmesan cheese. The heat will slightly melt the cheese, helping it cling to the kernels. For a dairy-free, umami-rich option, nutritional yeast (often called “nooch”) is an excellent choice. It provides a savory, cheesy flavor that complements the sweet and salty balance wonderfully, taking your kettle corn in a surprisingly delicious direction.
- Indulgent Butter Drizzle: If you’re looking to add a touch of richness, a drizzle of melted butter is always a welcome addition. For an even deeper, nuttier flavor, consider browning the butter first. Simply melt butter in a small saucepan over medium heat, stirring occasionally, until it turns a golden-brown color and smells nutty. Then, drizzle this glorious brown butter over your warm kettle corn for an extra layer of decadence.
- Sweet Chocolate Temptation: Transform your kettle corn into a dessert-worthy treat by adding chocolate! Once the kettle corn has cooled slightly but is still just warm, drizzle it with melted dark, milk, or white chocolate. You can melt chocolate chips in a microwave-safe bowl in 30-second intervals, stirring until smooth. For a marbled effect, drizzle two types of chocolate. Allow the chocolate to set completely before serving, creating delightful clusters of chocolate-coated kettle corn. This is a fantastic option for parties or as a special sweet indulgence.

Print

Kettle Corn
Author: Ali
Prep Time: 5 mins
Cook Time: 5 mins
Total Time: 10 mins
Yield: 4 to 5 cups
Description
This homemade kettle corn recipe is super-easy to make on the stovetop with 4 simple ingredients, delivering a perfect sweet and salty snack in minutes.
Ingredients
Scale
- 2 tablespoons refined coconut oil
- 1/4 cup popcorn kernels
- 2 tablespoons turbinado sugar
- 1/2 teaspoon fine sea salt
Instructions
- Prep a sheet pan. Line a large sheet pan with parchment paper and set it aside. This prepares your cooling station for the hot kettle corn.
- Heat the oil. In a large, heavy-bottomed pot (such as a Dutch oven), add the coconut oil and 2–3 popcorn kernels. Cover with a lid and place over medium heat. When the test kernels pop, the oil has reached the perfect temperature for popping.
- Add popcorn. Quickly pour in the remaining popcorn kernels and salt. Cover the pan again and give it a small, vigorous shake to ensure all kernels are evenly coated with oil and salt.
- Pop the corn. Cover the pot with the lid slightly ajar, positioning the opening away from you to allow hot steam to escape. Continue cooking, giving the pot a quick and vigorous shake every 5 seconds to prevent burning and promote even popping. Listen closely for the popping sounds. When the popping *just* starts to slow down significantly (longer pauses between pops), quickly open the lid, add in the turbinado sugar, cover, and give the popcorn a final strong shake to combine. Remove from heat when the popping slows to approximately 1 to 2 seconds between pops to avoid burning the sugar.
- Finish the kettle corn. Immediately pour the hot kettle corn onto the prepared parchment-lined sheet pan, spreading it into an even layer. Use a spatula to gently separate any large clumps while the sugar coating is still warm and sticky. Allow the kettle corn to cool for 5–10 minutes; during this time, the sugar will crisp up and harden, creating that delightful crunch.
- Serve. Once completely cooled, break the kettle corn into pieces. Taste for seasoning and sprinkle on an extra pinch of salt if desired to enhance the sweet and salty balance. Enjoy your delicious homemade kettle corn warm or at room temperature!