
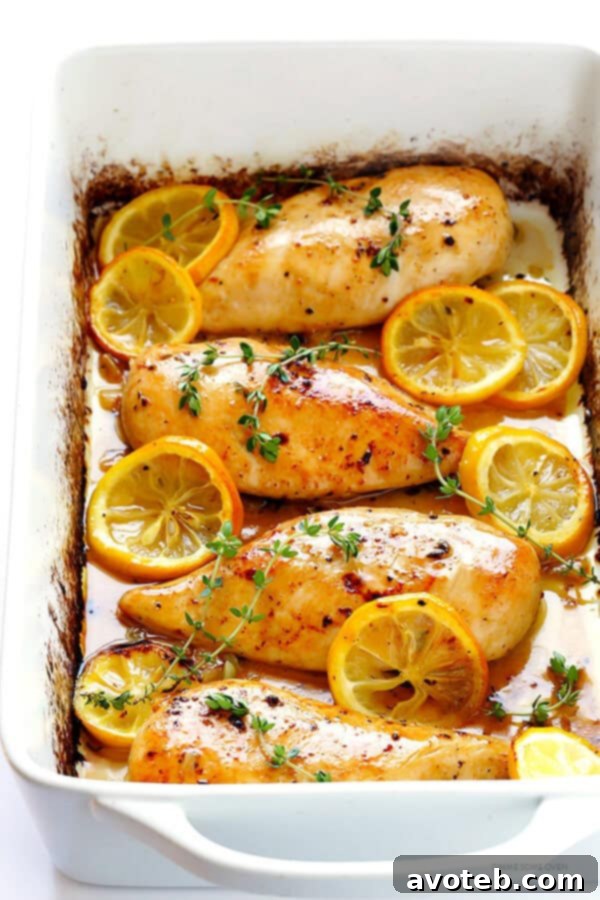
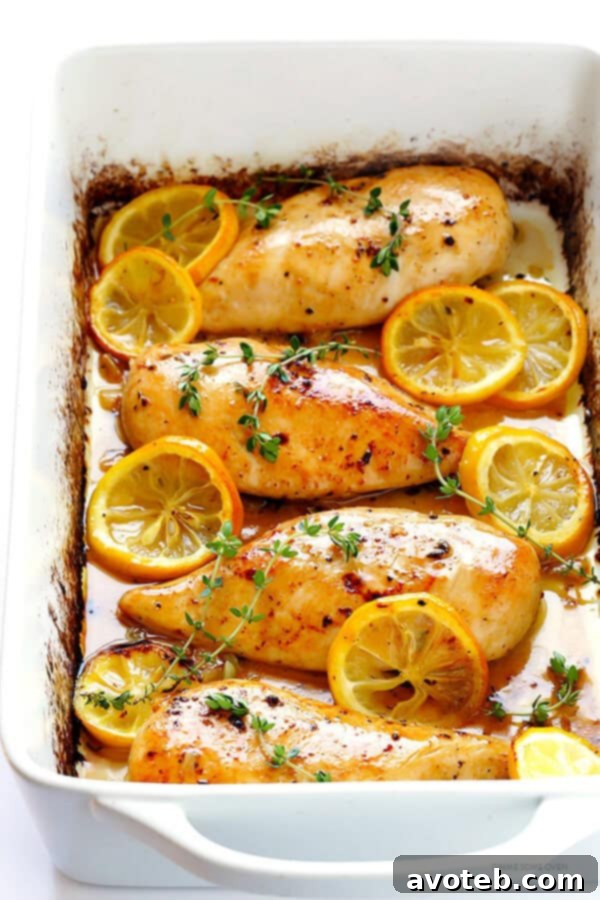
The Ultimate Guide to Perfectly Juicy Baked Lemon Chicken Breasts
There’s something universally appealing about a perfectly cooked chicken breast. It’s lean, versatile, and a staple in countless kitchens. Yet, for many home cooks, the quest for a truly juicy and tender baked chicken breast often ends in disappointment, yielding dry, rubbery results. But what if we told you there’s a simple, foolproof method to achieve consistently succulent chicken, elevated with the bright, vibrant flavors of fresh lemon?
Inspired by countless requests from our incredible community and building upon the overwhelming success of our 5-step method for perfectly baked chicken breasts, we’re thrilled to introduce a zesty, aromatic twist: Baked Lemon Chicken Breasts. This recipe isn’t just about cooking chicken; it’s about transforming a simple ingredient into a show-stopping meal that’s both effortless to prepare and bursting with an unforgettable fresh lemony flavor. Prepare to fall in love with chicken all over again!
This dish is a true game-changer for busy weeknights and special occasions alike. It requires only a handful of pantry staples, minimal prep time, and delivers maximum flavor. Say goodbye to dry, bland chicken, and hello to a culinary triumph that will have everyone asking for seconds. Let’s dive into the secrets of creating this irresistible baked lemon chicken.
Unlock the Secret to Tender Chicken: The B.R.R.R.R. Method
The foundation of our incredibly juicy baked lemon chicken lies in a revolutionary 5-step method designed to combat the common pitfalls of cooking chicken breasts. If you’ve ever choked down a dry, flavorless piece of chicken, you know the struggle is real. But fear not, because the “B.R.R.R.R.” method is here to change your chicken-cooking life forever:
- Brine: The essential first step for moisture and tenderness.
- Brush: Coating for flavor and beautiful browning.
- Rub: Infusing the chicken with aromatic seasonings.
- Roast: High-heat cooking for quick, even results.
- Rest: Allowing juices to redistribute for ultimate succulence.
Let’s explore each step in detail to understand the science behind this magic method and how it guarantees perfect results every single time:
1. Brine: The Ultimate Moisture Keeper
Brining is the unsung hero of tender chicken. By soaking chicken breasts in a simple solution of warm salt water for at least 15 minutes, you’re doing more than just adding flavor. The salt solution helps to break down the muscle fibers in the chicken, allowing them to absorb moisture and become more tender. This process, known as osmosis, ensures that the chicken retains its juiciness during cooking, preventing it from drying out. Even a short brine makes a significant difference, resulting in noticeably more succulent chicken.
2. Brush: Flavor and Golden Perfection
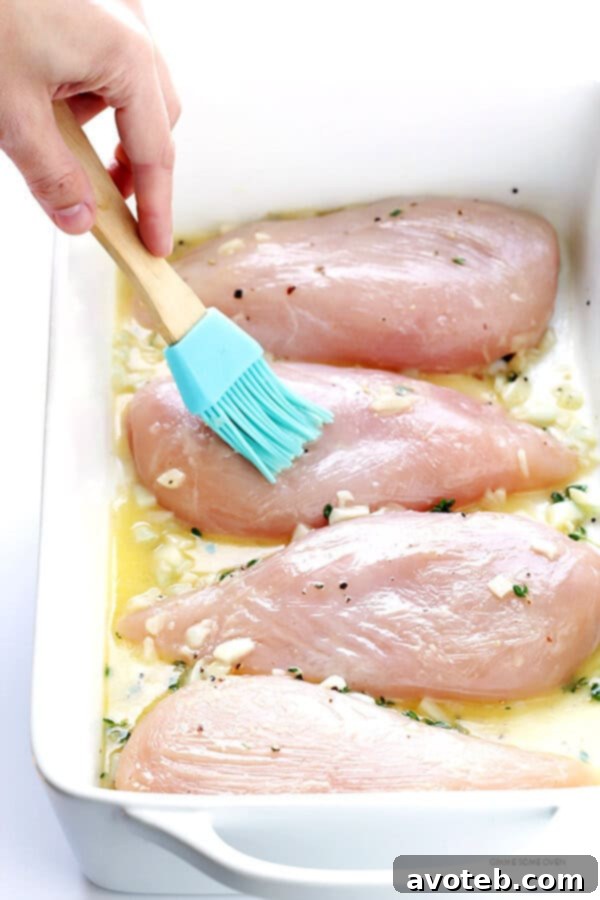
Once brined, the chicken is ready to be brushed with our luscious lemon garlic butter sauce. This step is crucial for two reasons: flavor and texture. The melted butter acts as a carrier for the vibrant lemon juice, aromatic minced garlic, and fresh thyme, ensuring every inch of the chicken breast is infused with deliciousness. Furthermore, the butter helps the chicken achieve a beautiful golden-brown crust as it roasts, adding an appetizing visual appeal and a slight crispness to the exterior.
3. Rub: A Symphony of Seasonings
After brushing, a generous rub of Kosher salt and freshly cracked black pepper further enhances the chicken’s natural flavors. While the lemon garlic butter forms the primary flavor profile, this simple seasoning ensures a well-rounded taste experience. For this specific recipe, the rub integrates perfectly with the lemony butter, creating a harmonious blend that’s both bright and savory.
4. Roast: High Heat, Quick Cook
The secret to perfectly cooked chicken breasts lies in high-heat roasting. By preheating your oven to 450°F (230°C), you ensure that the chicken cooks quickly and evenly. This rapid cooking prevents the chicken from languishing in the oven and drying out. Our specific method involves baking in stages with regular basting, which locks in moisture and builds layers of flavor with each application of the lemon butter sauce. This high-temperature, attentive approach yields a tender interior and a beautifully browned exterior.
5. Rest: The Crucial Final Step
Often overlooked, the resting phase is absolutely critical for juicy chicken. Once cooked, removing the chicken from the oven and loosely covering it with foil allows the juices within the meat to redistribute evenly. If you slice into chicken immediately after cooking, those precious juices will simply run out, leaving you with dry meat. A rest period of 5-10 minutes ensures that the chicken reabsorbs its moisture, resulting in a supremely tender and flavorful bite every time. This simple step is the final touch to guarantee a perfect baked lemon chicken experience.
Crafting the Irresistible Lemon Garlic Butter Sauce
The heart of this baked lemon chicken recipe is its simple yet profoundly flavorful lemon garlic butter sauce. This sauce not only infuses the chicken with incredible taste but also contributes significantly to its tenderness and golden finish. Each ingredient plays a vital role in creating this vibrant marinade and basting liquid:
- Fresh Lemons: The star of the show. We use freshly-squeezed lemon juice for its bright, zesty acidity, which tenderizes the chicken and cuts through the richness of the butter. A little lemon zest could also be added for an extra aromatic punch.
- Minced Garlic: Garlic and lemon are a match made in culinary heaven. Minced fresh garlic provides a pungent, aromatic depth that beautifully complements the citrusy notes, creating a classic flavor profile.
- Melted Butter: Butter brings richness, a creamy texture, and aids in browning the chicken to perfection. It also acts as an excellent vehicle for distributing the lemon and garlic flavors evenly over the chicken. For a dairy-free option, olive oil can be substituted, though the flavor profile will be slightly different.
- Fresh Thyme Leaves: Fresh thyme adds an earthy, slightly peppery, and subtly floral note that pairs wonderfully with both lemon and chicken. Its delicate aroma elevates the overall sophistication of the dish. Other fresh herbs like rosemary or oregano could also be explored for variations.
- Kosher Salt and Freshly-Cracked Black Pepper: These fundamental seasonings enhance all the other flavors, bringing them into perfect balance. Using Kosher salt ensures even seasoning and better flavor absorption during brining.
For those who enjoy cooking with wine, a splash of dry white wine (like Sauvignon Blanc or Pinot Grigio) can be whisked into the sauce. The acidity of the wine adds another layer of complexity and helps to further tenderize the chicken, creating an even more gourmet experience.
Preparation & Baking: Step-by-Step Perfection
Achieving perfectly baked lemon chicken is straightforward when you follow these steps:
1. Prepare Your Chicken
Start with four boneless, skinless chicken breasts. For even cooking, it’s essential to pound them to an even thickness, about 3/4 to 1 inch thick. This prevents thinner parts from drying out while thicker parts finish cooking. Then, initiate the brine: in a large bowl, dissolve 1/4 cup Kosher salt in 1 quart of warm water. Submerge the chicken breasts and let them brine for 15 minutes at room temperature, or cover and refrigerate for up to 6 hours. After brining, rinse the chicken thoroughly under cold water and pat them completely dry with paper towels. This drying step is crucial for achieving a good sear and preventing steaming.
2. Preheat and Prepare the Sauce
Preheat your oven to a robust 450°F (230°C). While the oven heats, whisk together the minced garlic, melted butter, fresh lemon juice, and fresh thyme leaves in a medium bowl. This aromatic sauce will be your flavor powerhouse.
3. Coat and Season
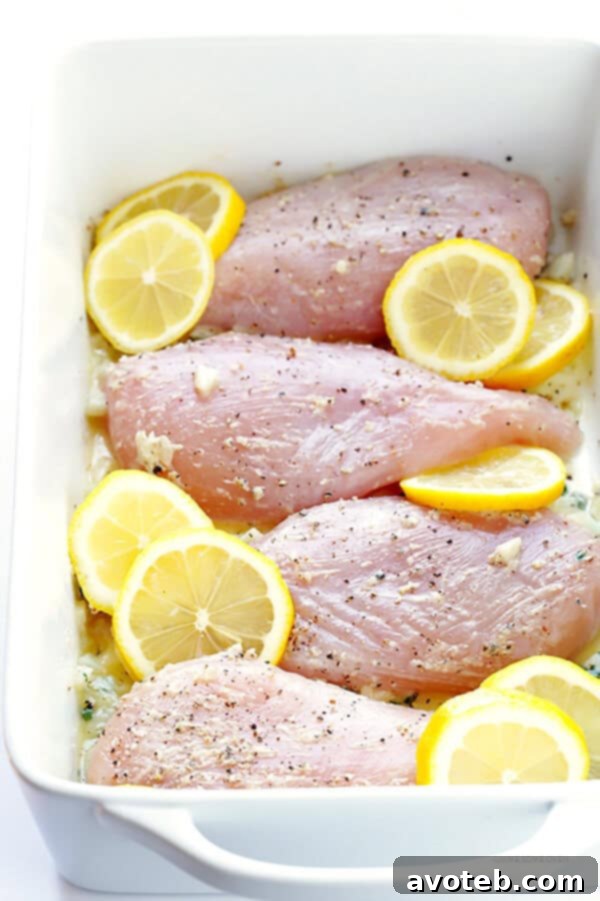
Pour about half of the lemon garlic butter mixture into a large baking dish. Arrange the brined and dried chicken breasts in an even layer on top of the sauce. Using a pastry brush, liberally coat both sides of each chicken breast with the butter mixture. Finish by sprinkling each piece generously with Kosher salt and freshly cracked black pepper. For an aesthetic touch, you can add a few extra lemon slices around the chicken in the baking dish, but avoid placing them directly on the chicken as they can become bitter during prolonged cooking.
4. The Roasting and Basting Process
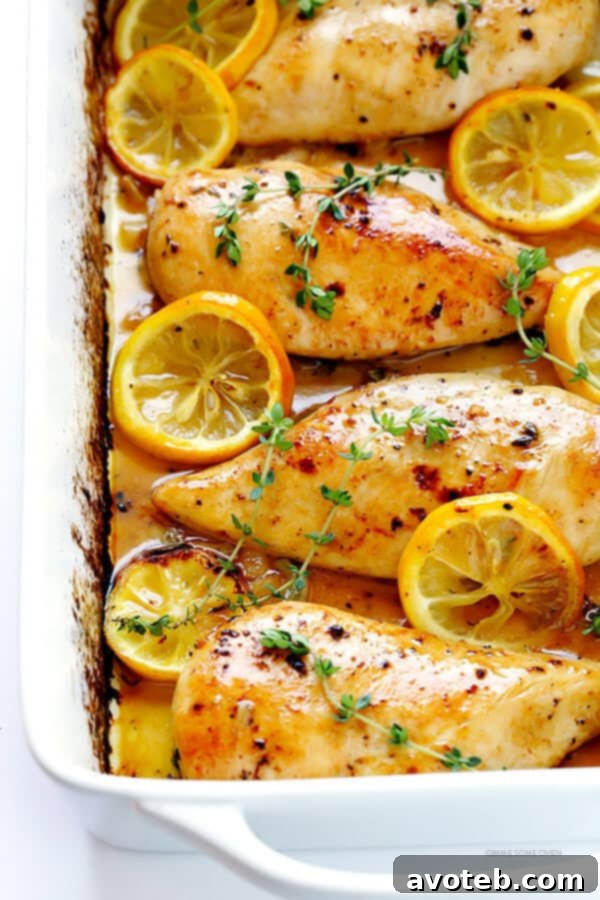
Bake the chicken for 5 minutes. Then, carefully remove the pan from the oven and generously brush the chicken again with the remaining lemon butter sauce. Return to the oven and bake for another 5 minutes. Repeat this basting process once more, then bake for a final 5-8 minutes. The total baking time will be approximately 15-18 minutes, depending on the thickness of your chicken breasts.
To ensure perfect doneness and food safety, always use a cooking thermometer. Insert it into the thickest part of the breast; the internal temperature should register between 160-170°F (71-77°C). The FDA recommends 170°F for chicken, but many chefs remove it at 160-165°F as it continues to cook a few degrees while resting (carryover cooking).
5. Achieving a Golden Finish (Optional Broiling)
If you desire an extra golden-brown and slightly crispy top, turn your broiler on high for the final 3-5 minutes of cooking. Keep a very close eye on the chicken during this stage, as broilers can quickly burn food. Remove it once it reaches your desired level of browning.
6. The Essential Rest
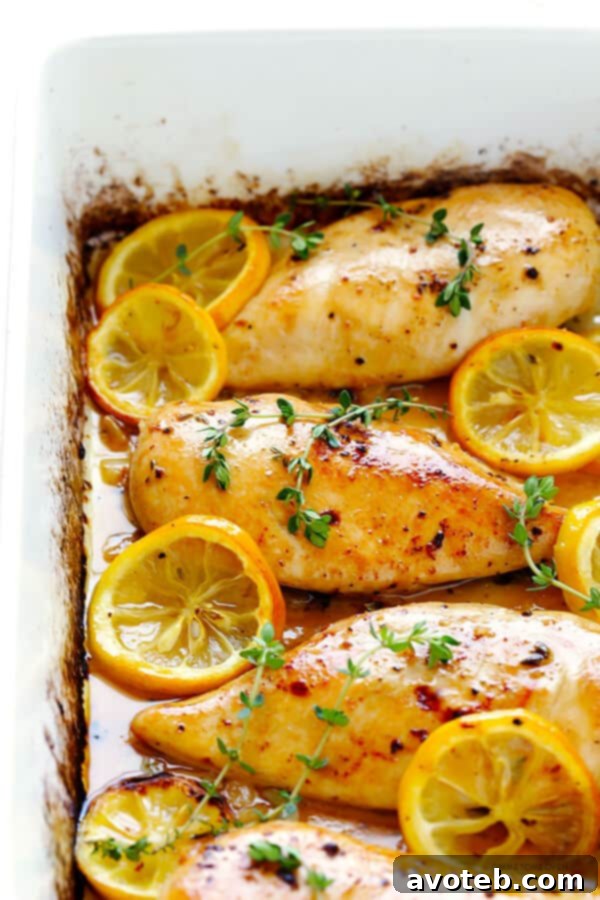
Once cooked, remove the pan from the oven and give the chicken one final brush with any leftover butter mixture in the pan. Loosely cover the baking dish with aluminum foil and let the chicken rest for at least 5-10 minutes. This resting period is crucial for the juices to redistribute throughout the meat, guaranteeing maximum tenderness and flavor. Serve immediately after resting, garnished with fresh lemon slices and extra thyme sprigs if desired.
Serving Suggestions and Meal Prep Ideas
This baked lemon chicken is incredibly versatile, making it a perfect centerpiece for a wide range of meals. Whether you serve it fresh or repurpose leftovers, its bright flavor will shine.
Freshly Served Dinner Ideas:
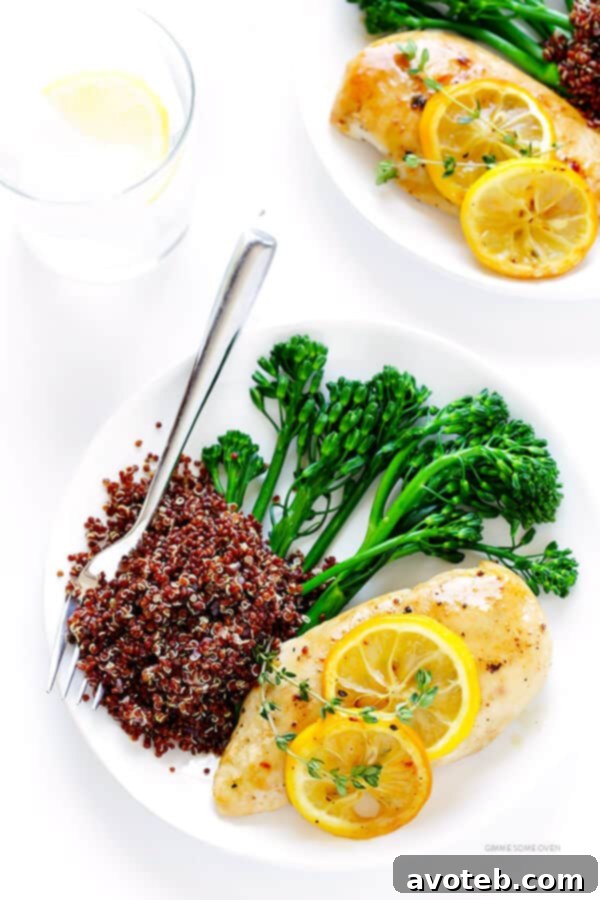
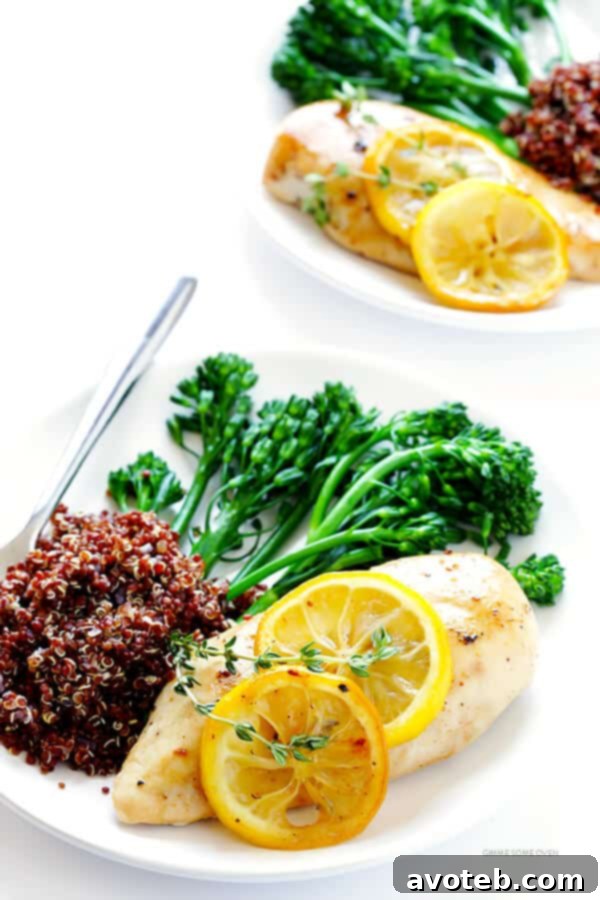
- Classic Pairing: Serve alongside roasted asparagus, steamed green beans, or a medley of colorful roasted vegetables like broccoli and bell peppers.
- Starchy Sides: Complement its richness with creamy mashed potatoes, fluffy rice pilaf, quinoa, or a light couscous salad.
- Hearty Salads: Slice the warm chicken and add it to a vibrant green salad with a light vinaigrette, cherry tomatoes, cucumbers, and a sprinkle of feta cheese.
- Pasta Perfection: Toss sliced or shredded chicken with a light lemon-garlic pasta, a touch of olive oil, fresh parsley, and a dusting of Parmesan cheese for a delightful meal.
Creative Leftover & Meal Prep Solutions:
One of the best things about this recipe is how wonderfully it lends itself to meal prep. We highly recommend making extra!
- Quick Lunches: Dice or shred the cold chicken and use it in sandwiches, wraps, or pita pockets with fresh greens and a smear of hummus or mayo.
- Power Bowls: Add shredded lemon chicken to grain bowls with your favorite cooked grains (farro, brown rice), roasted vegetables, and a healthy dressing.
- Savory Tacos/Quesadillas: The bright flavor works surprisingly well in chicken tacos or quesadillas.
- Freezing for Future Meals: Cooked lemon chicken freezes beautifully for up to 3 months. Once cooled, dice or shred it and store it in airtight containers or freezer bags. Thaw overnight in the refrigerator and reheat gently. It’s perfect for quick additions to soups, stews, or stir-fries when you’re short on time.
Baked Lemon Chicken Recipe

Baked Lemon Chicken
- Prep Time: 20 minutes
- Cook Time: 15 minutes
- Total Time: 35 minutes
- Yield: 4 servings
Description
This baked lemon chicken recipe is perfectly juicy and tender, easy to make, and full of the best fresh lemony flavor, thanks to our simple 5-step method.
Ingredients
- 4 boneless skinless chicken breasts, pounded to even thickness and brined in saltwater (*see easy instructions below)
- 4 cloves garlic, peeled and minced
- 3 tablespoons melted butter
- 2 tablespoons freshly-squeezed lemon juice
- 1 teaspoon fresh thyme leaves
- 1 teaspoon Kosher salt
- 1/2 teaspoon freshly-cracked black pepper
- optional garnishes: fresh lemon slices, extra fresh thyme sprigs
Instructions
- *To brine your chicken breasts: In a large bowl, combine 1 quart of warm water and 1/4 cup Kosher salt. Stir until most of the salt is absorbed. Add the chicken breasts and let them sit in the mixture for 15 minutes at room temperature, or cover the bowl and refrigerate for up to 6 hours. Remove chicken breasts from the brine, rinse them with cold water, then pat them completely dry with paper towels.
- Heat oven to 450°F (230°C).
- In a medium bowl, whisk together the minced garlic, melted butter, fresh lemon juice, and fresh thyme leaves until combined. Set aside.
- Pour about half of the melted butter mixture into a large baking dish. Place the chicken breasts on top in an even layer. Use a pastry brush to coat the chicken breasts completely on both sides with the butter mixture. Then sprinkle each chicken breast evenly with a generous pinch of Kosher salt and freshly cracked black pepper.
- Optionally, add a few extra lemon slices around the chicken in the baking dish for presentation. (Disclaimer: We don’t recommend eating these or laying them directly on top of the chicken breasts, as they can become a little bitter the longer they cook.)
- Bake for 5 minutes. Remove the pan from the oven and brush the chicken again thoroughly with the remaining butter mixture. Bake again for 5 minutes, remove, and brush once more. Bake for a final 5-8 minutes, or until the chicken is cooked through and no longer pink. (Total baking time will be 15-18 minutes). Use a cooking thermometer to measure the temperature in the thickest part of the breast; it should be between 160-170°F (71-77°C). The FDA recommends 170°F.
- *Optional for extra browning: If you want the chicken to be a little bit browned and crispier on top, you can turn the broiler on high for the final 3-5 minutes and broil the chicken until it is cooked through and extra browned on top. Keep a close eye on the chicken so that it does not overcook and/or burn.
- Once the chicken is cooked, remove the pan from the oven and brush the chicken thoroughly with any remaining butter mixture in the pan. Loosely cover the pan with aluminum foil, and let the chicken rest for at least 5-10 minutes. Serve immediately, garnished with extra lemon slices and thyme sprigs if desired.
- Leftovers can be refrigerated in a sealed container for up to 3 days, or frozen for up to 3 months.
This post contains affiliate links.

Conclusion: Your New Go-To Lemon Chicken
With this comprehensive guide and our proven B.R.R.R.R. method, you’re now equipped to create the most incredibly juicy and flavorful baked lemon chicken breasts you’ve ever tasted. Gone are the days of dry, uninspiring chicken dinners. This recipe promises not only a delicious meal but also a newfound confidence in your chicken-cooking abilities. Whether you’re whipping it up for a quick weeknight dinner, preparing meals for the week ahead, or impressing guests, this lemon-infused masterpiece is guaranteed to be a hit.
So, gather your fresh lemons, aromatic garlic, and a sprig of thyme. It’s time to transform your chicken game and savor every tender, zesty bite of this unforgettable dish. Enjoy the process, and most importantly, enjoy the rave reviews!