
The Ultimate Guide to Baking a Heavenly Homemade Angel Food Cake
There’s a certain magic that surrounds an Angel Food Cake. Long before I truly appreciated the culinary marvel of a dessert that uses zero butter and zero egg yolks, I was utterly captivated by its ethereal lightness. I still vividly recall my mom reaching for the “special pan” – that distinct tube pan – and the collective gasp we’d let out as she carefully inverted the cake fresh from the oven. (Honestly, that delicate inversion still makes me a little anxious!) But then, once it cooled to perfection, we’d generously pile our slices with warm, sweet berries and billows of homemade whipped cream, delighting in eating “like angels.” It was a simple joy, a cherished memory, and a taste that has stayed with me through the years.
To this very day, my adoration for angel food cake remains as strong as ever. However, my journey with this divine dessert has evolved. I’ve since bid a fond farewell to the convenience of the box mix and embraced the profoundly satisfying experience of crafting it entirely from scratch. The transition was less daunting than I imagined, revealing that a homemade angel food cake isn’t just feasible; it’s genuinely rewarding.
Why Homemade Angel Food Cake Triumphs Over Box Mix
While a box mix offers a quick solution, the homemade version elevates the experience entirely. It allows for control over the quality of ingredients, resulting in a cake that is incomparably lighter, more tender, and boasting a delicate, golden crust that simply melts in your mouth. The process, though requiring a baker’s dozen of egg whites, isn’t overly complicated. It’s an exercise in technique, patience, and a little bit of culinary alchemy that transforms simple ingredients into something truly extraordinary. Using sifted cake flour, rather than all-purpose, is a crucial step that contributes to the cake’s signature airy texture. After some careful whisking, gentle folding, and precise baking, you’re rewarded with a towering, cloud-like confection that embodies pure bliss.
This recipe, thoughtfully adapted from the culinary experts at Cooks Illustrated, represents my favorite approach to this simple, classic, and deliciously angelic cake. It’s a recipe designed for everyone to enjoy, turning a seemingly complex dessert into an accessible and delightful baking project.
Print Recipe
Angel Food Cake Recipe
Prep Time: 10 minutes
Cook Time: 50 minutes
Total Time: 60 minutes
Yield: 6-8 servings
Description
You will absolutely adore this delicious and incredibly light Angel Food Cake recipe! It’s surprisingly quick and easy to prepare for such an elegant dessert, making it the perfect sweet treat to celebrate any special occasion, big or small. Its delicate texture and subtle sweetness are sure to impress.
Ingredients
- 1 cup sifted cake flour
- 1 1/2 cups sifted sugar, divided
- 12 large egg whites (about 1 3/4 cups), at room temperature
- 1 tsp. cream of tartar
- 1/4 tsp. salt
- 2 tsp. vanilla extract
- 1 tsp. fresh lemon juice (or orange juice for a different citrus note)
- 1/2 tsp. almond extract
Instructions
- Preheat your oven to 325°F (160°C) with an oven rack positioned in the lower-middle section. This ensures even baking and prevents the top from browning too quickly. Prepare an ungreased large 9-inch tube pan, ideally one with a removable bottom. The ungreased pan is crucial as it allows the cake batter to climb the sides, resulting in a taller, airier cake. If your pan does not have a removable bottom, carefully line it with parchment or waxed paper, leaving an overhang to assist with removal.
- In a small bowl, whisk together the sifted cake flour and 3/4 cup of the granulated sugar until well combined. Set this mixture aside. Place the remaining 3/4 cup of sugar in a separate small bowl; this will be incorporated into the egg whites later.
- Using a stand mixer fitted with a whisk attachment, begin beating the room-temperature egg whites on low speed. Beat just until they are foamy and lightly broken up. Add the cream of tartar and salt, then increase the mixer speed to medium. Continue to beat until the egg whites form very soft, billowy mounds – they should hold their shape but still be very pliable. With the mixer still running at medium speed, gradually add the remaining 3/4 cup sugar, one tablespoon at a time, allowing each addition to dissolve before adding the next. This slow addition helps create a stable meringue. Continue beating until the whites become shiny, smooth, and form soft peaks. When you lift the whisk, the peaks should droop slightly, indicating they are not overly stiff. Finally, gently beat in the vanilla extract, lemon (or orange) juice, and almond extract until they are just incorporated.
- With a large rubber spatula, carefully sift about 3 tablespoons of the reserved flour-sugar mixture over the egg white mixture. Gently fold it in, using an upward motion from the bottom of the bowl and turning the bowl as you go, being careful not to deflate the meringue. Repeat this process, adding the flour-sugar mixture in small batches (approximately 6-8 times), until all of the dry ingredients are fully incorporated and the batter is smooth. The key here is gentle folding to maintain the airy structure of the egg whites.
- Gently scrape the delicate batter into the prepared tube pan. Use your spatula to carefully smooth the top surface, lightly removing any large air bubbles by gently swirling the spatula through the batter. Bake for 50-60 minutes, or until the cake achieves a beautiful golden-brown color and the top springs back lightly when pressed firmly.
- Immediately upon removing the cake from the oven, invert the pan. If your tube pan has small “feet” or prongs around the rim, invert it directly onto them. If not, invert the pan onto the neck of a sturdy glass bottle (like a soda or wine bottle) to allow air circulation. This crucial step prevents the cake from collapsing as it cools. Allow the cake to cool completely in this inverted position for 2-3 hours. Patience is key here for the best texture.
- Once thoroughly cooled, to release the cake, gently run a thin, flexible knife or offset spatula around the outer edge of the pan, being careful not to separate the lovely golden crust from the cake itself. Carefully slide the cake out of the pan. Then, run the knife around the removable bottom to detach it from the cake, or gently peel off any parchment or waxed paper if you used it. Place the cake bottom-side up on a serving platter or cake stand. For serving, use a long, serrated knife and saw gently through the cake to create clean slices, rather than pressing down, which can compress the airy texture. Serve immediately or cover loosely to keep fresh.
Baker’s Notes & Pro Tips
To ensure your Angel Food Cake turns out perfectly light and fluffy every time, keep these expert tips in mind:
- Room Temperature Egg Whites: This is critical! Cold egg whites won’t whip up to their full volume. Separate your eggs while cold (they separate more easily), then let the whites sit on the counter for 30 minutes to an hour before whipping.
- Spotless Equipment: Any trace of grease or yolk in your mixing bowl or on your whisk attachment will prevent the egg whites from whipping properly. Ensure all equipment is meticulously clean and dry.
- Sifting is Key: Don’t skip sifting the cake flour and sugar. This introduces air and eliminates lumps, contributing to the cake’s fine, tender crumb.
- Gentle Folding: When incorporating the flour mixture into the egg whites, use a light hand. Overmixing will deflate the meringue and result in a dense cake.
- Cooling Upside Down: Inverting the cake immediately after baking is non-negotiable. This prevents the delicate structure from compressing and maintains its impressive height and airy texture.
Source: Adapted from Cooks Illustrated.
The History and Charm of Angel Food Cake
Angel Food Cake, with its pristine white crumb and cloud-like texture, has been a beloved American dessert for over a century. Its origins are often traced back to the mid-19th century in the United States, particularly among Pennsylvania Dutch communities. The name itself, “Angel Food,” perfectly encapsulates its delicate, airy quality, suggesting a cake light enough for angels to eat. It gained popularity as a way to utilize egg whites, a byproduct of other baking endeavors that often called for yolks, like custards and ice cream. Its distinctive appearance and unique texture quickly made it a staple for special occasions, holidays, and celebrations where a lighter, elegant dessert was desired.
Unlike traditional butter cakes, Angel Food Cake relies entirely on stiffly beaten egg whites for its leavening and structure. This absence of butter and egg yolks contributes to its low-fat profile and incredibly tender crumb. The careful balance of sugar, flour, and a leavening agent like cream of tartar, combined with precise whipping and folding techniques, is what gives this cake its signature rise and delicate chew. It’s a testament to the power of simple ingredients when handled with care and respect.
Creative Ways to Serve Your Angel Food Cake
While an Angel Food Cake is spectacular on its own, its delicate flavor profile makes it a versatile canvas for countless toppings and accompaniments. Here are some of my all-time favorite ways to enjoy it:
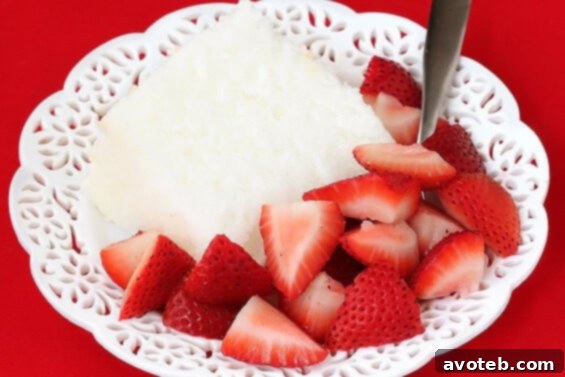
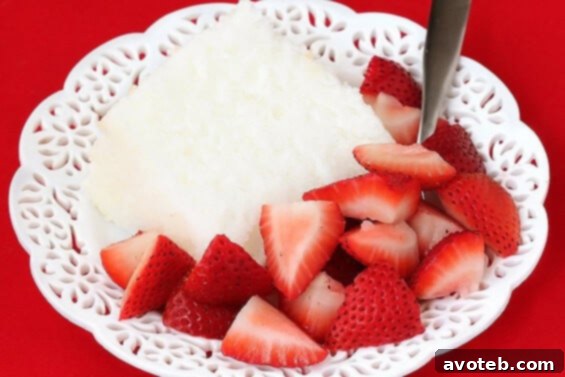
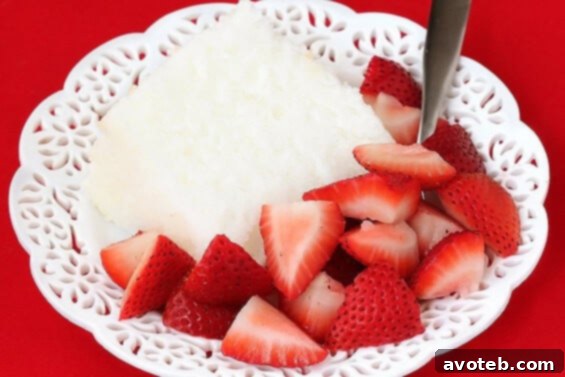
- Fresh Fruit Medley: Any kind of fresh fruit pairs beautifully, but berries (strawberries, blueberries, raspberries) are especially delightful. For an extra touch, gently warm the berries or macerate them slightly with a hint of sugar. For a grown-up twist, consider mixing your berries with a splash of your favorite liquor or wine (like Grand Marnier or a dessert wine) to give them a sophisticated kick.
- Rich Chocolate Indulgence: Drizzle slices generously with Nutella, homemade chocolate sauce, or even a simple ganache for a decadent treat. The richness of chocolate provides a wonderful contrast to the cake’s lightness.
- Cloud-like Whipped Cream: A dollop of homemade whipped cream is a classic and essential pairing. Its smooth, airy texture complements the cake perfectly, and you can flavor it with vanilla, almond, or even a touch of citrus zest.
- Caramelized Sweetness: For those with a sweet tooth, a spoonful of dulce de leche offers a rich, creamy, and caramel-like topping that adds depth and indulgence.
- Grilled Perfection: For a unique twist, try grilling slices of Angel Food Cake after baking. A quick sear on a hot grill (or even in a grill pan) creates beautiful char marks and adds a subtle smokiness and crisp texture that’s unexpectedly delicious. Serve warm with ice cream or more fresh fruit.
- Lemon Curd or Fruit Coulis: A tangy lemon curd or a vibrant fruit coulis (like raspberry or passion fruit) can add a burst of bright flavor that cuts through the sweetness and enhances the cake’s delicate notes.
Frequently Asked Questions About Angel Food Cake
Q: Can I use all-purpose flour instead of cake flour?
A: While technically possible, it is highly recommended to use cake flour. Cake flour has a lower protein content than all-purpose flour, which results in a finer, more tender crumb characteristic of angel food cake. All-purpose flour can make the cake tougher and less airy.
Q: Why did my angel food cake collapse after baking?
A: The most common reason for collapse is not inverting the cake immediately after removing it from the oven. Inverting the hot cake allows it to cool and set without its delicate structure collapsing under its own weight. Undermixing or overmixing the egg whites can also contribute, as can opening the oven door too early during baking.
Q: How do I get my egg whites to whip properly?
A: Ensure your egg whites are at room temperature, and that your mixing bowl and whisk are impeccably clean and free of any grease or egg yolk. Even a tiny speck of yolk can prevent the whites from whipping to their full volume. Start whipping on low speed and gradually increase, adding sugar slowly once they begin to froth.
Q: Can I store leftover Angel Food Cake?
A: Yes, Angel Food Cake can be stored at room temperature, tightly covered, for up to 2-3 days. It can also be frozen for longer storage (up to 4-6 weeks) by wrapping it tightly in plastic wrap and then foil. Thaw at room temperature before serving.
Embrace the Joy of Baking Angel Food Cake
Baking a homemade Angel Food Cake is more than just following a recipe; it’s about creating a moment of pure, unadulterated joy. From the rhythmic whisking of egg whites to the triumphant inversion of the golden cake, each step is a small victory. The result is a dessert that, true to its name, feels like a little piece of heaven on a plate. It’s a testament to the fact that sometimes, the simplest ingredients, when treated with care and a touch of love, can yield the most extraordinary results. So, gather your ingredients, clear your counter, and prepare to delight in the magic of your very own homemade Angel Food Cake.