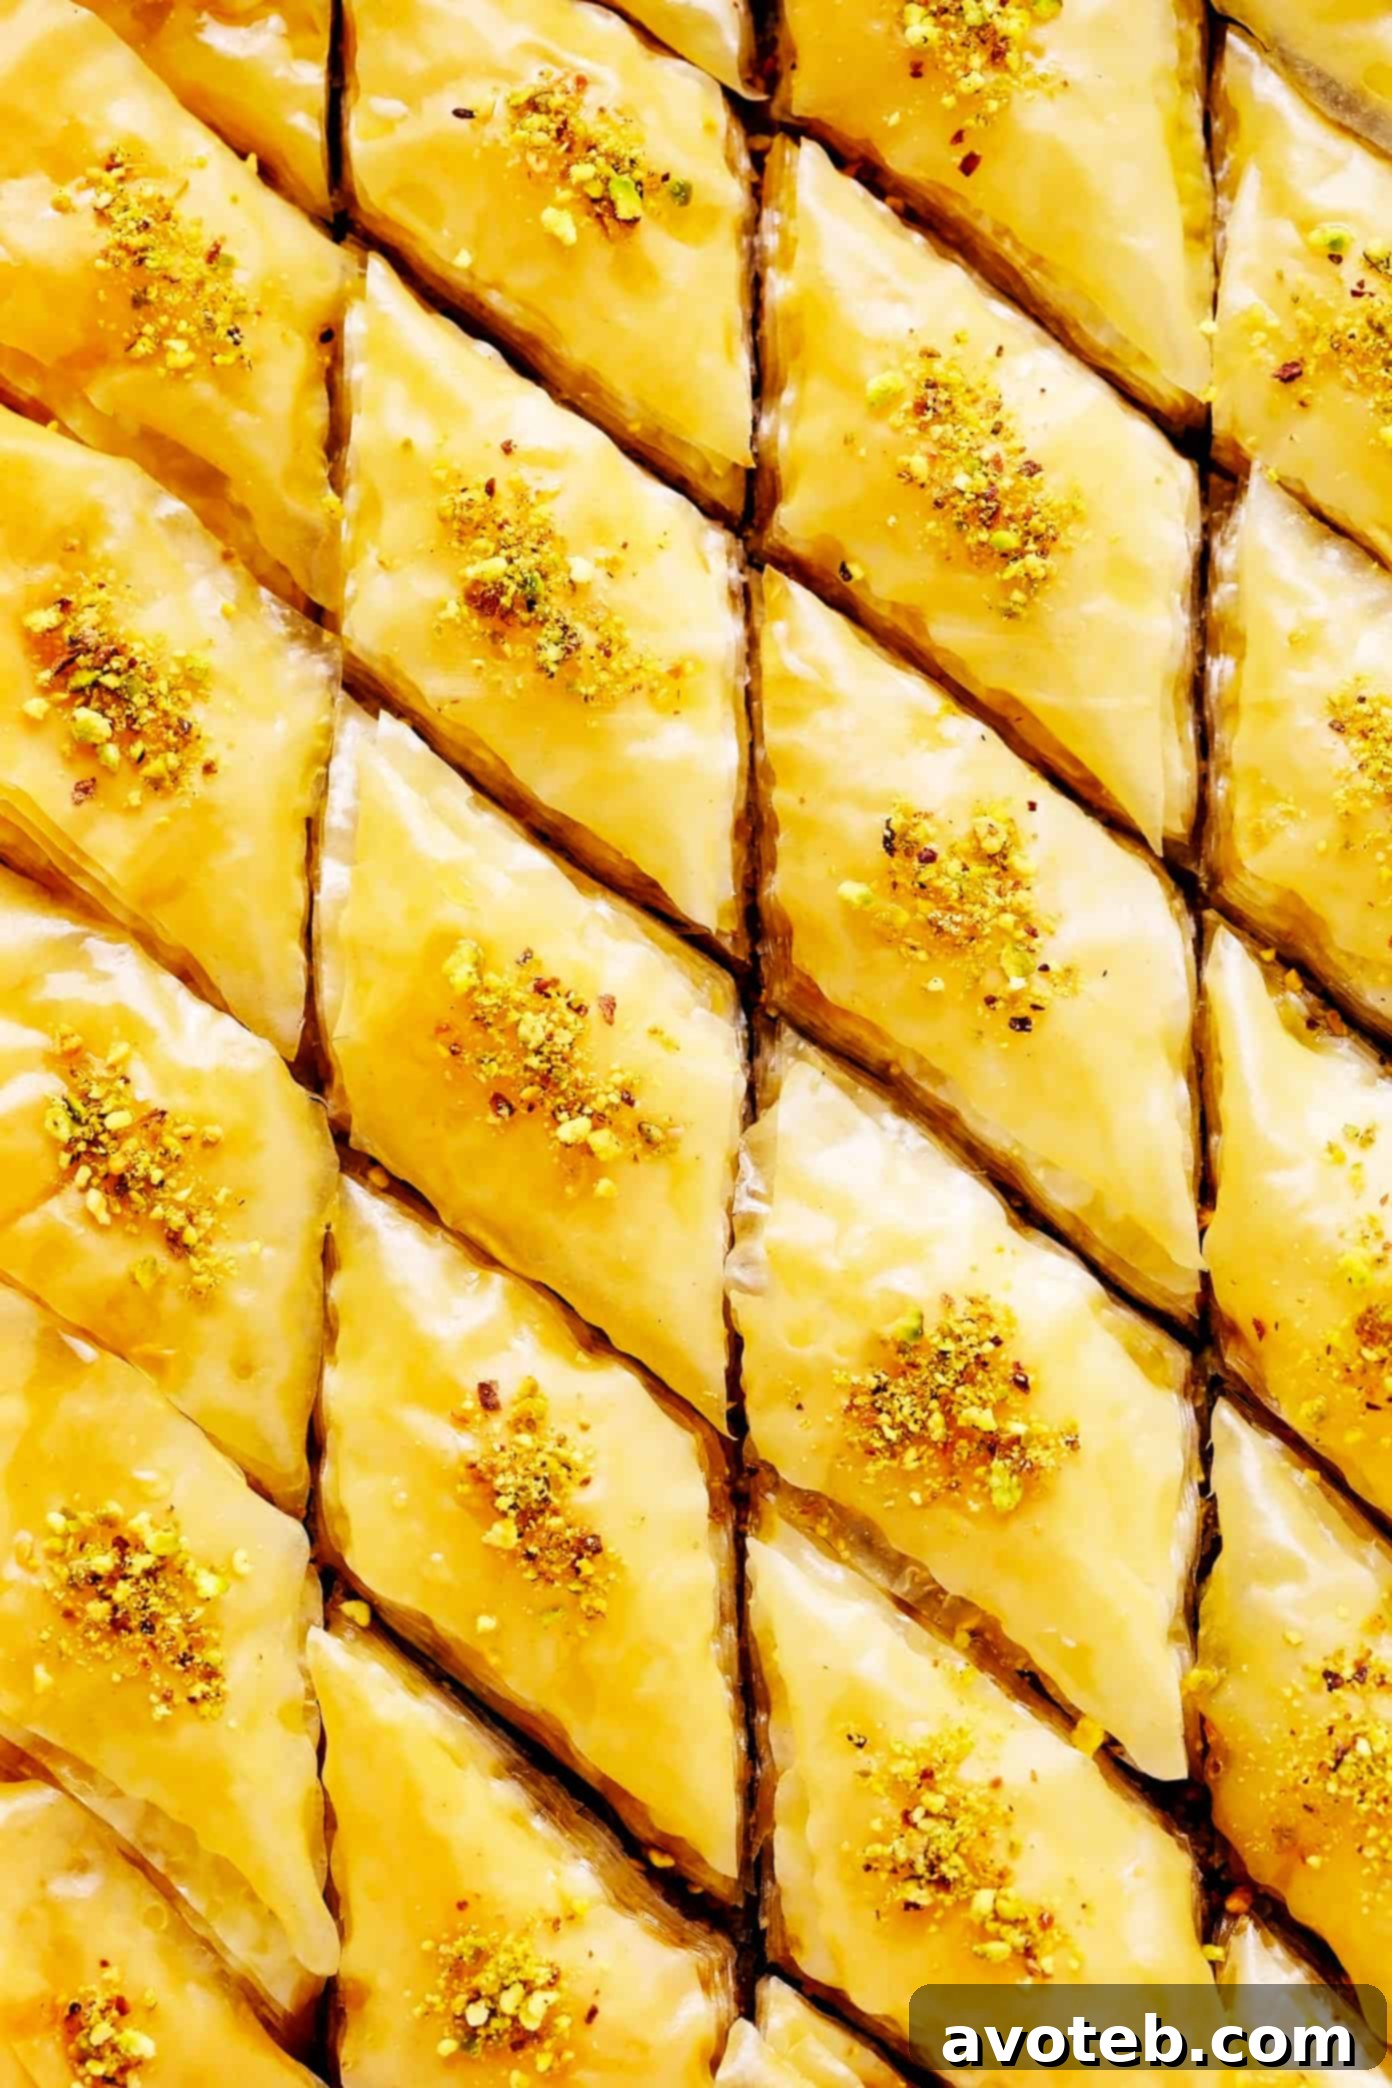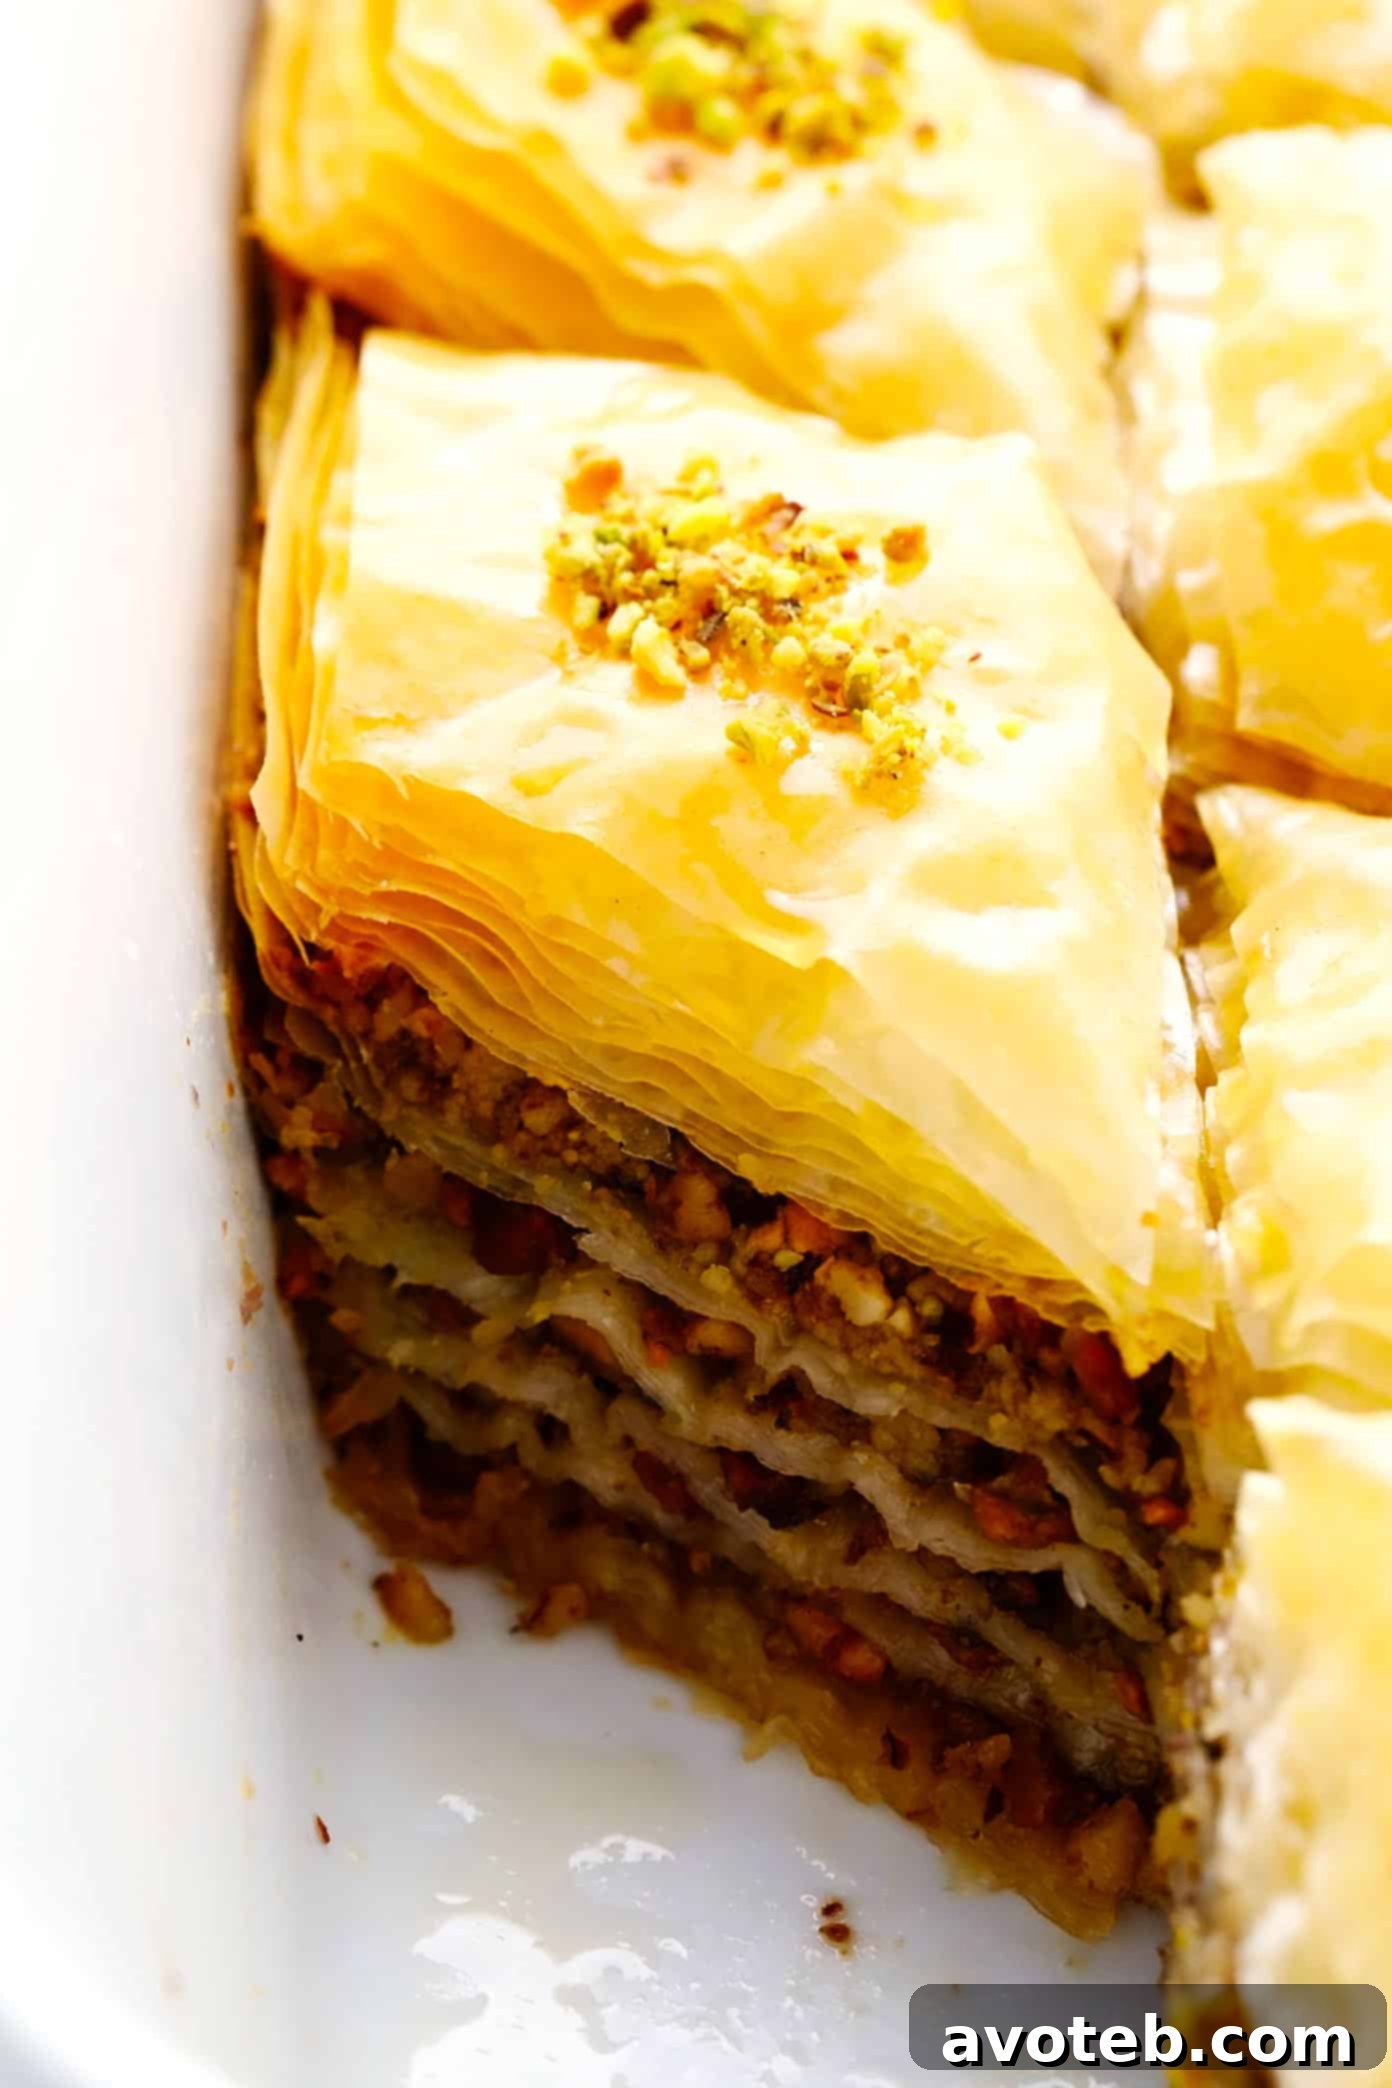
Discover the art of making authentic homemade baklava with perfectly crispy, golden phyllo layers, your preferred blend of nuts, and a fragrant citrus-infused honey syrup. This comprehensive guide, complete with a video demonstration, will lead you through every step to create this irresistible sweet treat.
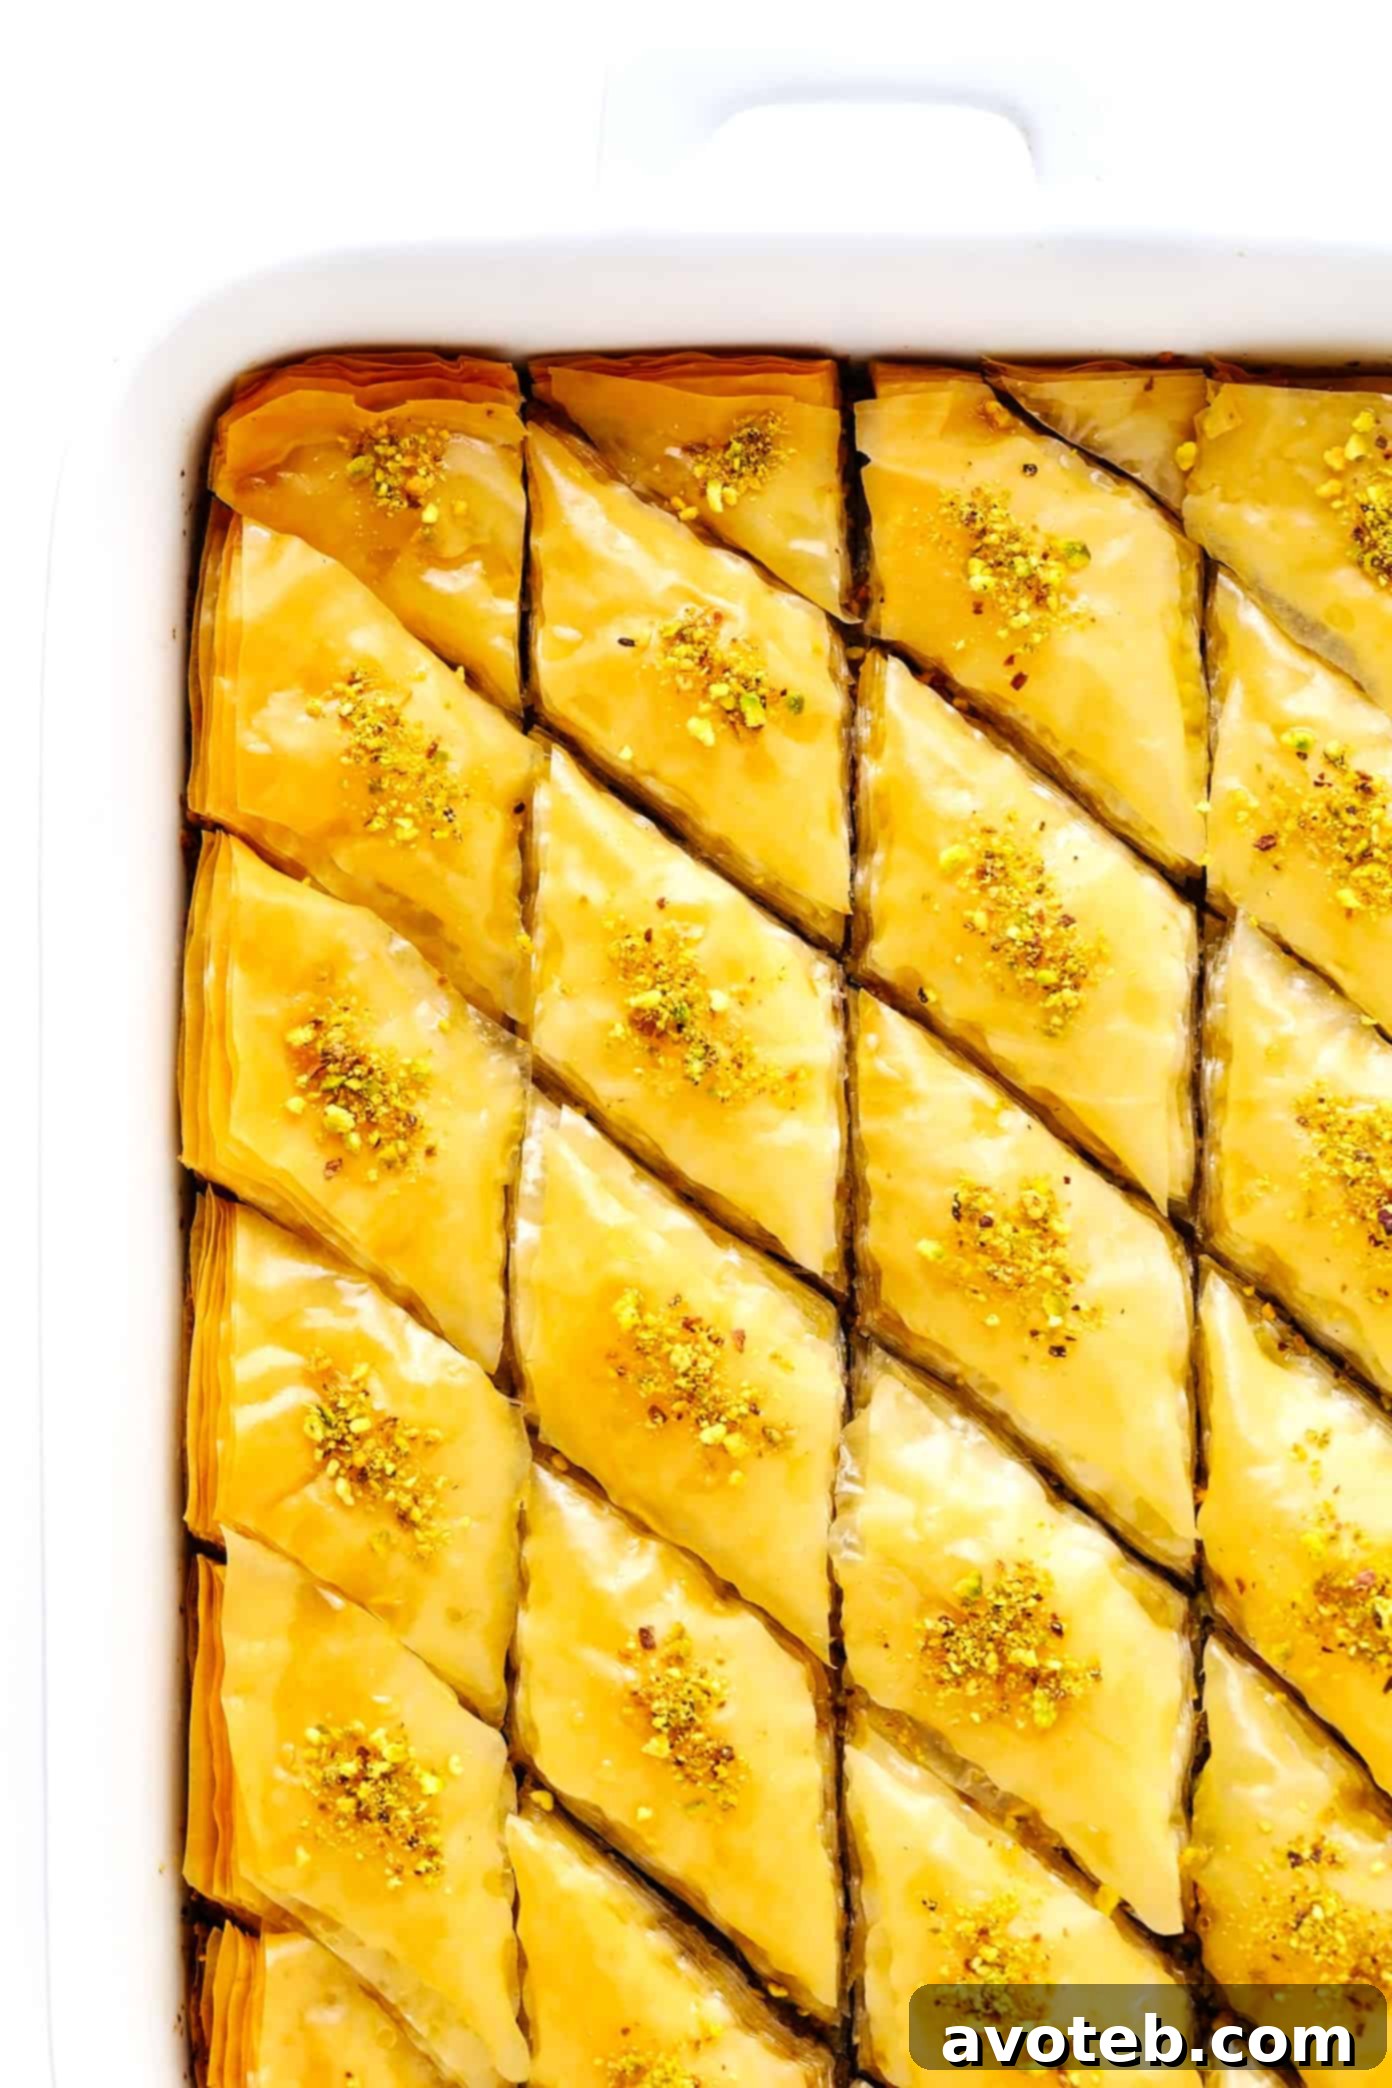
For many years, the dream of crafting homemade baklava has resided at the very top of my culinary bucket list. Last December, I finally dedicated myself to mastering this delightful dessert. What began as a month-long “baklavathon,” exploring various global baklava styles and culinary traditions, testing numerous recipes, and refining our family’s favorite version, transformed into a genuine passion. To my pleasant surprise, I discovered immense joy in the intricate yet rewarding process of making baklava. It’s truly a labor of love, demanding a few dedicated hours for preparation, assembly, and baking, but the extraordinary reward of this delectable pastry is undoubtedly worth every moment.
While baklava might seem daunting at first glance due to its multi-layered nature and delicate appearance, the method for crafting this particular style is remarkably straightforward. As you’ll observe in our accompanying video demonstration below, it requires no specialized techniques or sophisticated equipment, making it entirely accessible even for novice bakers. Personally, I find repetitive baking tasks incredibly soothing and meditative. The rhythmic chopping of nuts and the meticulous, gentle brushing of each of those forty delicate, flaky phyllo sheets—all destined to be soaked in a golden, fragrant honey syrup—became a surprisingly relaxing ritual. It’s a culinary journey that rewards patience with an exquisite fusion of flavor and texture, turning baking into a truly enjoyable experience.
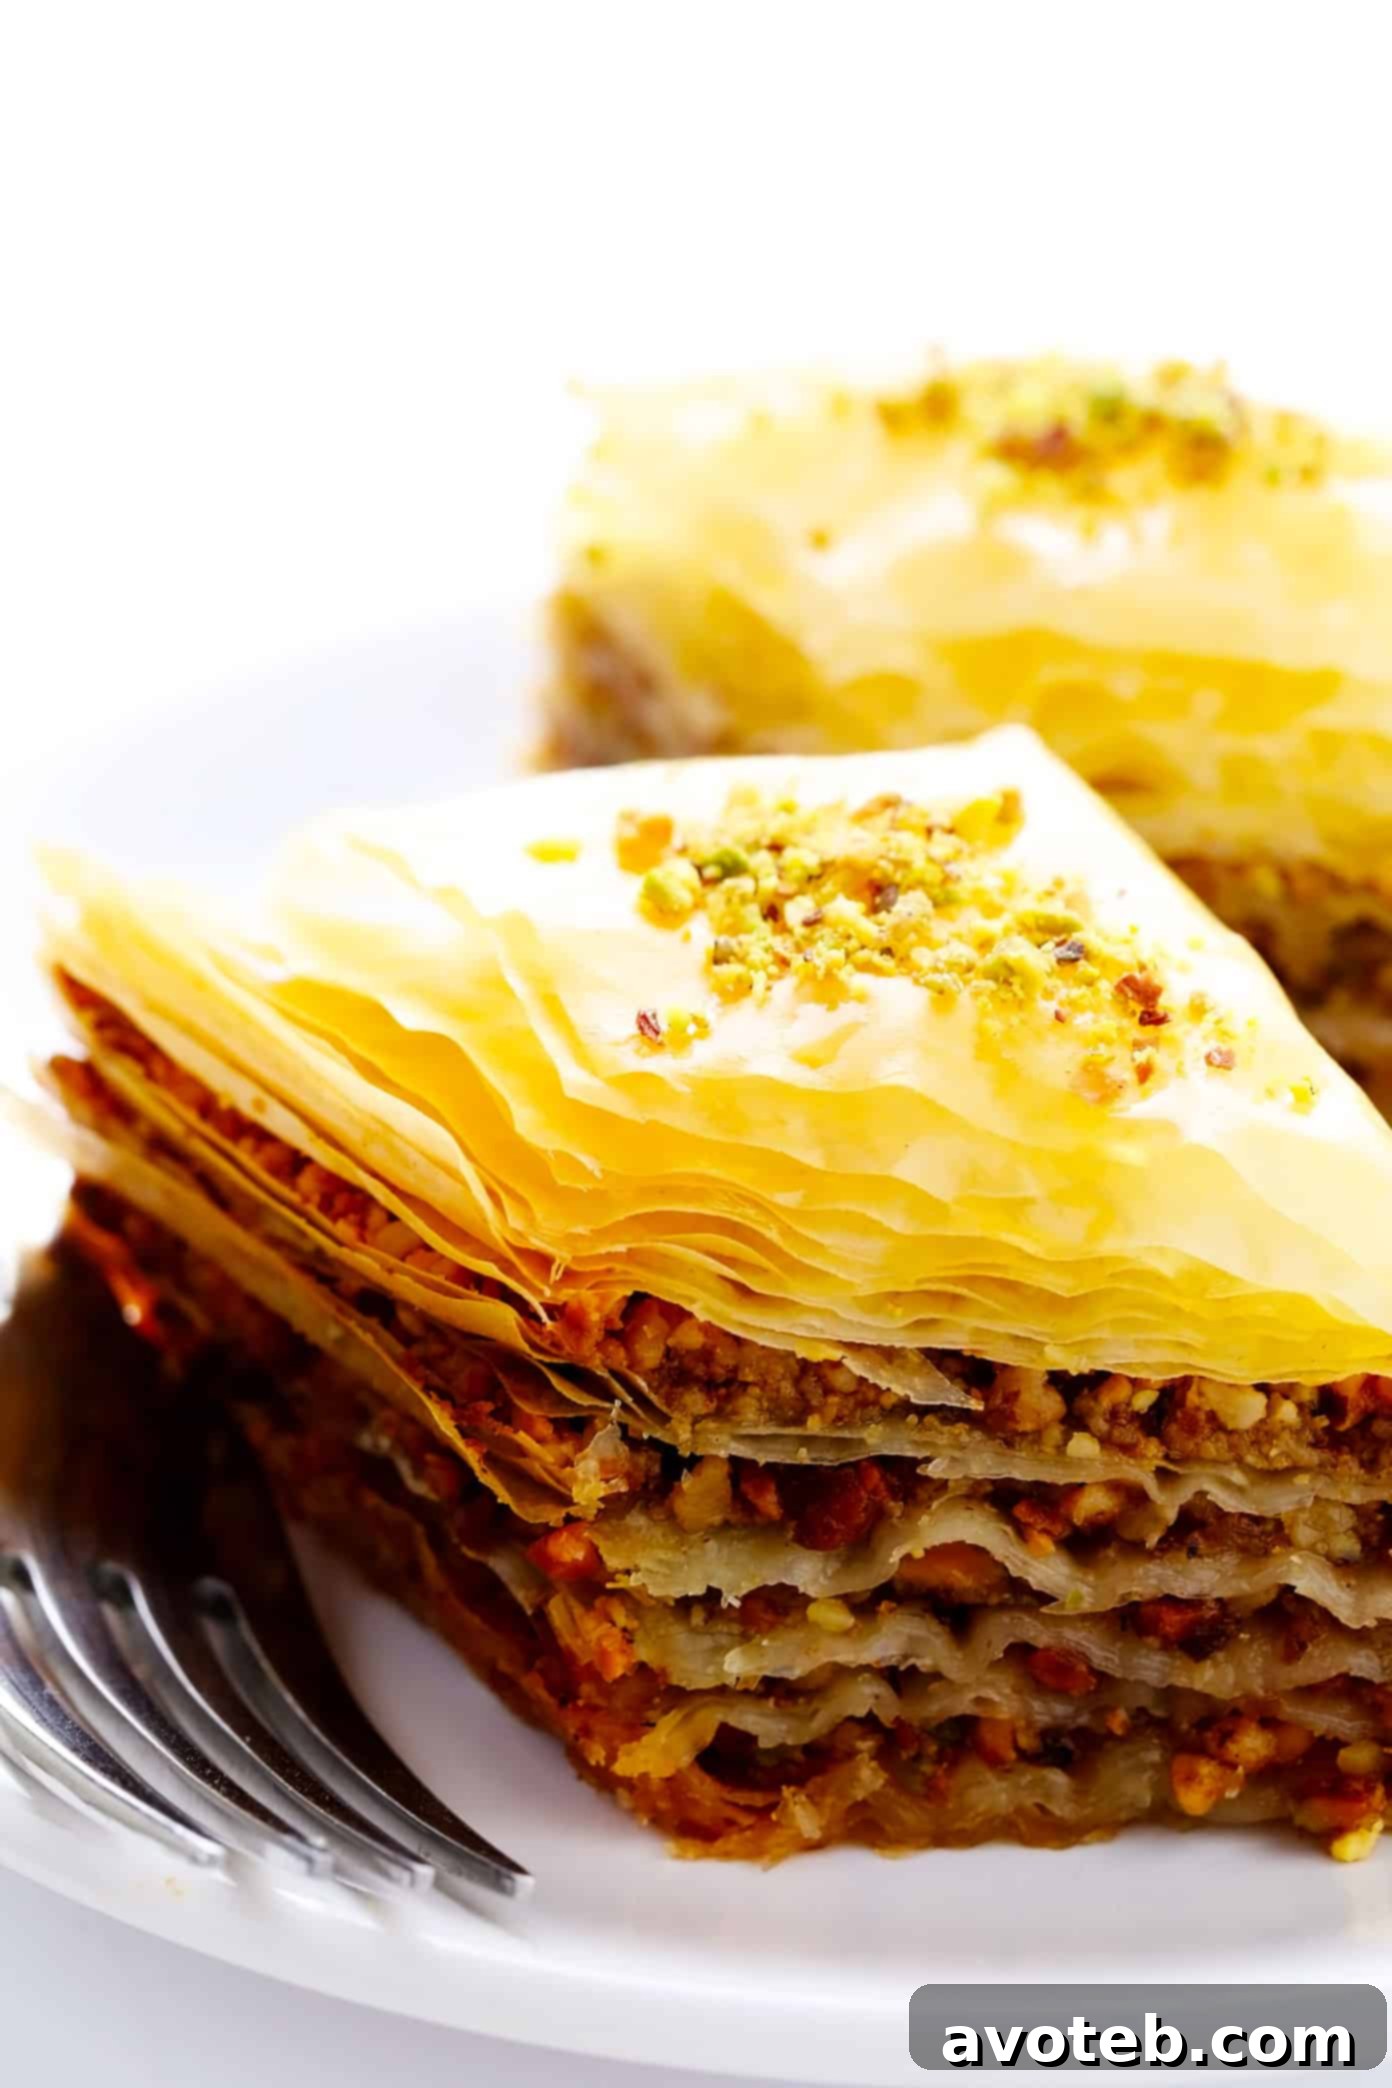
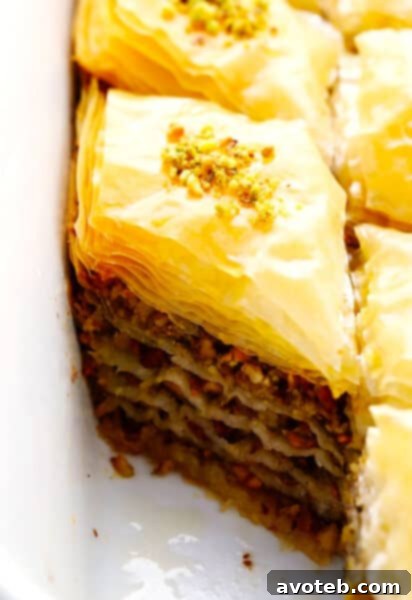
The world of baklava is incredibly vast and diverse, with countless variations rooted deeply in different regional food traditions. Our family’s most beloved recipe, however, strikes a beautiful and harmonious balance, artfully blending the best elements from both Greek and Turkish baklava styles. It features abundant, rich, buttery, and perfectly golden, flaky sheets of phyllo dough, generously interspersed with a sumptuous mixture of finely chopped pistachios and walnuts. The pastry is then drenched in a glorious honey-sweetened syrup, infused with a subtle touch of warming spices and the delicate, intoxicating aroma of orange blossom water. This thoughtful combination adds an irresistible depth and complexity of flavor that makes each bite utterly decadent and profoundly delicious.
This baklava recipe is an ideal undertaking for leisurely weekend days when you have a bit more time to indulge in the culinary arts. During busy holiday seasons, especially now with a very active 8-month-old bustling around, I’ve found it to be the perfect evening project. It offers blissful, uninterrupted solo baking time once the little ones are finally asleep, providing a quiet, creative escape. Beyond being a delightful treat for your own household, homemade baklava also makes an exceptional, thoughtful, and much-appreciated gift for friends and family during any festive occasion. Prepare yourself for an abundance of “oohs” and “ahhs” – this impressive dessert is a guaranteed crowd-pleaser and a memorable token of affection!
If you’re embarking on your first baklava-making adventure, I strongly recommend taking a few moments to thoroughly read through the detailed notes, helpful tips, and frequently asked questions provided below before you even begin the recipe. This preliminary review will equip you with essential knowledge and confidence, ensuring a smoother baking experience. Rest assured, while this recipe requires a certain level of time and attention, the process is genuinely easy to follow, and the magnificent end product will absolutely justify your efforts. So, tie on your apron, gather your ingredients, and let’s embark on this delightful journey to create some truly magnificent homemade baklava together!
Mastering Homemade Baklava: A Quick Video Guide
Watch our concise 1-minute video demonstration to see each step of making delicious, crispy baklava with ease. This visual guide complements the written recipe, showing you how to achieve those perfectly golden layers and luscious honey syrup, making the process even clearer.
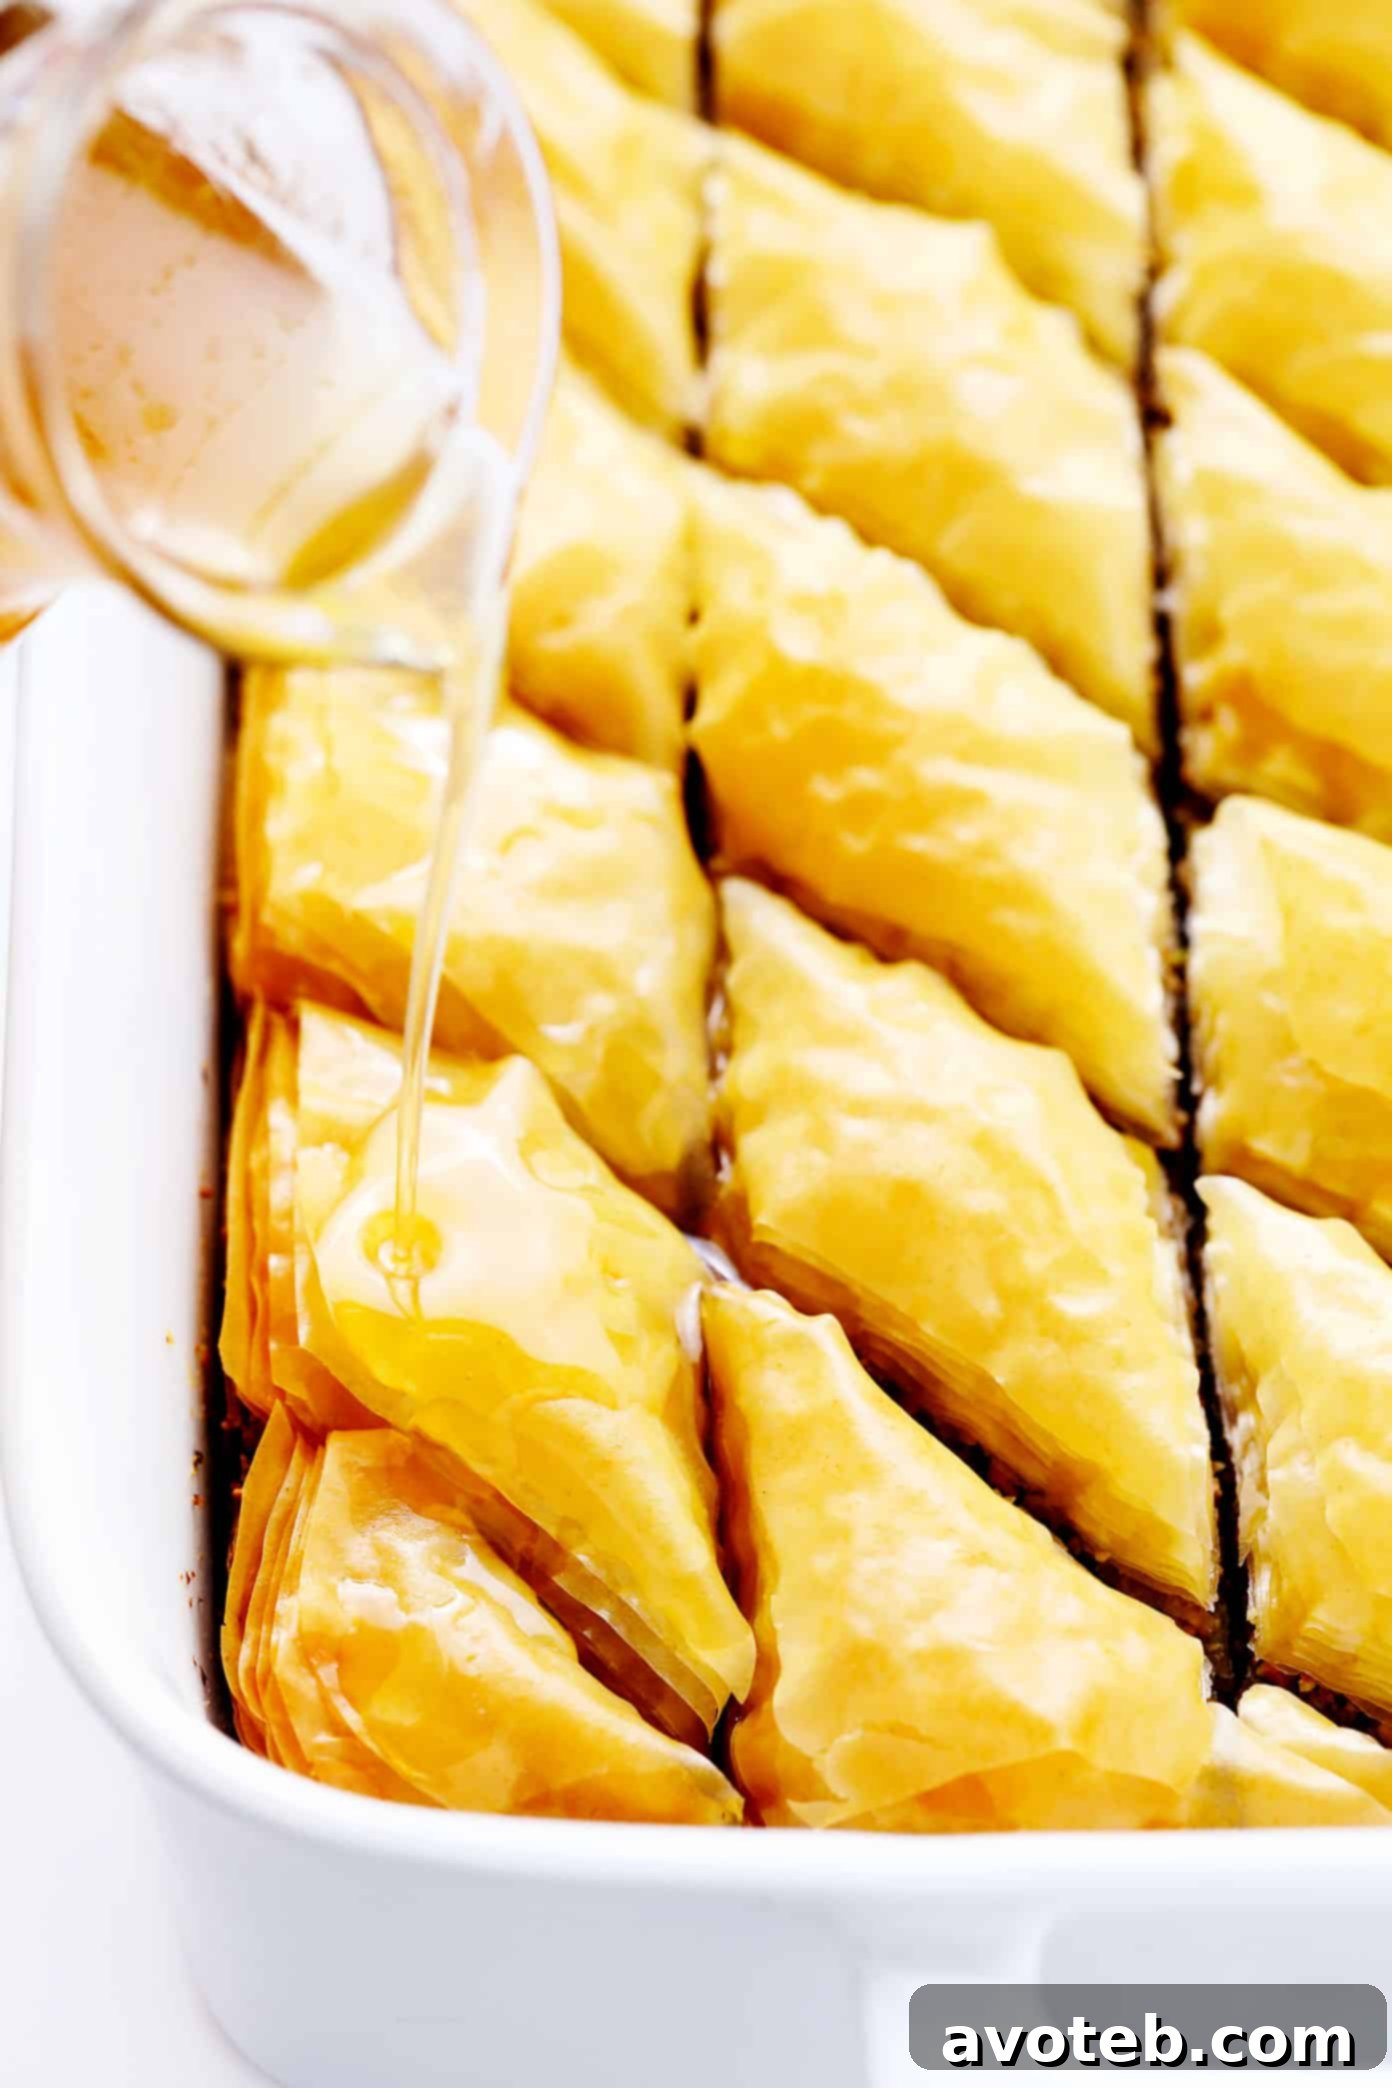
Essential Ingredients for Your Perfect Baklava
Before diving into the detailed step-by-step recipe, let’s take a closer look at the key ingredients that form the very foundation of our exquisite baklava. Understanding the role of each component is crucial for achieving the perfect balance of taste, texture, and aroma that defines this classic dessert.
- Phyllo Dough: You will need one 1-pound package of frozen phyllo dough, which typically contains around 40 ultra-thin sheets. Also widely known as filo or fillo dough, these delicate, tissue-thin sheets of pastry require careful thawing according to the package directions before they can be used. It is absolutely vital to note that phyllo dough is distinctly different from puff pastry. While they are often sold side-by-side in grocery stores, their textures and uses are completely different. Phyllo bakes up incredibly thin and crispy, unlike the airy, puffy texture of puff pastry. Always double-check to ensure you are purchasing phyllo for authentic baklava results.
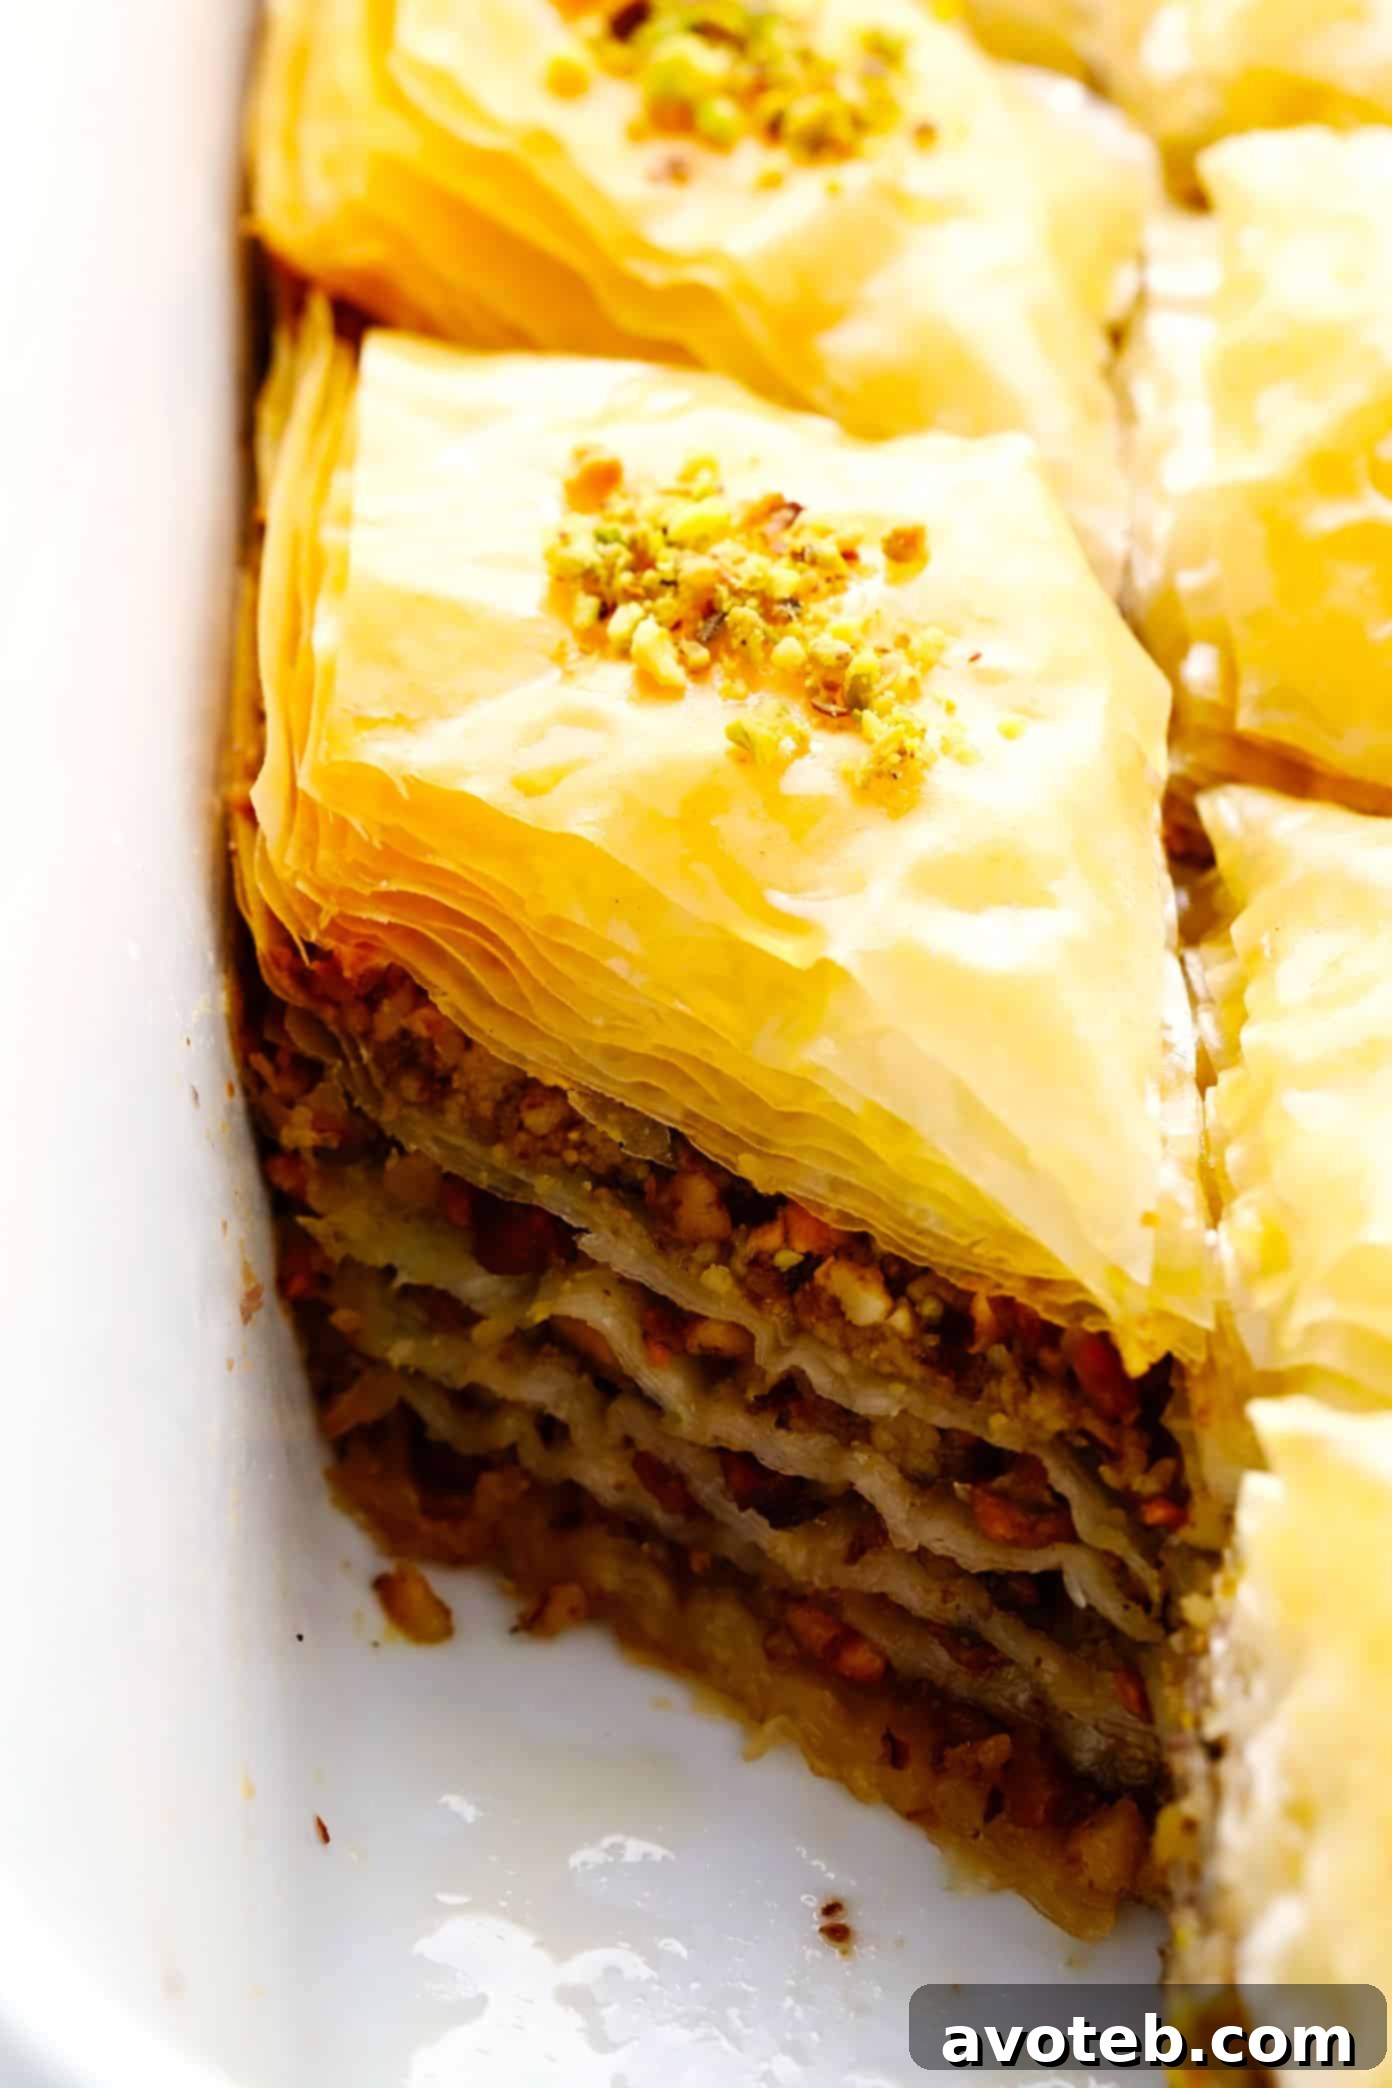
- Nuts: For this specific recipe, I’ve found that a 50/50 mixture of vibrant pistachios and rich, earthy walnuts offers a wonderfully balanced flavor profile and a delightful textural contrast. However, you are most welcome to use an equivalent amount of whatever varieties of nuts you prefer – almonds, pecans, or a different blend would also be delicious. The most important technique here is to very finely chop the nuts. This ensures that the baklava will be easy to slice cleanly into neat pieces without crumbling, and it also contributes to a more consistent texture in every bite. I find that blitzing the nuts briefly in a food processor is the easiest and most efficient method, but you can certainly chop them by hand with a sharp chef’s knife if you prefer.
- Ground Cinnamon: We will mix a subtle yet essential hint of fragrant ground cinnamon into the chopped nut mixture. This spice adds a warming, aromatic depth that beautifully complements the sweetness of the honey. If you happen to have aromatic ground cardamom on hand, I highly recommend adding an extra 1/2 teaspoon to the nut filling. Cardamom introduces a wonderfully exotic and fragrant note that truly elevates the baklava’s flavor profile.
- Melted Butter: Traditionally, and for the very best results, baklava is often made with clarified butter (also known as ghee). Clarified butter is prepared by melting regular butter and carefully separating out the water and milk solids, leaving behind a pure butterfat. This yields baklava with a superior, cleaner flavor, a more even golden-brown color, and an ultimately crisper texture. That said, I have also successfully made this recipe using regular (unclarified) melted butter, and it still produces a delicious outcome. Please refer to our detailed notes below for specific instructions and considerations, regardless of which type of butter you decide to use.
- Honey Syrup: The luxurious, glistening honey syrup is the soul of baklava, providing its characteristic sweetness and moistness. You will need four main ingredients to craft this essential syrup: pure honey, water, white granulated sugar, and freshly-squeezed orange juice (lemon juice is also a suitable alternative for a brighter zest). To truly elevate the aromatic complexity and traditional floral undertones, I also highly recommend adding an extra 2 to 3 teaspoons of orange blossom water, and/or a hint of delicate rose water. These floral essences impart a truly irresistible depth of flavor. If you find it challenging to track down a bottle of orange blossom water, you are welcome to omit it, but it remains my favorite secret ingredient for an unparalleled aromatic experience in this recipe.
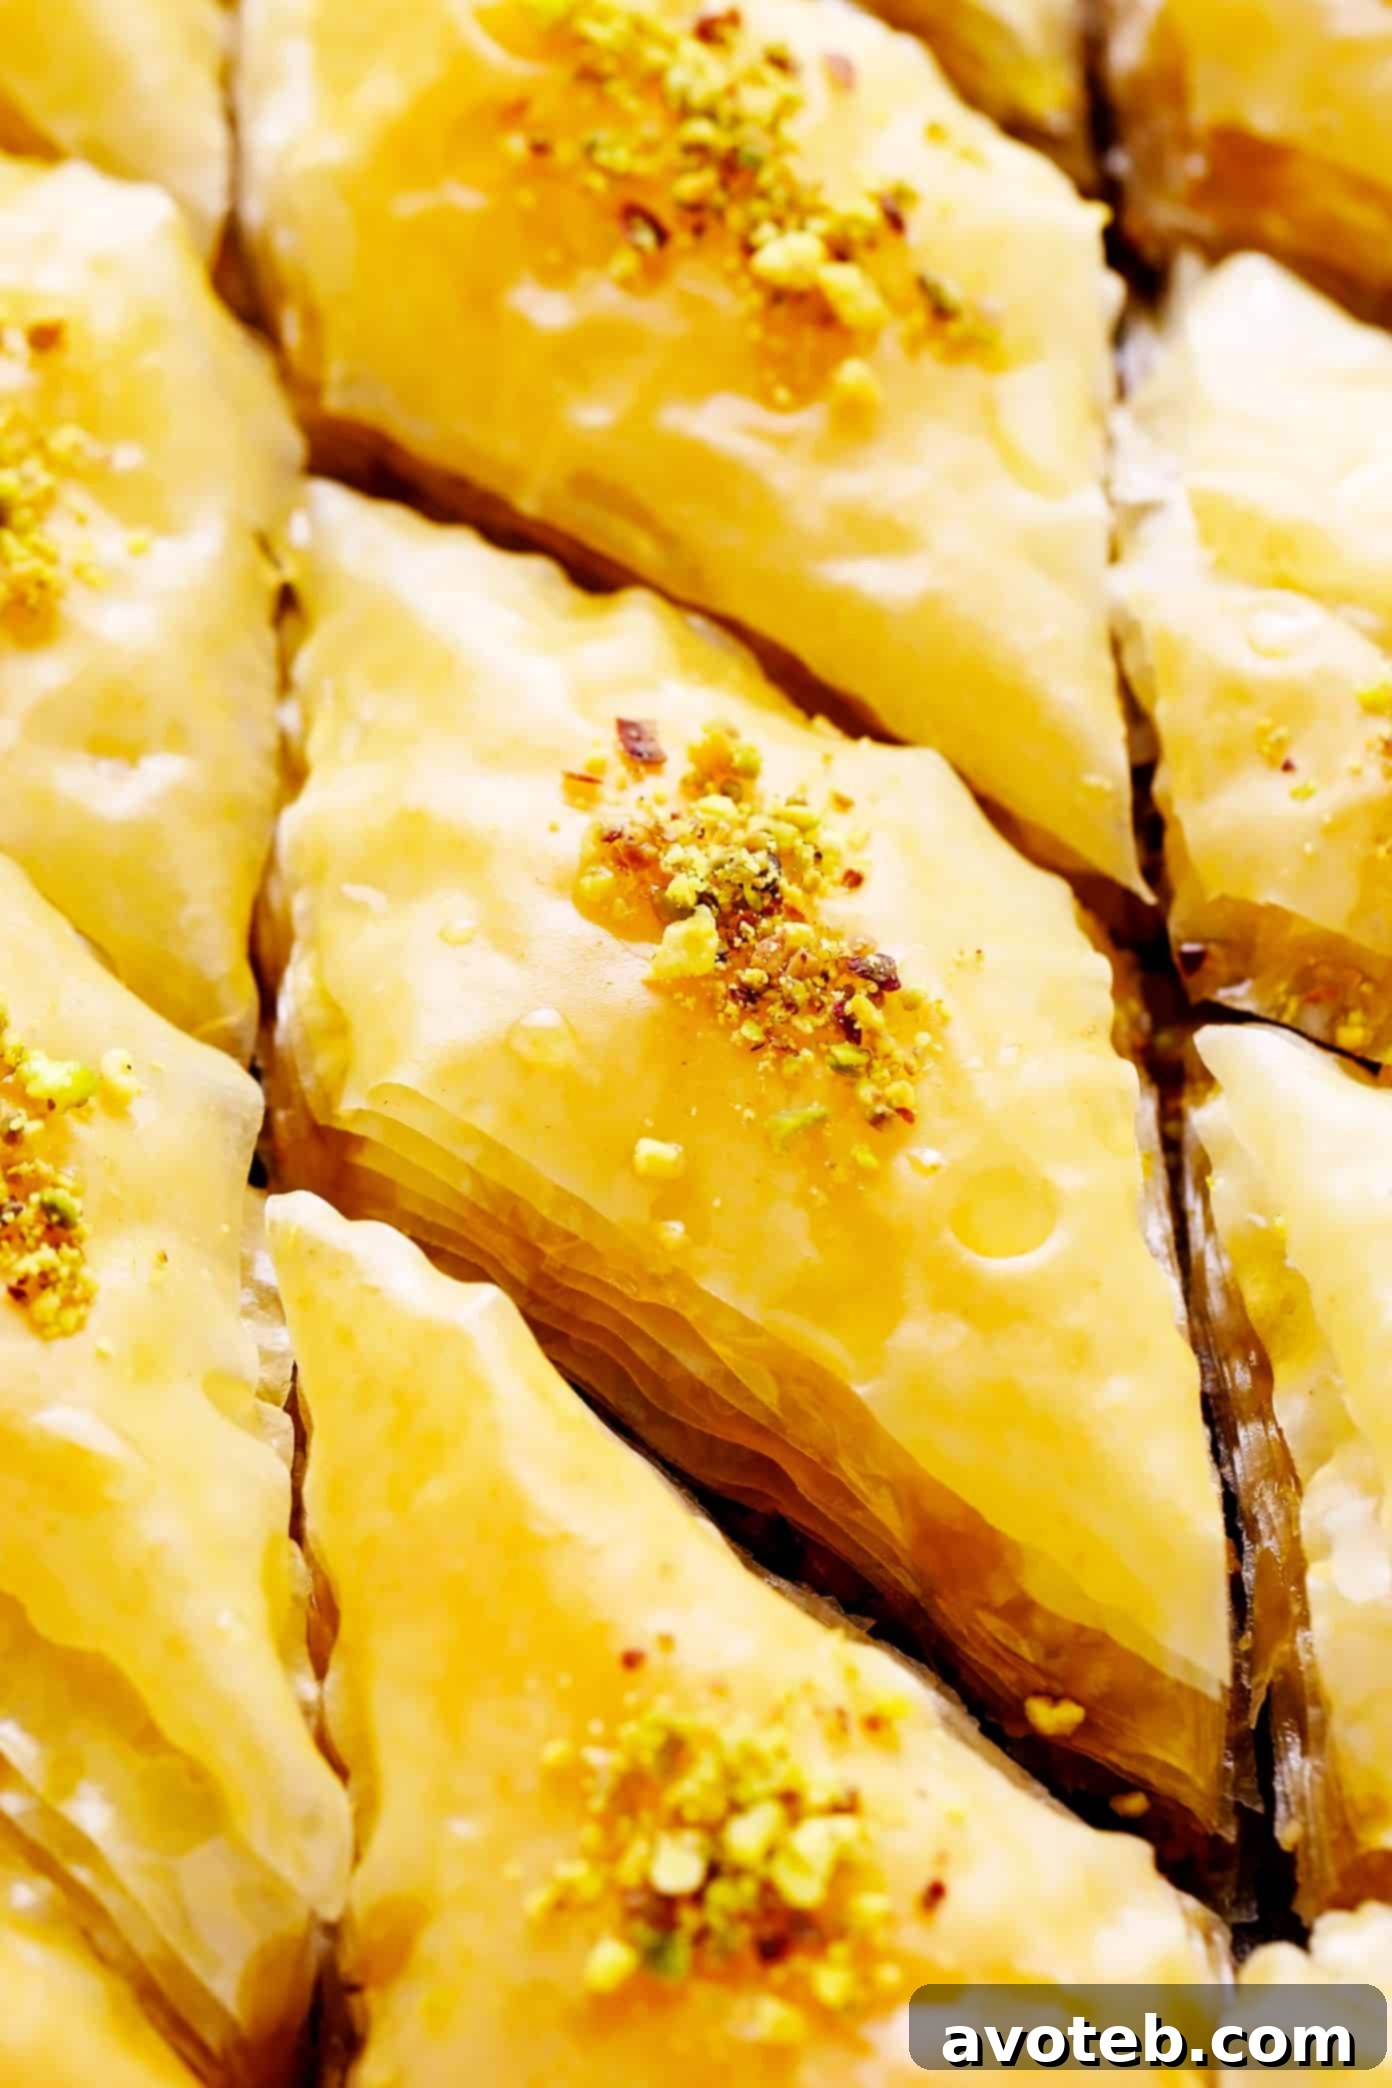
Step-by-Step Guide: How to Craft Your Own Baklava
While extremely detailed instructions for how to make baklava are included in the video above and the comprehensive recipe card below, here are some invaluable tips and tricks I’ve learned along the way that I find immensely helpful for ensuring baklava perfection:
- Pre-portion Your Nuts: To significantly streamline the assembly process and guarantee an incredibly even distribution of the delicious nut filling throughout all your baklava layers, I find it incredibly helpful to pre-portion the finely chopped nuts into five equal amounts *before* you even begin the layering process. This makes them extra-easy to grab and sprinkle on, and it also ensures that each layer of nuts will be consistently thick and flavorful.
- Chill the Honey Syrup: This is an absolutely golden rule for achieving irresistibly crispy baklava! The key lies in the thermal shock created when very cold syrup is poured directly over piping hot, freshly baked baklava. Once your honey syrup is prepared and cooked, I recommend immediately transferring it to a shallow, heat-safe bowl and refrigerating it. The goal is for the syrup to be thoroughly chilled before it’s time to pour it over the hot baklava. For an even quicker chill, you can even pop the syrup in the freezer for the first 30 minutes. This critical temperature difference helps prevent sogginess and locks in the desired crisp texture.
- Trim Phyllo to Fit Your Pan: Most commercially available packages of phyllo dough sheets are slightly larger than a standard 9×13-inch baking pan. To achieve neat, uniform layers and a perfect fit, you will need to carefully trim the sheets down a bit to match your pan’s dimensions. However, don’t discard those trimmed scraps! They can be a lifesaver, coming in handy just in case a main phyllo sheet has a major tear and needs to be patched up a bit during assembly.
- Keep Phyllo Moist: Phyllo dough is notoriously delicate and dries out incredibly quickly when exposed to air, becoming brittle and almost impossible to work with. To prevent this, it’s absolutely essential to keep your stack of phyllo sheets covered while you are assembling the baklava, ensuring they stay nice and moist and pliable. I simply loosely drape a damp (but not soaking wet) clean kitchen towel over my stack of phyllo, but damp paper towels would also work exceptionally well.
- Clarify or Stir Melted Butter Well: For the very best baklava with superior flavor and an even, golden-brown finish, I highly recommend taking the time to clarify the butter. (Here is a simple online tutorial for clarifying butter; please note that you will need a final yield of 1.5 cups of *clarified* butter, so you’ll need to start with a slightly larger initial amount of regular butter). But if you choose to skip this step and use regular melted butter, just be sure to periodically whisk the butter vigorously while you are assembling the baklava. This prevents the milk solids and water from separating, ensuring that you’re not left with only the watery part of the butter at the very end, which could lead to soggy layers.
- Don’t Over-Butter the Phyllo: It’s a common misconception that each and every sheet of phyllo needs to be 100% drenched or saturated with butter. This is simply not true! The sheets will naturally moisten one another as they are layered together, and the baklava will become too soggy and greasy if you completely brush every single sheet. Plus, you’ll likely run out of butter before you finish! Instead, just lightly brush each sheet – paying particular attention to the edges – and you’ll be good to go, achieving that perfect crispness without excess oil.
- Create a Layer Checklist: While making baklava isn’t inherently difficult, it *is* surprisingly easy to accidentally lose track of where you are in the intricate layering process along the way. To stay organized and ensure you complete every step, I highly recommend jotting down a little note or a simple checklist to yourself each time you complete a layer (e.g., “10 sheets + nuts done”). This will help you keep track of what steps still remain and ensure a perfectly balanced baklava.
- Slice Completely Before Baking: This is a crucial step that many first-time baklava makers overlook! Don’t forget to slice the baklava all the way through to the bottom of the pan *before* you transfer it to the oven for baking. This allows the hot honey syrup to fully penetrate and soak into all the layers after baking, ensuring every single piece is evenly saturated and deliciously sweet. And also, remember to sprinkle any extra chopped nuts for garnish *after* baking, otherwise, they will inevitably burn during the high heat of the oven.
- Store Baklava at Room Temperature: If you want your baklava to stay as wonderfully crispy as possible, it’s best to store it at room temperature in a loosely-covered (not airtight) container. I simply loosely place a sheet of aluminum foil on top of my baking dish or food storage container, but you could also cover yours with a clean kitchen towel. Storing it this way allows for proper air circulation, preventing moisture buildup. Alternately, you can store the baklava in the refrigerator, but just be aware that it will be considerably less crispy and may become slightly chewy.
- Embrace Imperfection: At the end of the day, remember that baklava is a lovingly handcrafted dessert, and every single slice does not need to be perfectly layered or geometrically identical. So, don’t stress about achieving absolute perfection! 🙂 Just be patient, enjoy the therapeutic process, and have fun with it. I promise that the results will be deliciously worth every moment of your effort!
Customizing Your Baklava: Delicious Variations to Explore
One of the truly wonderful aspects of baklava is its inherent versatility. This recipe serves as an excellent foundational guide, and you are warmly encouraged to customize it to your personal preferences and creativity. Here are a few delightful and simple variations to consider that can transform your baklava experience:
- Experiment with Different Nuts: While pistachios and walnuts are typically the most popular and traditional kinds of nuts used in baklava across many cultures, the culinary world offers exciting alternatives. Almonds, pecans, hazelnuts, or even delicate pine nuts are all delicious options that you’re welcome to incorporate. You will simply need 1 pound of nuts in total for the recipe, so feel free to choose one single type or create your own custom blend by mixing together a few different kinds of nuts to achieve a unique flavor profile.
- Adjust Honey Levels: Our baklava recipe definitely has a noticeable and rich honey flavor, contributing significantly to its overall sweetness and aroma. If you prefer a less intense honey flavor, or simply wish to reduce the specific taste of honey, you are welcome to substitute granulated white sugar for part or even all of the honey in the syrup. This allows you to tailor the sweetness and flavor to your exact liking.
- Make it Less Sweet Overall: If your preference leans towards a dessert that is generally less sweet, you have complete control over this! Feel free to simply use less of the prepared honey syrup when drizzling it over the baked baklava. You can drizzle it more sparingly, allowing the rich flavors of the pastry and nuts to shine through more prominently, resulting in a more subtly sweet treat.
- Explore Diverse Spices: While cinnamon is most often and traditionally added to baklava, don’t hesitate to venture into a world of warming spices to enhance your baklava’s aroma and complexity. Feel free to experiment by mixing different warming spices into the nut filling or even by simmering them directly into the honey syrup. Cardamom, cloves, allspice, nutmeg, and/or ginger would all be absolutely delicious additions to this recipe, each offering a unique aromatic journey.
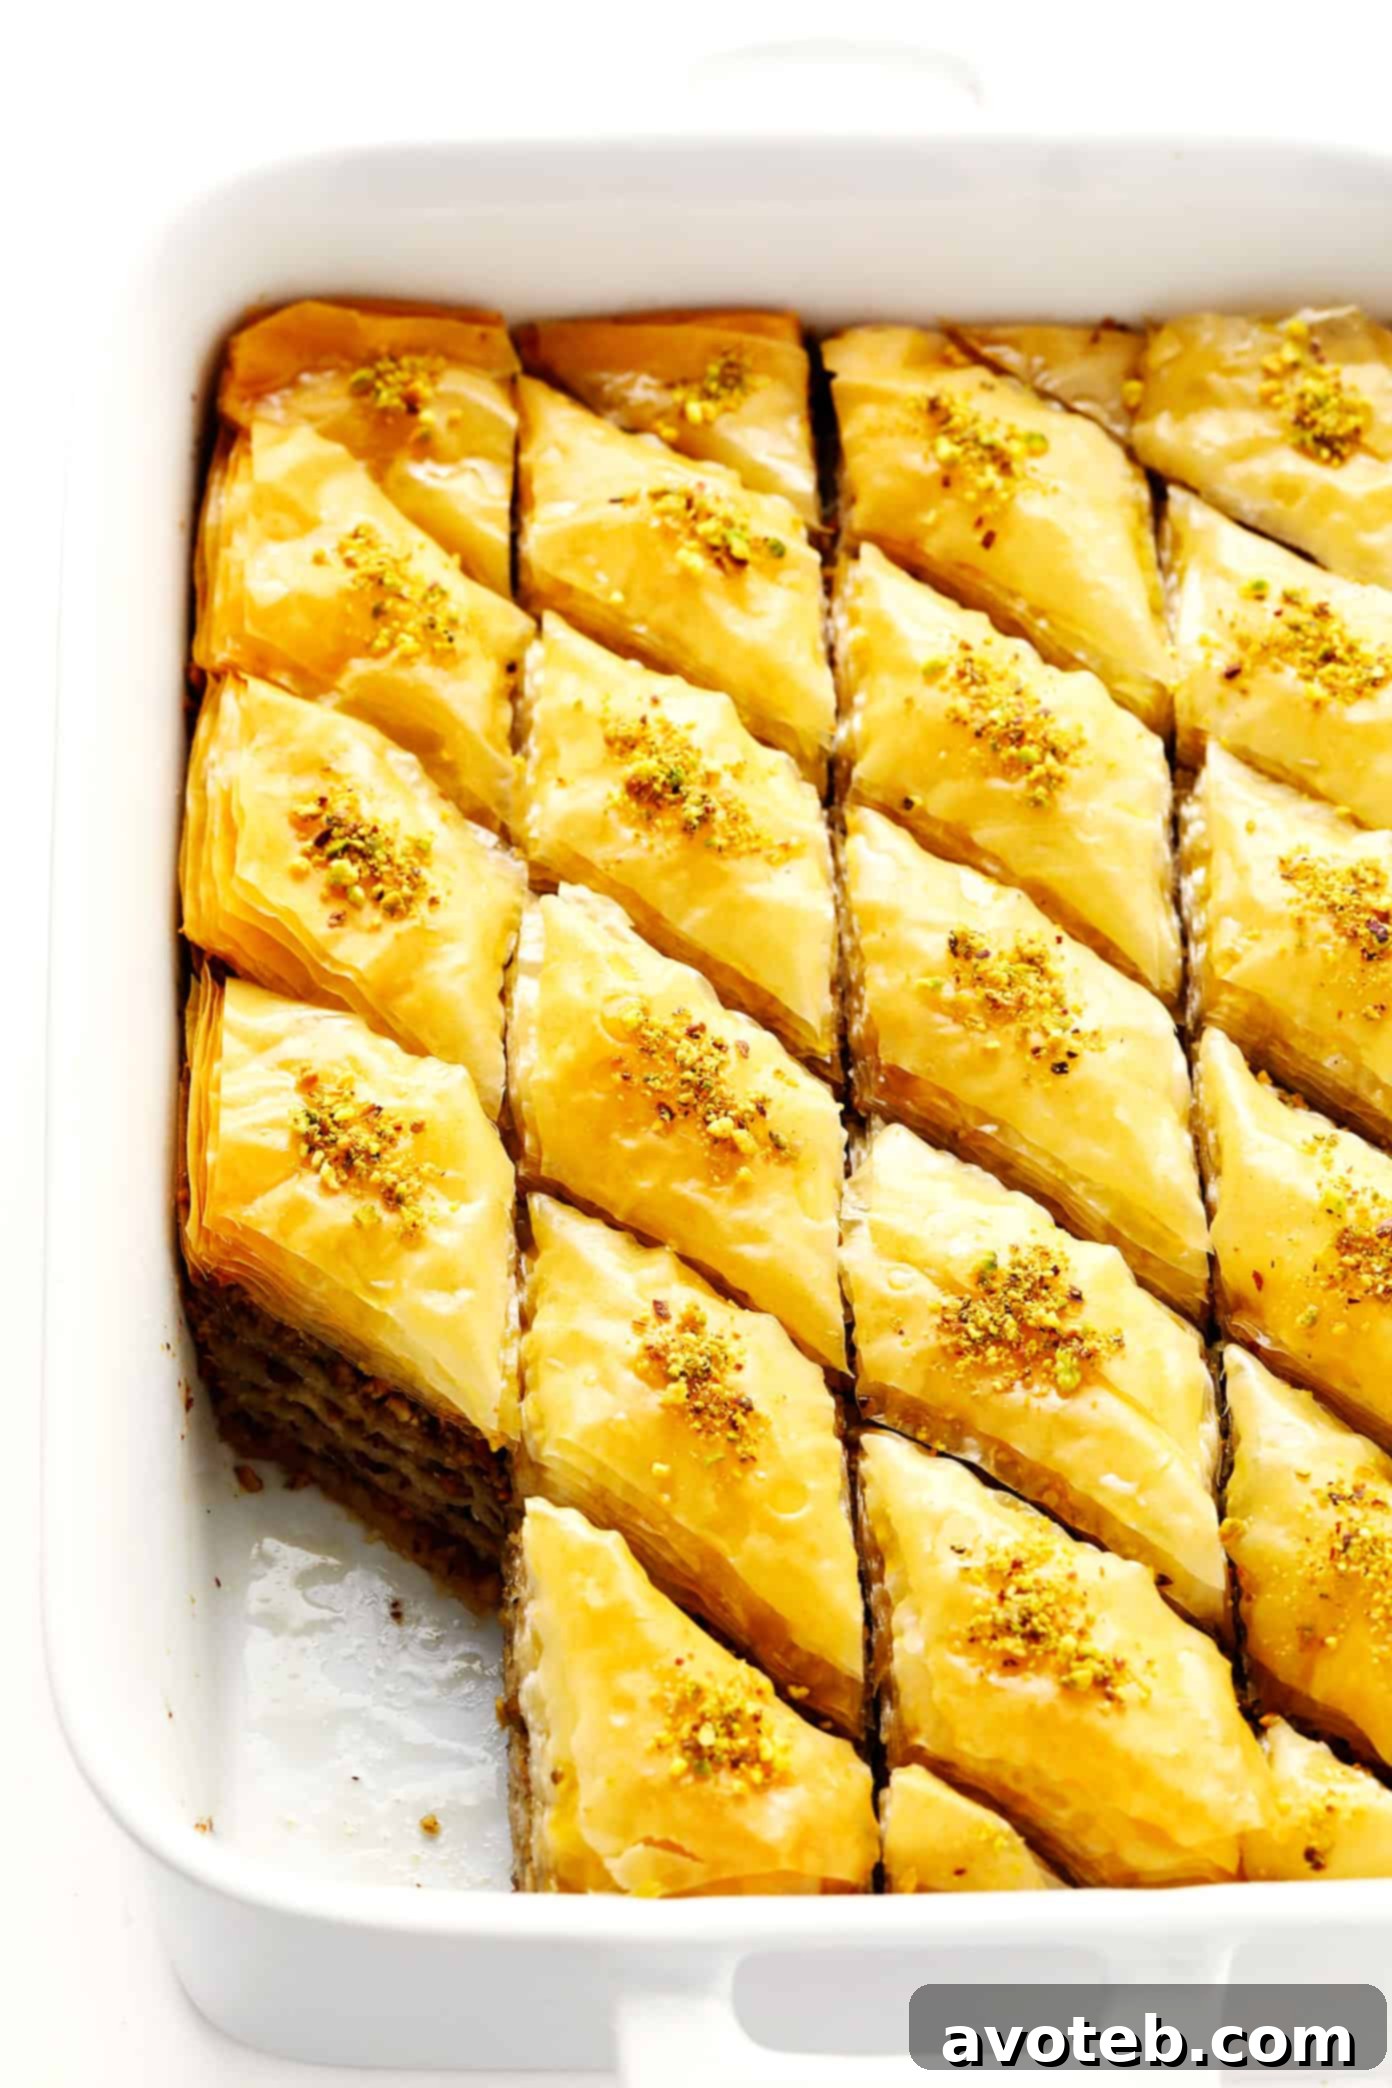
- Creative Slicing Patterns: Instead of uniformly slicing the baklava into traditional diamond shapes as shown here and in the video, feel free to express your creativity! You can slice it into neat squares, elegant rectangles, or whatever fun shapes or intricate patterns you prefer. Just ensure that, regardless of the shape, you slice it completely through to the bottom before baking to allow for optimal syrup penetration.
Baklava FAQs: Your Questions Answered
Finally, here are answers to a few common questions about baklava and some potential troubleshooting tips to help ensure your baking success and deepen your appreciation for this magnificent dessert:
- How do you pronounce baklava (and spell it)? Baklava is a dessert with a rich multicultural history, and its pronunciation and spelling can vary significantly between the different regions and culinary traditions that cherish it around the world. Turkish baklava, which is one of the most widely known and recognized examples, is typically pronounced BAH-klah-vah. You might also encounter variations in spelling such as “baklawa” or “baclava” depending on the transliteration from other languages.
- Where did baklava originate? The precise pre-Ottoman origin of baklava remains a subject of historical debate and is not definitively known, with various theories pointing to ancient Roman, Byzantine, or Central Asian roots. However, in modern times, it is a cherished and common dessert found across a vast culinary landscape. This includes Iranian, Turkish, and Arab cuisines, and its popularity extends throughout other countries of the Levant and Maghreb regions, along with the South Caucasus, the Balkans, and Central Asia, each region often boasting its own unique take on this beloved pastry.
- How do you prevent soggy baklava? Soggy baklava is a common concern, but it can be easily prevented by adhering to a few key practices. Soggy baklava is often caused by either over-brushing the delicate phyllo sheets with too much butter (simply use the judicious amount listed in our recipe), not chilling the syrup sufficiently (the thermal shock of cold syrup hitting the hot baklava is crucial for steam evaporation and crispiness), or storing it tightly sealed and/or refrigerated (you absolutely don’t want to seal in excess moisture). Always store baklava loosely covered at room temperature for optimal crispness.
- How finely-chopped should the nuts be? The ideal texture of the nuts in your baklava is largely a matter of personal preference. I personally like mine to be pretty finely-chopped, as clearly shown in the accompanying photos here. This finer texture makes it considerably easier to slice the baklava cleanly into neat pieces without crumbling and ensures a smoother eating experience. However, if you prefer a more rustic texture with a bit more chew, you are certainly welcome to chop the nuts a bit more coarsely. Just ensure they are not so large that they interfere with cutting the delicate layers.
- Should you cut baklava all the way through? Opinions can vary on this particular topic among baklava enthusiasts. I personally advocate for cutting the baklava all the way through to the bottom of the pan *before* baking. This method allows the honey syrup to soak more deeply and evenly into the very bottom layers of the pastry after baking, ensuring a deeply moist and flavorful base. However, if you prefer the honey more evenly spread throughout the layers but with a slightly less saturated bottom, you can opt to cut the baklava *almost* all the way through, just lightly scoring the bottom phyllo layer rather than severing it completely.
Baklava
- Author: Ali
- Prep Time: 1 hour
- Cook Time: 1 hour 15 mins
- Total Time: 2 hours 15 mins
- Yield: About 24 pieces
Description
This is your comprehensive, step-by-step guide to making luscious homemade baklava, featuring perfectly crispy, golden layers of phyllo pastry, a rich selection of nuts, and a fragrant citrus honey syrup. For further ingredient customization ideas, please refer to the notes section above.
Ingredients
Baklava Ingredients:
- 1 (16-ounce, approximately 40-sheet) package frozen phyllo dough, thawed to room temperature (refer to thawing instructions in the notes below)
- 1 pound of your chosen nuts (we recommend a blend of half walnuts and half pistachios for the best flavor)
- 1 teaspoon ground cinnamon
- 1 1/2 cups melted butter (clarified butter is highly recommended for superior results, see notes)
Syrup Ingredients:
- 2/3 cup honey
- 2/3 cup water
- 2/3 cup white granulated sugar
- 3 tablespoons freshly-squeezed orange juice (lemon juice can be substituted)
- 1 tablespoon orange blossom water (optional, but highly recommended for authentic flavor, see notes)
Instructions
- Thaw the phyllo dough: For optimal results, transfer the sealed package of frozen phyllo dough to your refrigerator the night before you plan to bake. On baking day, allow it to rest on the kitchen counter, still in its original packaging, at room temperature for at least 1 hour before you begin working with it. This gentle thawing process prevents the delicate sheets from tearing.
- Prepare the honey syrup: In a small saucepan, combine the honey, water, granulated sugar, and freshly squeezed orange juice. Place the saucepan over medium-high heat, stirring occasionally, until the mixture nearly reaches a gentle simmer. Once simmering, reduce the heat to medium and allow it to continue simmering for an additional 5 minutes. Remove the syrup from the heat, carefully transfer it to a heat-safe bowl, and stir in the orange blossom water if you are using it. Immediately refrigerate the syrup until it is completely chilled and ready for use.
- Finely chop the nuts: Process your chosen nuts in a food processor until they are very finely chopped. If you don’t have a food processor, you can achieve a similar fine chop by hand with a sharp chef’s knife, or by placing the nuts in a heavy-duty ziplock bag and pounding them with a mallet or rolling pin. Once chopped, pulse or stir the nuts together with the ground cinnamon until thoroughly combined. Set aside a few tablespoons of this mixture to use as a decorative topping later. Divide the remaining nut mixture into 5 equal portions, which should be roughly 3/4 cup per portion, and set them aside.
- Trim the phyllo dough: Gently unwrap the thawed phyllo sheets and carefully transfer them to a clean cutting board. Using a sharp chef’s knife, trim the stack of phyllo sheets to precisely fit the dimensions of your 9×13-inch baking dish. Discard any excess scraps. Immediately and lightly cover the trimmed stack of phyllo sheets with a damp kitchen towel to prevent them from drying out and becoming brittle.
- Arrange your assembly line: Preheat your oven to 325°F (162°C). To ensure a smooth and efficient assembly process, arrange your workstation strategically. Place your 9×13-inch baking dish prominently, followed by the bowl of melted butter (with a pastry brush handy), then the covered stack of phyllo sheets, and finally, your pre-portioned bowls of chopped nuts. Now you’re ready to begin layering!
- Butter the baking dish: Using a soft pastry brush, generously and lightly brush the entire inside surface of your baking dish with melted butter. This prevents sticking and contributes to a golden, crispy base.
- First Layer (Phyllo & Nuts): Carefully lay a single sheet of phyllo dough into the buttered baking dish. Lightly brush this sheet with melted butter – remember, it doesn’t need to be perfectly covered. Repeat this process with 9 additional sheets, brushing each lightly with butter, until you have a base of 10 buttered phyllo sheets. Evenly sprinkle approximately 1/5 of your pre-portioned nut mixture over the top of this tenth phyllo layer.
- Second Layer (Phyllo & Nuts): Follow the same procedure, layering 5 more phyllo sheets, each lightly brushed with butter. Once the fifth sheet is buttered, sprinkle another 1/5 portion of the nut mixture evenly over it.
- Third Layer (Phyllo & Nuts): Continue the pattern with 5 more phyllo sheets, lightly buttering each one, and then sprinkle another 1/5 portion of the nut mixture on top.
- Fourth Layer (Phyllo & Nuts): Repeat the layering process, adding 5 more buttered phyllo sheets, followed by another 1/5 portion of the nut mixture.
- Fifth Layer (Phyllo & Nuts): Lay down 5 more phyllo sheets, brushing each with butter, and then distribute the final 1/5 portion of your nut mixture evenly over this layer.
- Top Layer (Phyllo): For the final layer, carefully place the remaining 10 phyllo sheets into the dish, lightly brushing each one with melted butter. Once all 10 sheets are in place, generously brush any leftover melted butter over the very top surface of the baklava.
- Cut the baklava: Before baking, it is crucial to slice the baklava all the way through to the bottom of the pan using a very sharp paring knife. You can cut it into traditional diamond shapes, squares, or any desired pattern. This precise cutting allows the syrup to penetrate deeply into all layers after baking.
- Bake: Carefully transfer your baking dish to the preheated oven. Bake for approximately 1 hour and 15 minutes, or until the top layers of the baklava achieve a rich, golden-brown hue and a beautifully crispy texture. Keep an eye on it to prevent over-browning.
- Drizzle with syrup: Once baked, immediately remove the baking dish from the oven and place it on a wire cooling rack. Without delay, evenly drizzle the thoroughly chilled honey syrup over the entire surface of the piping hot baklava. You will hear a satisfying sizzle and crackle – this is exactly what you want, as it indicates the syrup is being absorbed and contributing to the crispiness. Finally, sprinkle a pinch of the reserved chopped nuts on top of each individual piece of baklava for a beautiful garnish.
- Cool to room temperature: Allow the baklava to sit uncovered on the cooling rack for a minimum of 3-4 hours, or until it has completely cooled down to room temperature. This cooling period is essential for the syrup to fully set and for the baklava to develop its ultimate crisp texture. Serve and enjoy this delightful treat! Storage instructions are provided below.
Equipment
Pistachios
Buy Now →
Orange Blossom Water
Buy Now →
Pastry Brush
Buy Now →
Notes
Layering Checklist: To help you stay organized and ensure a perfectly balanced baklava during assembly, here’s a simplified breakdown of the phyllo and nut layers:
- 10 phyllo sheets + 1/5 nuts
- 5 phyllo sheets + 1/5 nuts
- 5 phyllo sheets + 1/5 nuts
- 5 phyllo sheets + 1/5 nuts
- 5 phyllo sheets + 1/5 nuts
- 10 phyllo sheets (top layer)
How to thaw frozen phyllo dough: For the absolute best and easiest handling of phyllo dough, remove the *sealed* package from its cardboard box and allow it to thaw slowly in the refrigerator overnight. Once removed from the fridge, let the sealed package rest on your kitchen countertop at room temperature for an additional hour before you begin working with it. This gentle thawing process is crucial to prevent the delicate sheets from tearing. For a quicker thaw, you can leave the sealed package on the countertop for 2-3 hours until it’s no longer frozen but still cool. It is strongly advised *not* to defrost phyllo dough in the microwave, as this can severely alter its delicate texture and make it extremely difficult to separate the sheets.
Clarified vs. Unclarified Butter: You have the option to use either clarified butter (also known as ghee) or regular melted butter for this recipe. However, using clarified butter offers several distinct advantages: it ensures more even browning, contributes to a superiorly crispier texture, and typically extends the shelf life of your finished baklava. You can purchase clarified butter ready-made from many grocery stores or easily make it yourself at home. If you choose to use regular (unclarified) butter, simply melt a few sticks and be sure to regularly whisk the butter vigorously during the assembly process to prevent the milk solids and water from separating, ensuring you apply an even consistency to each delicate layer.
Orange Blossom Water: Its flavor is quite potent and distinctly floral, so we recommend starting with 1 or 2 teaspoons and then adding more to taste if desired, especially if you’re new to this ingredient. Alternatively, you could experiment with delicate rose water, or a delightful blend of both. If you cannot source orange blossom or rose water, feel free to omit them entirely from the syrup; your baklava will still be wonderfully delicious, though with a slightly different aromatic profile.
Storage instructions: To maintain the optimal crispiness and flaky texture of your homemade baklava, it’s best stored at room temperature. Place it in a baking dish or a food storage container that is loosely covered – avoid airtight seals, as these can trap moisture and cause the phyllo to soften. A sheet of aluminum foil lightly draped over the dish, or a clean kitchen towel, works perfectly. Stored this way, baklava will typically retain its quality for between 8-10 days at room temperature, but it will be at its absolute crispiest and most delicious during the first 5 days. Refrigeration is possible, but please note that it will significantly reduce its crispness and may alter the texture.
Source: This cherished baklava recipe has been thoughtfully adapted and refined from a wonderful guide found on Natasha’s Kitchen, a reliable source for delicious culinary creations.