
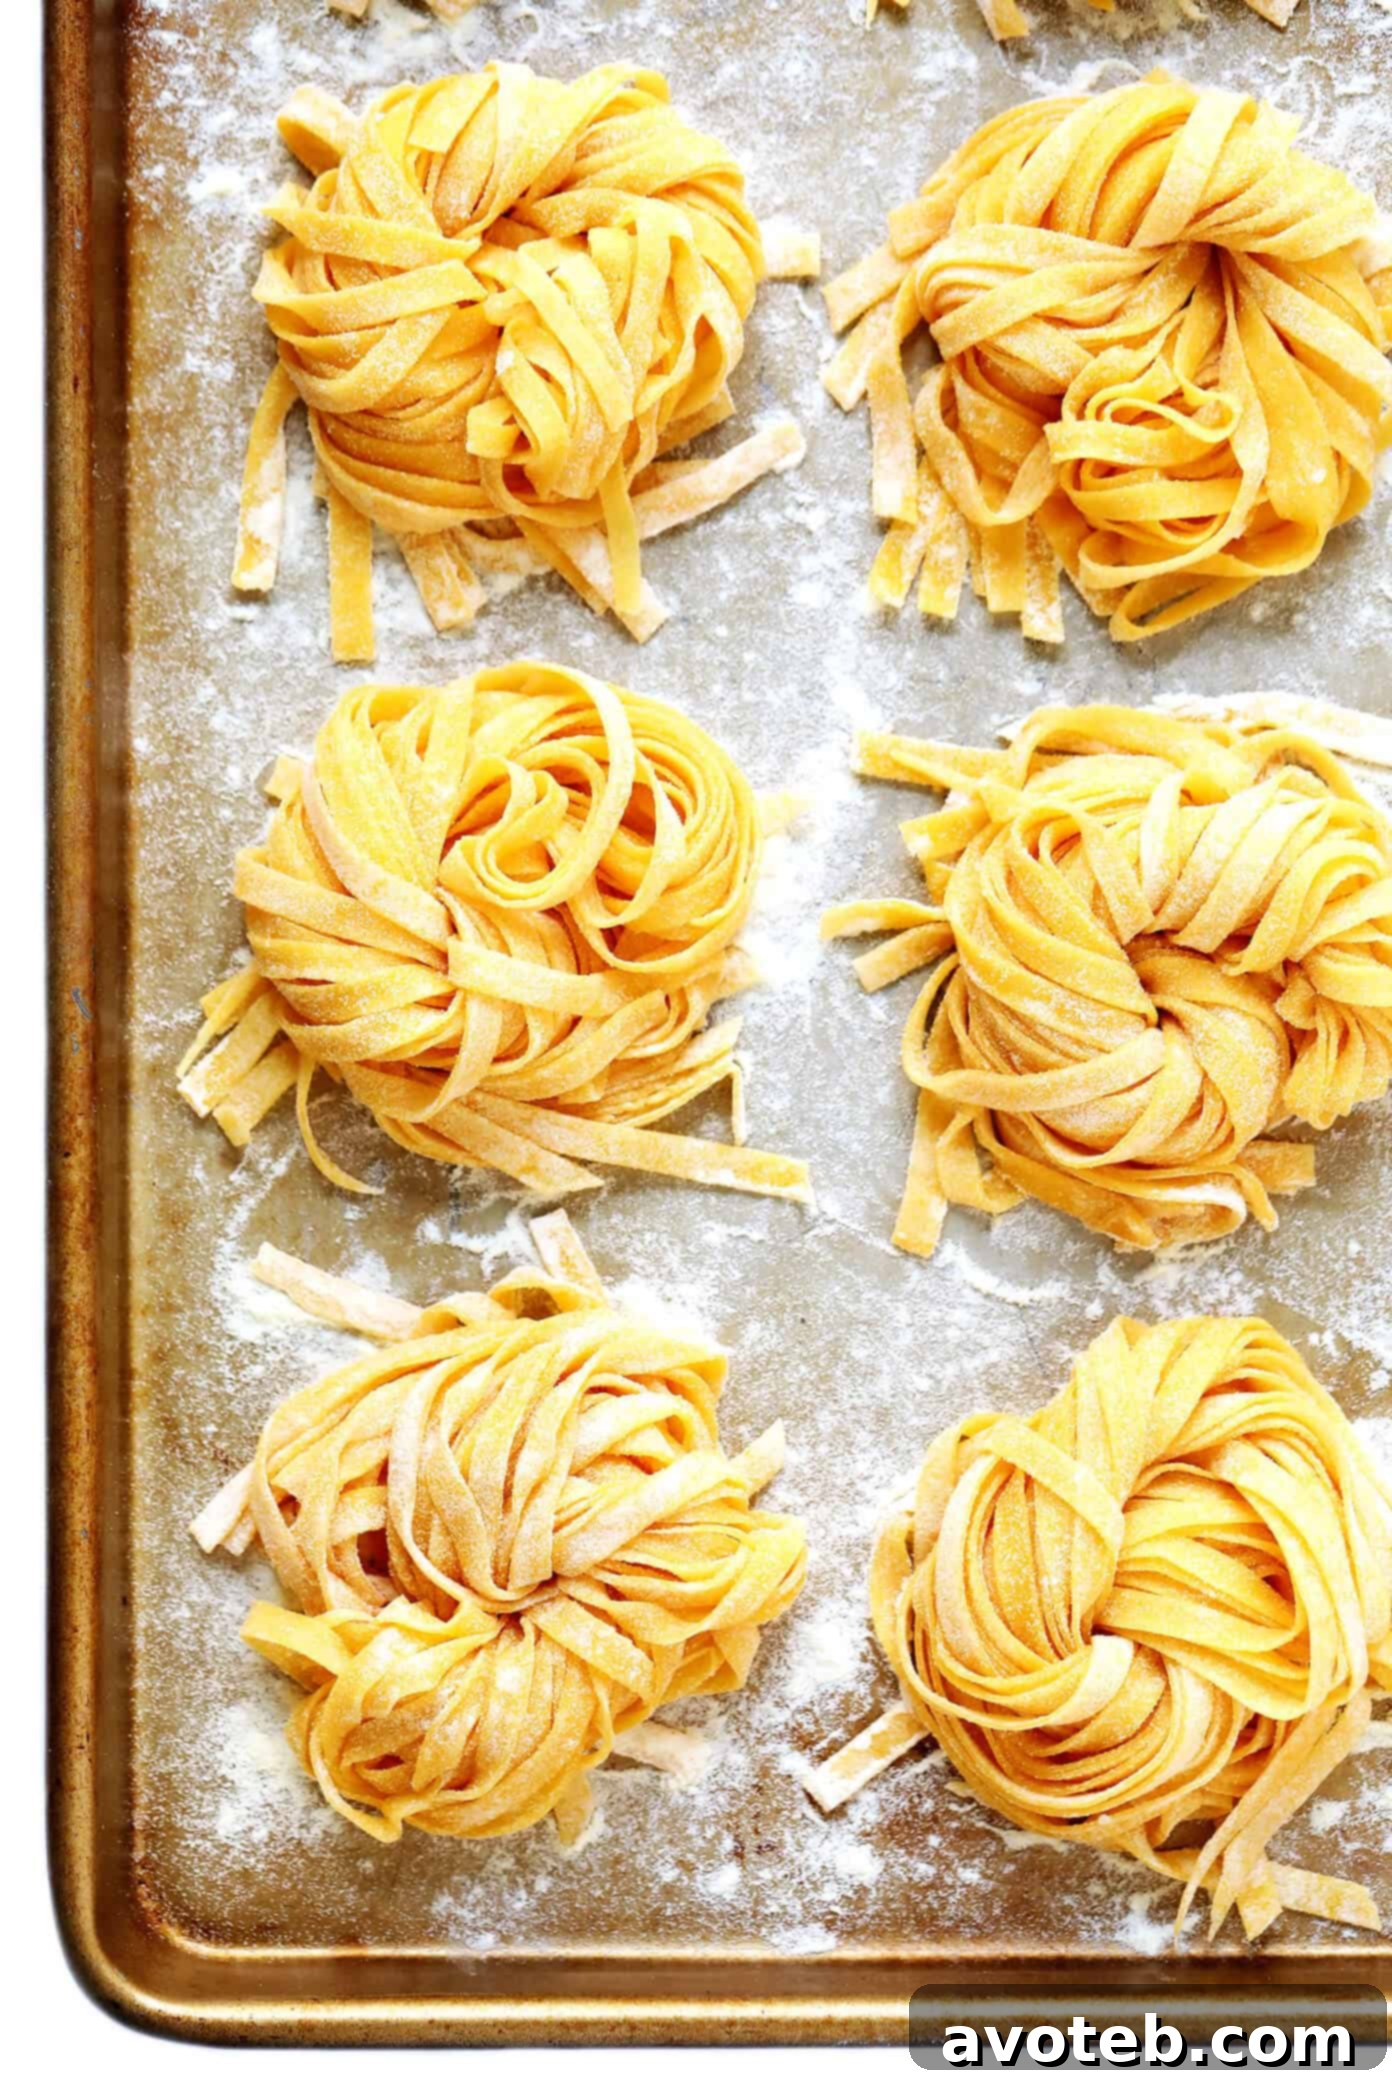
Discover the joy of homemade pasta with this incredibly easy 4-ingredient recipe. Master the art of crafting fresh pasta by hand, in a stand mixer, or with a food processor, complemented by expert tips on rolling techniques using a pasta maker or a simple rolling pin.
The Irresistible Allure of Homemade Pasta: A Culinary Journey
There’s a certain magic that happens when you create something from scratch, especially in the kitchen. For me, that magic has recently taken the form of homemade pasta, and I must confess, I’m utterly enchanted. The journey began on a memorable trip to the sun-drenched Amalfi Coast, a place where every meal felt like a celebration of simple, fresh ingredients. My partner, Barclay, and I returned home with a shared mission: to infuse our kitchen with the authentic flavors of Italy. While he embarked on perfecting homemade mozzarella, I plunged headfirst into the delightful world of fresh pastas, gnocchis, and artisan breads. I even broke my self-imposed rule against new kitchen gadgets while abroad, bringing home an adorable traditional pasta maker and a charming wooden drying rack, eager to turn our pasta dreams into reality.
What I discovered was beyond my expectations: homemade pasta is not just delightful, it’s surprisingly easy, incredibly delicious, and immensely fun! The process of making the fresh pasta dough is remarkably straightforward. With a food processor, you can have a perfect dough in under 5 minutes. Even without one, using a stand mixer or your own two hands, the dough comes together beautifully in less than 15 minutes. Rolling out the noodles, especially with the help of a pasta maker, also proved to be far less intimidating than I imagined. I’ve since become quite adept with my little pasta maker, but don’t worry, I’ve also included comprehensive instructions for hand-rolling and using a stand mixer attachment.
Part of the adventure has been experimenting with different pasta flours, uncovering their unique qualities and finding my favorites for various dishes. While “00” flour remains my go-to for its silky texture, I sometimes blend it with semolina for heartier pasta shapes and sauces that demand a bit more bite. But above all, the sheer pleasure of *eating* fresh pasta is unparalleled. Its distinct chewiness and vibrant freshness elevate even the simplest dishes, transforming everyday favorites like Cacio e Pepe into extraordinary culinary experiences.
Beyond the plate, homemade pasta offers so much more. Imagine inviting friends over on a Friday night, sharing a bottle of rosé, and together, rolling out batches of golden noodles, filling the kitchen with laughter and warmth. Or the convenience of having leftover linguine in the fridge, ready for a quick, wholesome weeknight dinner. And there’s a special joy in sharing: surprising friends and neighbors with quaint little nests of fresh pasta, lovingly crafted and ready to cook. Our sunny living room window now often features fresh pappardelle casually draped, drying to perfection, a charming testament to our newfound passion. This journey has brought immense joy, and if you, like me, appreciate truly exceptional pasta, I have a feeling this will become your new favorite culinary pursuit.
Your Guide to Perfect Homemade Pasta
To continue our celebration of Italian cuisine, I’m excited to share everything I’ve learned about crafting truly delicious homemade pasta. My aim is to provide methods and options that suit every kitchen setup, ensuring that anyone can embark on this rewarding journey. So, delve into these tips, choose the method that best fits your style, and please share your experiences – I would absolutely love to hear how your homemade pasta adventure unfolds!
Essential Ingredients for Your Homemade Pasta
Before we dive into the step-by-step recipe, let’s explore the four fundamental ingredients you’ll need to create a pound of classic, exquisite egg pasta. The quality of these simple components is key to a superior end product.
- Flour: The Foundation of Flavor and Texture
Your choice of flour significantly impacts the texture of your pasta. I have a strong preference for “00” flour, renowned for creating the silkiest, most delicate noodles. However, for heartier sauces or shapes that require a more robust structure, I often opt for a 50/50 blend of “00” and semolina flour. Semolina, with its coarser grind and higher protein content, lends a delightful chewiness and helps sauces cling beautifully. Rest assured, any of these flours, or a combination thereof, will yield excellent results with this recipe:
- “00” Flour: This finely milled Italian flour is my top choice for its ability to produce incredibly smooth and tender pasta, a true luxury for the palate.
- Semolina Flour: Ideal for adding a rustic texture and firmer bite. It’s also excellent for dusting your work surface and pasta to prevent sticking during rolling and drying.
- All-Purpose Flour: A versatile and readily available option that performs commendably if you don’t have specialized flours on hand.
- Eggs: The Binder and Enhancer
This recipe calls for four large eggs, which are crucial for both binding the dough and enriching its flavor and color. Room temperature eggs are often preferred as they incorporate more easily into the flour, resulting in a smoother, more cohesive dough.
- Olive Oil: For Suppleness and Subtle Flavor
A tablespoon of good quality olive oil adds elasticity to the dough, making it more pliable and easier to work with. It also contributes a subtle, desirable flavor. If your dough feels too dry during mixing, a few additional teaspoons of water can be added gradually to achieve the right consistency.
- Sea Salt: A Flavor Essential
We incorporate a teaspoon of fine sea salt directly into the pasta dough to enhance its taste. Furthermore, it’s vital to generously salt your pasta water when cooking – this is where much of the pasta’s final seasoning comes from.
Essential Equipment for Homemade Pasta Making
Whether you’re a minimalist cook or a gadget enthusiast, there’s a method for you. You can make this pasta entirely by hand with just a few basic tools. However, if you’re looking to streamline the process, certain appliances can make the journey even smoother.
- For Dough Preparation:
- Food Processor: My absolute favorite method for speed and ease. It whips up the dough in minutes. You’ll need a food processor fitted with its standard blade.
- Stand Mixer: Another excellent option, especially if you plan to use a pasta roller attachment. A stand mixer with a dough hook makes kneading effortless.
- By Hand: No special equipment needed here, just a large clean surface (like a cutting board), your hands, and perhaps a fork and bench scraper.
- For Rolling and Shaping Pasta:
- Rolling Pin and Knife: The traditional way to roll out and cut pasta sheets. This method is incredibly satisfying and requires no special machinery.
- Manual Pasta Maker: I personally recommend the Atlas 150 pasta maker. It’s robust, reliable, and makes achieving consistent thickness a breeze.
- Stand Mixer Pasta Roller Attachment: If you own a KitchenAid stand mixer, their pasta roller attachment is a fantastic investment, transforming your mixer into a pasta-making powerhouse.
- Pasta Drying Rack: While optional, a wooden pasta drying rack is incredibly helpful for preventing noodles from sticking together while they dry, and it adds a charming, rustic touch to your kitchen.
Crafting Your Pasta Dough: Three Convenient Methods
Achieving the perfect pasta dough is the first step to incredible homemade noodles. Here, I’ll detail three methods, allowing you to choose the one that best suits your kitchen and preferences.
Method 1: Making Pasta Dough in a Food Processor (My Favorite!)
This is by far the quickest and easiest method, making homemade pasta accessible even on busy days.
- Add all four ingredients – flour, eggs, olive oil, and sea salt – to the bowl of a food processor fitted with its normal blade attachment.
- Pulse for about 10-15 seconds, or until the mixture transforms into a coarse, crumbly texture resembling fine breadcrumbs. Avoid over-processing, as you don’t want to create a sticky ball in the processor.
- Transfer the crumbly dough mixture onto a lightly-floured clean cutting board or work surface. Gather the dough with your hands and gently pat it into a cohesive ball.
- Knead the dough by hand for 1-2 minutes. The goal is to achieve a smooth, elastic texture. If the dough feels too dry and isn’t coming together, add a tablespoon or two of water, one at a time. Conversely, if it’s too wet or sticky, incorporate a small amount of extra flour. The ideal consistency is firm but pliable, slightly drier than you might expect for bread dough.
- Once smooth, shape the dough into a tight ball, wrap it securely in plastic wrap to prevent drying, and let it rest at room temperature for at least 30 minutes. This resting period is crucial as it allows the gluten to relax, making the dough much easier to roll out. The dough can be used immediately after resting or refrigerated for up to 1 day.
Method 2: Making Pasta Dough in a Stand Mixer
This method offers convenience, especially if you plan to use a stand mixer pasta roller attachment later.
- Combine all your ingredients (flour, eggs, olive oil, sea salt) in the bowl of a stand mixer.
- Attach the dough hook. Mix and knead the dough on low speed for 8-10 minutes. During this time, the dough will gradually transform from a shaggy mixture to a smooth, elastic, and slightly firm ball.
- As with the food processor method, monitor the dough’s consistency. If it appears too dry, add a tablespoon or two of water. If it’s sticky, add a little extra flour. The dough should be relatively dry but not crumbly.
- Form the kneaded dough into a ball, wrap it tightly in plastic wrap, and allow it to rest at room temperature for 30 minutes. This rest is essential for gluten development and easier rolling. Use immediately or refrigerate for up to 1 day.
Method 3: Making Pasta Dough By Hand (The Traditional Way)
Embrace the true artisan spirit by making your pasta dough entirely by hand – a rewarding and meditative process.
- On a large, clean cutting board or work surface, mound the flour into a neat pile.
- Using your fingers or a spoon, create a spacious well in the center of the flour mound, much like a volcano crater. This well will hold the wet ingredients.
- Crack the eggs directly into the center of the well. Sprinkle the sea salt over the eggs and drizzle the olive oil on top.
- Using a fork, gently begin whisking the eggs in the center. As they combine, gradually incorporate small amounts of the surrounding flour into the egg mixture. Continue this process, bringing more and more flour into the center, until the mixture becomes a thick, paste-like consistency. Don’t worry if a little egg escapes the well; simply use your hands or a bench scraper to pull it back in.
- Once the mixture is thick, ditch the fork and use your hands to fully incorporate the remaining flour, folding and pressing until a loose dough ball forms.
- Now for the kneading: Knead the dough vigorously for about 10 minutes. Use the heel of your hand to push the dough away from you, fold it over, rotate, and repeat. This action develops the gluten, resulting in a smooth, elastic, and strong dough. Dust your work surface with extra flour if the dough becomes sticky, or add a tiny bit of water if it’s too dry. The final dough should be firm but supple.
- Form the dough into a ball, wrap it tightly in plastic wrap, and let it rest at room temperature for 30 minutes. This resting period is non-negotiable for tender, pliable pasta. Use immediately or refrigerate for up to 1 day.
Rolling and Shaping Your Fresh Pasta: Achieving Perfect Noodles
Once your dough has rested and the gluten has relaxed, it’s time for the truly satisfying part: rolling it into thin sheets and shaping it into beautiful pasta. Remember, regardless of the method, dust your surfaces generously with semolina flour to prevent sticking.
Rolling Fresh Pasta with a Manual Pasta Maker
My preferred method, offering consistency and ease.
- After the 30-minute rest, unwrap your dough and place it back on a lightly floured cutting board. Using a knife, divide the dough into four equal wedges. Immediately re-wrap three of the wedges in plastic wrap to prevent them from drying out while you work on the first.
- Lightly flour your work surface or a large baking sheet and set it aside for your finished pasta.
- Take one dough wedge and flatten it into an oval-shaped disc with your hands.
- Feed this disc through your pasta maker on its widest setting (usually setting number 1).
- Once the sheet emerges, fold it into thirds, much like you would fold a letter to fit into an envelope. Pass it through the widest setting again, 2 or 3 more times. This helps to further develop the gluten and create a perfectly smooth sheet.
- Now, begin gradually reducing the roller settings, one pass at a time, feeding the dough through each setting until it reaches your desired thickness. I typically aim for setting 6 on my pasta maker, which yields a delicate yet sturdy noodle. If the dough starts to feel sticky, dust both sides with a little flour. If the sheet becomes too long to manage, simply cut it in half.
- Once your dough sheet is at the desired thickness, sprinkle it lightly with flour one last time. Attach the cutter attachment of your choice (spaghetti, fettuccine, etc.) to your pasta maker.
- Feed the pasta sheet through the cutter to create your desired pasta shape.
- Gently transfer the cut pasta to your drying rack or swirl it into individual “nests” and lay them on a semolina-dusted surface to dry for at least 30 minutes before cooking. Repeat the process with the remaining dough wedges.
Rolling Fresh Pasta with a Stand Mixer Attachment
This method offers the convenience of electric power, making it a breeze.
- The process is very similar to using a manual pasta maker, but with the added benefit of not having to crank a handle! Attach the pasta roller attachment to your stand mixer.
- Set the adjustment knob to the widest setting.
- Shape and feed your dough wedges into the roller, following steps 3-6 from the manual pasta maker instructions above, gradually reducing the thickness settings until your pasta sheet is perfect. Lightly flour the pasta as needed to prevent sticking.
- Once the sheet reaches your desired thinness, sprinkle it with flour once more. Remove the roller attachment and connect your chosen cutter attachment (e.g., fettuccine, spaghetti).
- Feed the pasta sheet through the cutter to create your noodles.
- Transfer the cut pasta to a drying rack or form small nests on a floured surface, allowing them to dry for 30 minutes before cooking. Repeat with the remaining dough.
Rolling Fresh Pasta By Hand with a Rolling Pin
The most traditional and empowering method, requiring patience and a bit of elbow grease.
- Take one dough wedge and flatten it into an oval-shaped disc, as described in previous methods.
- Transfer the disc to a well-floured cutting board. Using a sturdy rolling pin, begin rolling out the dough. Start from the center and roll outwards, rotating the dough frequently to ensure even thickness. Your goal is to achieve a very thin sheet, generally between 1-2 mm thick. Continue adding flour to your board as needed to prevent sticking. A good test for thickness: you should be able to faintly see your hand through the dough when you gently lift it.
- Once you have a large, thin sheet, use a pizza cutter or a sharp knife to slice the dough into roughly 5-inch sections.
- Lightly dust each section with a bit of extra flour. Then, starting from one of the shorter sides, loosely roll each section into a flat cylinder.
- Using your knife, cut the rolled cylinders cross-wise to create your desired width of noodles (e.g., thin strips for tagliolini, wider for fettuccine).
- Unfurl the cut noodles and transfer them to a drying rack, or twirl them into cute little pasta “nests” and arrange them on a floured surface to dry for 30 minutes before cooking. Repeat this process with the remaining dough wedges.
How to Cook Fresh Homemade Pasta
Cooking fresh pasta is a swift affair, very different from its dried counterpart. Pay close attention to ensure perfect al dente results!
- Bring a large stockpot of generously-salted water to a vigorous rolling boil over high heat. The water should taste like the sea.
- Add your fresh pasta to the boiling water. Immediately and gently stir the noodles to prevent them from sticking together.
- Continue to cook until the pasta is al dente. This happens *much* faster than with dried pasta, so keep a very close eye on it! The cooking time will vary depending on the thickness and shape of your pasta. For noodles rolled to setting 6 on my pasta maker, it typically takes about 90 seconds. Thicker shapes might take up to 3-5 minutes.
- Once cooked to your liking, drain the fresh pasta thoroughly and serve immediately with your favorite sauce.
How to Store Fresh Pasta
Proper storage ensures your homemade pasta stays fresh and delicious for future meals.
- Before storing, allow your freshly cut pasta to air out on a drying rack or a baking sheet dusted with semolina flour for at least 30 minutes, and up to 2 hours. This prevents sticking and helps them hold their shape.
- For Refrigeration: Transfer the partially dried pasta to an airtight container. It will keep well in the refrigerator for up to 2 days.
- For Freezing: For longer storage, freeze the pasta. Arrange the nests or strands on a baking sheet and flash-freeze for about 15-20 minutes until firm. Then, transfer the frozen pasta to an airtight freezer bag or container. It can be stored in the freezer for up to 2 weeks.
- To Cook Frozen Pasta: There’s no need to thaw! Simply add the frozen pasta directly to boiling salted water. It may take an extra minute or two to cook compared to fresh, but still much quicker than dried pasta.
Delicious Recipes to Pair with Your Fresh Pasta
Now for the most exciting part: enjoying the fruits of your labor! Fresh pasta elevates almost any dish. Feel free to explore our extensive pasta archives for inspiration, but here are some of my all-time favorite recipes that truly shine with homemade noodles:
- Cacio e Pepe (pictured above) – The ultimate test for fresh pasta, where its texture is truly the star.
- Pasta Carbonara – The rich sauce beautifully coats homemade spaghetti.
- Pasta Marinara – A classic, simple sauce that lets the freshness of the pasta sing.
- Pasta Arrabbiata – The robust and spicy sauce clings perfectly to fresh noodles.
- Pasta Aglio e Olio – A simple yet profound dish, ideal for showcasing delicate homemade pasta.
- Fettuccine Alfredo – Creamy, decadent, and utterly divine with fresh fettuccine.
Print Recipe
Homemade Pasta
My favorite 4-ingredient homemade pasta recipe — easy to make by hand, in a mixer, or in a food processor. See tips above for how to roll the pasta out either by hand, with a pasta maker, or with a stand mixer.
Details
- Prep Time: 58 minutes
- Cook Time: 2 minutes
- Total Time: 60 minutes
- Yield: 1 pound fresh pasta
Ingredients
- 4 large eggs (room temperature)
- 2 1/2 cups flour (“00” flour, semolina flour, all-purpose flour — or a blend)
- 1 tablespoon olive oil
- 1 teaspoon fine sea salt
Instructions
How To Make Pasta In A Food Processor:
- Add all ingredients to the bowl of a food processor, fitted with the normal blade attachment. Pulse for about 10 seconds, or until the mixture reaches a crumbly texture.
- Remove the dough and form it into a ball with your hands, then place the dough on a lightly-floured cutting board. Knead the dough for 1-2 minutes until it is smooth and elastic. (If the dough seems too dry, add an extra tablespoon or two of water. If the dough seems wet or sticky, add some extra flour, but aim for a fairly dry dough.)
- Form the dough into a ball with your hands and wrap it tightly in plastic wrap. Let the dough rest at room temperature for 30 minutes. Use immediately or refrigerate for up to 1 day.
- Roll out the pasta dough into your desired shape, either by hand or using a pasta maker (see detailed instructions above). Cook the pasta in a large pot of generously-salted boiling water until it is al dente, usually between 1-5 minutes depending on the thickness of your pasta. Drain and use immediately.
How To Make Pasta In A Stand Mixer:
- Add all ingredients to the bowl of a stand mixer, fitted with the dough hook. Knead the dough on low speed for 8-10 minutes until it is smooth and elastic. (If the dough seems too dry, add an extra tablespoon or two of water. If the dough seems wet or sticky, add some extra flour, but aim for a fairly dry dough.)
- Form the dough into a ball with your hands and wrap it tightly in plastic wrap. Let the dough rest at room temperature for 30 minutes. Use immediately or refrigerate for up to 1 day.
- Roll out the pasta dough into your desired shape, either by hand or using a pasta maker (see detailed instructions above). Cook the pasta in a large pot of generously-salted boiling water until it is al dente, usually between 1-5 minutes depending on the thickness of your pasta. Drain and use immediately.
How To Make Pasta By Hand:
- Place the flour in a mound on a large cutting board. Use your fingers or a spoon to create a good-sized well in the middle of the flour mound. Add the eggs in the center of the well. Sprinkle the salt and drizzle the olive oil on top of the eggs.
- Use a fork to begin whisking the eggs until combined. Then gradually whisk some of the surrounding flour into the egg mixture, adding more and more until the egg mixture is thick. Use your hands to fold in the rest of the dough until it forms a loose ball. Knead the dough for about 10 minutes or until it is smooth and elastic, sprinkling some extra flour on the cutting board if needed to prevent sticking or if the dough seems too wet or sticky. (If the dough seems too dry, add an extra tablespoon or two of water, but aim for a fairly dry dough.)
- Form the dough into a ball with your hands and wrap it tightly in plastic wrap. Let the dough rest at room temperature for 30 minutes. Use immediately or refrigerate for up to 1 day.
- Roll out the pasta dough into your desired shape, either by hand or using a pasta maker (see detailed instructions above). Cook the pasta in a large pot of generously-salted boiling water until it is al dente, usually between 1-5 minutes depending on the thickness of your pasta. Drain and use immediately.
Equipment
Here are some recommended tools to help you on your pasta-making journey:
- Semolina Flour
- “00” Flour
- Pasta Maker
Notes
Flour: As mentioned in the post above, I most often make homemade pasta with “00” flour, which yields the silkiest pasta. But if I am making a sauce that is a bit more hearty, I will use half “00” and half semolina flour, which yields a pasta that is a bit more sturdy and also helps the sauce to cling to the pasta better. That said, any of the three flour options listed above will work well.