
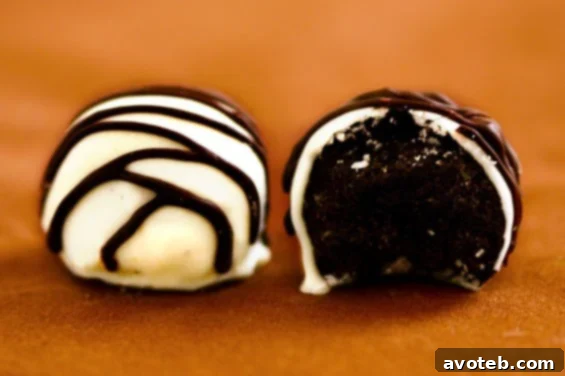
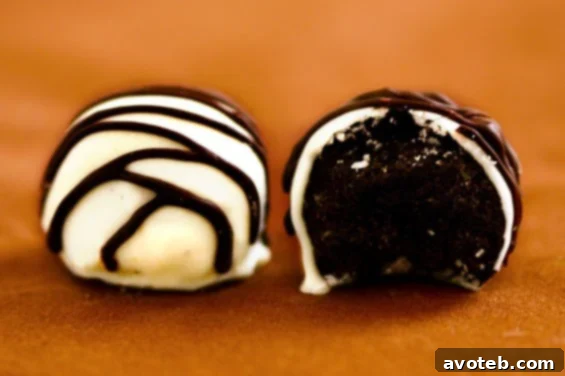
As the festive season rolls in, or indeed, any time you crave a simple yet sensational sweet treat, few desserts capture hearts quite like homemade Oreo Truffles. Often affectionately known as “Snowballs” or “Dirty Snowballs,” these delightful confections are an absolute marvel for their incredible taste, minimal ingredients, and effortless preparation. Forget complicated baking projects; these truffles are a testament to how three simple ingredients—Oreos, cream cheese, and chocolate—can combine to create pure magic. They are universally loved, making them a perennial crowd-pleaser at parties, potlucks, and holiday gatherings. If you’re looking for a dessert that’s quick to assemble, requires no baking, and delivers maximum flavor, your search ends here. This recipe isn’t just about making a dessert; it’s about crafting an experience—a bite-sized burst of chocolatey, creamy goodness that leaves everyone asking for more.
The beauty of Oreo Truffles lies in their deceptive simplicity. You don’t need to be a seasoned baker to master these. In fact, their straightforward nature makes them an ideal project for getting kids involved in the kitchen. Imagine the joy of little hands crushing cookies, rolling dough into perfect spheres, and watching them transform into elegant, chocolate-dipped delights. They are not only a delicious indulgence but also remarkably versatile, offering endless possibilities for customization to suit any palate or occasion. Whether you stick to the classic dark chocolate coating or explore vibrant variations with white chocolate, sprinkles, or different Oreo flavors, these truffles are guaranteed to impress. Prepare to elevate your dessert game with this fail-proof recipe that promises delicious results every single time. Get ready to dive into the world of irresistible Oreo Truffles and discover why they continue to be a cherished favorite for so many!
Why These Oreo Truffles Are a Must-Try
Oreo truffles hold a special place in the pantheon of easy desserts, and for very good reasons. They offer a unique combination of rich flavor, delightful texture, and unparalleled convenience. Here’s why this recipe should be at the top of your list for your next sweet craving or party:
- Effortless Preparation: No oven required! This is a true no-bake wonder. With just a food processor (or a sturdy Ziploc bag and a rolling pin), you can transform Oreos into a fine crumb, mix it with cream cheese, and get ready for dipping. It’s perfect for busy schedules or when you simply don’t want to heat up your kitchen.
- Minimal Ingredients: You only need three core ingredients: a package of your favorite Oreo cookies, a block of cream cheese, and a delicious chocolate coating. Simple pantry staples result in a gourmet-tasting treat.
- Crowd-Pleasing Flavor: The combination of crunchy chocolate cookie crumbs and tangy, smooth cream cheese, all enveloped in a sweet chocolate shell, is simply irresistible. This flavor profile appeals to almost everyone, from kids to adults, making it an undeniable hit at any gathering.
- Versatility Galore: While the classic recipe is fantastic, Oreo truffles are incredibly adaptable. You can experiment with different Oreo flavors (mint, peanut butter, golden), various chocolate coatings (dark, milk, white, colored candy melts), and a plethora of toppings (sprinkles, nuts, shredded coconut, cocoa powder). This means you can create a unique batch every time!
- Perfect for Gifting and Parties: These bite-sized beauties are not just delicious; they are also visually appealing. Stack them in decorative boxes for thoughtful homemade gifts or arrange them on a platter for an elegant dessert display. Their portability and ease of eating make them ideal party food.
- Kid-Friendly Activity: This recipe is fantastic for involving younger helpers. Mashing cookies (safely!), rolling the truffle mixture into balls, and even decorating are fun tasks that kids can easily assist with, fostering a love for cooking and baking.
Once you try making these Oreo Truffles, you’ll understand why they consistently earn rave reviews. They are the epitome of simple elegance and decadent flavor, proving that sometimes, the best desserts are the ones that are the easiest to make.
Print Recipe

Classic Oreo Truffles (Snowballs) Recipe
Prep Time: 25 minutes
Chill Time: 60 minutes (or 15 min freezer)
Total Time (Active + Chill): Around 1 hour 30 minutes
Yield: 25 –30 delectable truffles 1x
Description: An Unforgettable No-Bake Treat
Prepare to fall in love with these incredibly simple yet utterly delicious Oreo Truffles, also known as “Snowballs.” This no-bake recipe combines the iconic flavor of Oreo cookies with rich cream cheese, all coated in a smooth layer of chocolate. Perfect for parties, gifting, or a delightful treat anytime, these visually appealing truffles are quick to make, requiring minimal effort but delivering maximum indulgence. A true crowd-pleaser that’s both fun to create and an absolute joy to devour!
Ingredients: The Core of Your Delectable Truffles
Scale
- 1 (16 oz.) package Oreo cookies (classic chocolate sandwich cookies, or try your favorite flavor like mint or peanut butter for a twist)
- 1 (8 oz.) package full-fat cream cheese, softened to room temperature (this is crucial for a smooth mix)
- 1 (24 oz.) package white almond bark, or good-quality white chocolate chips (for a classic ‘snowball’ look)
- Optional: 1-2 tablespoons shortening (like Crisco) or coconut oil, for thinning out the chocolate coating if needed.
- Optional: 1 cup semi-sweet chocolate chips for drizzling (or milk/dark chocolate for contrast)
Step-by-Step Instructions for Perfect Oreo Truffles
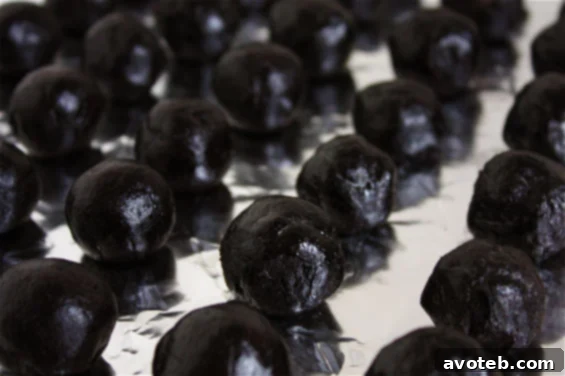
- Prepare the Oreo-Cream Cheese Base: Begin by combining the entire package of Oreo cookies (no need to remove the cream filling!) with the softened cream cheese in a food processor. Process until the mixture is thoroughly blended and forms a thick, uniform dough. The cream cheese should be at room temperature to ensure a smooth, lump-free consistency. If you don’t own a food processor, no worries! You can place the Oreos in a large, sturdy Ziploc bag and crush them into fine crumbs using a rolling pin or the bottom of a heavy pan. Once finely crushed, transfer the crumbs to a mixing bowl and use a spatula or your hands to thoroughly incorporate the softened cream cheese until a cohesive dough forms. Remove the dough from the processor or bowl, and then, using your hands, shape it into small, uniform balls, approximately 1 inch (2.5 cm) in diameter. Consistency in size helps with even chilling and dipping. Arrange the shaped balls on a parchment paper-lined baking sheet.
- Chill for Firmness: Once all the truffle balls are formed, it’s crucial to chill them until they are firm. Place the baking sheet with the truffle balls into the refrigerator for at least 1 hour. This chilling step is vital as it prevents the truffles from melting and disintegrating when dipped into the warm chocolate coating, ensuring a smooth and neat finish. If you’re short on time, you can place them in the freezer for about 15-20 minutes for a quicker firming process. While the truffles are chilling, you can prepare your chocolate coating.
- Melt the Chocolate Coating: While your Oreo balls are chilling, melt the white almond bark or good-quality white chocolate chips. You can do this using a double boiler for gentle, even melting, or carefully in the microwave. If using the microwave, heat in 30-second intervals, stirring well after each interval, until smooth and completely melted. Be cautious not to overheat the chocolate, as this can cause it to seize. If the melted chocolate appears too thick for dipping, feel free to stir in a tablespoon or two of shortening (like Crisco) or coconut oil. This will thin out the chocolate, making it easier to work with and ensuring a thinner, smoother coating on your truffles.
- Dip the Truffles: Once the truffles are thoroughly chilled and firm, and your chocolate coating is perfectly melted and smooth, it’s time to dip! Drop each truffle ball one at a time into the melted chocolate. Use a fork (preferably a dipping fork or a regular dinner fork with slightly wider tines) to carefully lift the truffle out of the chocolate. Gently tap the fork against the side of the bowl to allow any excess chocolate to drip off, ensuring a neat and even coating. Immediately transfer the dipped truffle to a fresh sheet of wax paper or parchment paper to set. Repeat this process with all the remaining truffle balls.
- Optional Chocolate Drizzle & Decoration: For an extra touch of elegance and flavor, consider adding a chocolate drizzle. Melt 1 cup of semi-sweet, milk, or dark chocolate chips using the microwave or a double-boiler. Once melted and smooth, you have several options for application:
- Pastry Bag Method: Spoon the melted chocolate into a pastry bag fitted with a very small, round tip. Pipe fine lines or your favorite pattern over the set truffles.
- Ziploc Bag Method: Alternatively, spoon the melted chocolate into a small Ziploc bag, seal it tightly, and then snip a tiny hole in one of the bottom corners. Use this improvised piping bag to drizzle chocolate over the truffles.
- Fork Drizzle Method: For a rustic yet charming look, simply dip a clean fork into the melted chocolate mixture and wave it back and forth over the truffles, creating delicate, artful drizzles.
You can also decorate the truffles with sprinkles, crushed nuts, shredded coconut, or a dusting of cocoa powder before the chocolate coating fully sets, if desired.
- Allow to Set and Serve: Let the chocolate-dipped truffles set completely at room temperature or in the refrigerator. Once the chocolate coating is firm, your delightful Oreo Truffles are ready to be enjoyed!
Creative Variations to Elevate Your Oreo Truffles
One of the most exciting aspects of Oreo truffles is their incredible adaptability. While the classic recipe is undeniably perfect, don’t hesitate to experiment and create unique versions that will surprise and delight your guests. Here are some inspiring ideas for variations and customizations:
- Oreo Flavor Adventures:
- Mint Oreo Truffles: Use Mint Oreos for a refreshing twist, and consider adding a drop of peppermint extract to the cream cheese mixture. A dark chocolate coating would complement this beautifully.
- Peanut Butter Oreo Truffles: Substitute regular Oreos with Peanut Butter Oreos, or even mix in a tablespoon of smooth peanut butter with the cream cheese. Dip in milk chocolate for a Reese’s-like experience.
- Golden Oreo Truffles: For a lighter, vanilla-based flavor, use Golden Oreos. White chocolate coating is a natural pairing, perhaps with a dash of almond extract.
- Seasonal Oreos: Keep an eye out for seasonal Oreo flavors like Red Velvet, Birthday Cake, or Pumpkin Spice to create themed truffles for holidays or special occasions.
- Diverse Chocolate Coatings:
- Dark Chocolate: For a more intense, less sweet flavor, dip your truffles in good quality dark chocolate.
- Milk Chocolate: A classic choice that offers a creamy, familiar sweetness.
- Colored Candy Melts: Perfect for themed parties (think pink for Valentine’s, green for St. Patrick’s Day, or blue for baby showers).
- Compound Chocolate: Often easier to work with than true chocolate, as it doesn’t require tempering.
- Exciting Toppings and Garnishes:
- Sprinkles: Rainbow sprinkles, chocolate sprinkles, or themed sprinkles for any holiday.
- Crushed Nuts: Finely chopped pecans, walnuts, almonds, or pistachios add a delightful crunch.
- Shredded Coconut: Toasted or untoasted, coconut flakes bring a tropical touch.
- Cocoa Powder or Powdered Sugar: A simple dusting for an elegant finish.
- Crushed Peppermint Candies: Ideal for holiday “Snowballs.”
- Sea Salt Flakes: A sprinkle of flaky sea salt on top of chocolate can enhance the flavor balance beautifully.
- Edible Glitter: For a truly dazzling, festive look.
- Flavor Enhancements (Mix-ins):
- Extracts: A few drops of vanilla, almond, peppermint, or even orange extract can subtly alter the flavor profile of the cream cheese mixture.
- Liqueurs (Adults Only!): For an indulgent adult treat, a teaspoon of coffee liqueur, peppermint schnapps, or Bailey’s Irish Cream can be incorporated into the cream cheese mixture.
Don’t be afraid to mix and match these ideas! The possibilities are virtually endless, making Oreo truffles a fun and creative dessert project for any occasion. Let your imagination run wild and create your signature truffle!
Expert Tips for the Best Oreo Truffles
Achieving perfectly smooth, delicious Oreo truffles is simple, but a few key tips can elevate your results from good to absolutely outstanding:
- Room Temperature Cream Cheese is Non-Negotiable: This is perhaps the most important tip. Cold cream cheese will result in a lumpy, uneven mixture that’s hard to combine with the cookie crumbs. Ensure your cream cheese has softened adequately at room temperature (usually about 30-60 minutes out of the fridge) for a perfectly smooth, homogenous truffle base.
- Achieve Fine Oreo Crumbs: Whether using a food processor or crushing by hand, aim for very fine, consistent crumbs. Large chunks of Oreo can make the truffles difficult to roll smoothly and can affect the texture. A food processor makes this task effortless.
- Chill Thoroughly: Do not rush the chilling process. Firm truffles are much easier to dip in chocolate without them falling apart or leaving crumbs in your coating. An hour in the refrigerator or 15-20 minutes in the freezer is crucial. If they get too soft during dipping, pop them back in the fridge for a few minutes.
- Don’t Overheat Your Chocolate: When melting your chocolate coating, go slow and steady. Overheated chocolate can seize (become thick and clumpy) or burn, making it unusable. Use a double boiler for the most control, or microwave in short bursts, stirring frequently.
- Thin Your Chocolate if Needed: If your melted chocolate is too thick, it will result in a very heavy, uneven coating on your truffles. A teaspoon or two of shortening or coconut oil stirred in will thin it out beautifully without affecting the taste or setting properties.
- Use Good Quality Chocolate: The flavor of your coating makes a big difference. Opt for a good quality almond bark or chocolate chips. Compound chocolate or candy melts are also excellent, easy-to-use options for dipping.
- Dipping Technique Matters: For a clean coating, drop the truffle into the chocolate, roll it quickly with a fork to coat, and then lift it out, gently tapping the fork against the edge of the bowl. This helps remove excess chocolate and prevents pooling at the base of the truffle when it sets.
- Storage: Store your finished Oreo truffles in an airtight container in the refrigerator. They will stay fresh and delicious for up to 1-2 weeks. You can also freeze them for longer storage (up to 1 month), just thaw them in the refrigerator before serving.
By following these simple tips, you’ll be well on your way to creating bakery-quality Oreo truffles that are a joy to make and an absolute delight to eat!