
Mastering the Perfect Pie Crust: 7 Essential Tips to Prevent Shrinking and Achieve Baking Success
There’s something truly magical about a homemade pie. Whether it’s the comforting aroma filling your kitchen or the joy of sharing a slice with loved ones, pies are a staple of cozy gatherings and celebratory feasts. However, many home bakers encounter a common frustration: the dreaded shrinking pie crust. You’ve meticulously rolled, crimped, and shaped your dough, only to pull it from the oven looking a little less grand than you envisioned.
The good news is that preventing pie crust shrinkage is entirely achievable with a few simple techniques and a deeper understanding of how dough behaves. Having just spent a wonderful holiday baking marathon, whipping up multiple pies, I’ve had pie crust science front of mind. Through conversations and questions from fellow bakers, it became clear that this challenge is widespread. So, I’m here to share the tried-and-true methods that ensure your pie crusts remain beautifully intact, perfectly fluted, and ready to hold your delicious fillings.
Forget the disappointment of a sad, shrunken crust. With these seven essential tips, you’ll be well on your way to crafting consistently stunning pie crusts that impress every time. Let’s dive into the secrets of a perfect, non-shrinking pastry!
1. Embrace the Power of Rest: Give Your Dough Ample Time to Relax
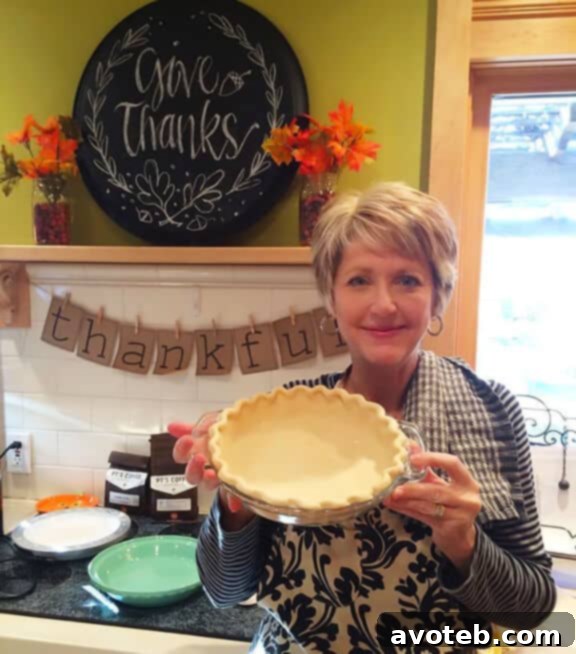
One of the most critical, yet often overlooked, factors in preventing pie crust shrinkage is allowing the dough sufficient “rest” time. This isn’t just a suggestion; it’s a fundamental step that allows the gluten strands within your dough to relax. When flour and water combine, gluten proteins form elastic networks. If these networks are too tense from mixing and rolling, they will contract when exposed to heat in the oven, leading to shrinkage. Proper resting periods combat this by allowing the gluten to loosen up, making the dough more pliable and stable.
There are three key moments when your pie dough will benefit immensely from a rest:
- After Initial Mixing: Once you’ve combined your ingredients and gently brought the dough together, shape it into a flat disk, wrap it tightly in plastic wrap, and refrigerate it. A minimum of 30 minutes is ideal, but an hour or even overnight is even better. This initial rest allows the flour to fully hydrate and the gluten to begin relaxing, making the dough much easier to roll out evenly later.
- After Rolling Out the Dough: This is a crucial, quick rest. After you’ve rolled your dough to the desired thickness and size, let it sit on your countertop for about 5 to 10 minutes before draping it into your pie plate. This brief pause allows any gluten tightened during the rolling process to relax slightly, minimizing its tendency to spring back or shrink once it’s in the pan.
- After Adding the Filling (Optional but Recommended): While not strictly essential for every recipe, a final chill can provide extra insurance against shrinkage. Once your crust is in the pan and filled (or prepared for blind baking), refrigerate the entire pie for another 10-15 minutes before placing it in the hot oven. This last chill helps solidify the fat in the crust, preventing it from melting too quickly and allowing the crust to set its shape before significant shrinkage can occur.
Patience truly is a virtue when it comes to pie crusts. Giving your dough these resting periods will make a noticeable difference in the final structure and beauty of your pie.
2. Utilize Pie Weights and Prick the Crust for Blind Baking
When a recipe calls for pre-baking, or “blind baking,” your pie crust before filling it, proper technique is paramount to prevent shrinkage and bubbling. Blind baking is often done for pies with wet fillings (like quiches or custard pies) to prevent a soggy bottom, or for pies with no-bake fillings.
The primary method to keep a blind-baked crust from slipping down the sides or puffing up excessively is to use pie weights. These weights, which can be ceramic beads, dried beans, rice, or even granulated sugar, provide gentle pressure that holds the crust in place as it bakes. To use them, line your chilled pie crust with parchment paper or aluminum foil, pressing it gently against the bottom and sides. Then, fill the liner with your chosen weights. This ensures the crust maintains its shape and prevents it from shrinking away from the pan’s edges.
Before adding the weights, remember to lightly prick the bottom of the pie crust with a fork. These small holes allow steam to escape from underneath the dough during baking. Without them, trapped steam can cause large air pockets and bubbles to form, distorting the crust’s shape. Don’t worry about the holes being visible in the final product; the crust expands slightly during baking and will mostly fill them in, resulting in an even, flat base.
For best results, bake the crust with weights for about two-thirds of the total blind-baking time, then remove the weights and liner and continue baking until the crust is golden and dry.
3. Choose Your Pie Pan Wisely: Opt for Metal or Ceramic Over Glass
The material of your pie pan can significantly impact how your crust bakes and its susceptibility to shrinking. While glass pie plates are beautiful for presentation and allow you to see the crust browning, they are generally much more slippery than their metal or ceramic counterparts. This slick surface can make it easier for the dough to slide down the sides of the pan as it bakes, contributing to shrinkage.
Metal pie pans (especially those made from aluminum or steel) are excellent conductors of heat, ensuring an evenly baked and beautifully browned crust. Their slightly rougher surface provides better grip for the dough, helping it adhere to the sides and maintain its shape. Ceramic pie dishes also offer a good balance of even heat distribution and a non-slippery surface, making them a fantastic choice for consistent results.
For most traditional butter or shortening-based pie crusts that require baking, I highly recommend using a metal or ceramic pie plate. Save your glass pans for no-bake fillings or crumb crusts where shrinkage isn’t a concern. The subtle texture of metal or ceramic pans provides the friction needed to help your dough hold its ground.
4. Handle With Care: Avoid Overworking the Dough
This rule is a cornerstone of great pie crusts, not just for preventing shrinkage but also for achieving that coveted flaky texture. Overworking pie dough is one of the quickest ways to develop excessive gluten, leading to a tough, inelastic, and prone-to-shrinkage crust. The more you mix and handle the dough, the more the gluten proteins align and strengthen, making the dough overly firm and springy.
The goal when mixing pie dough is to bring the ingredients together just enough for them to barely adhere. It’s perfectly fine, and even desirable, to see small, pea-sized chunks of butter or fat still visible in the dough. These pockets of fat are what create the flaky layers in your baked crust. If you continue to mix until the dough is completely smooth and uniform, you’ve gone too far.
When using a food processor, be especially careful. Pulse the ingredients only until they resemble coarse meal with visible butter bits, then turn it out and gently gather it into a disk by hand. When mixing by hand, use a light touch, just enough to form a cohesive dough. Embrace a slightly shaggy, slightly crumbly texture before chilling. Your gentle handling will be rewarded with a tender, flaky crust that holds its shape beautifully.
5. Roll, Don’t Stretch: Ensure Ample Dough for Your Pie Pan
Imagine your pie dough as a rubber band. If you stretch it to fit a larger space, it naturally wants to snap back to its original size. The same principle applies to pie dough. If you forcefully stretch your dough to cover the entire pie pan, it will inevitably try to contract while baking, resulting in a shrunken, uneven crust.
The solution is simple: when rolling out your dough, ensure it’s generously sized from the start. Aim for a circle that is at least 2-3 inches wider than your pie pan’s diameter. This allows for plenty of overhang on all sides once draped into the pan. This extra dough provides a margin of safety, ensuring you can gently ease the dough into the contours of the pan without any pulling or stretching.
When transferring the rolled dough to the pie plate, carefully fold it in half or quarters, then unfold it gently into the pan. Use your fingertips to lightly press the dough into the bottom and up the sides, ensuring it’s snugly nestled without being stretched. This careful placement, combined with a sufficiently sized dough circle, will significantly reduce the likelihood of shrinkage.
6. Leave a Little Wiggle Room: Trim Excess Dough Judiciously
Building on the previous tip, it’s wise to leave a slight excess of dough around the edges of your pie pan. While you don’t want an overly massive overhang, giving your crust an extra 1/2 to 1 inch of dough beyond the rim provides a crucial buffer against minor shrinkage that might still occur. Even with all the best practices, some minimal contraction is natural as the dough bakes and gluten firms up.
Instead of trimming your crust perfectly flush with the pan before baking, allow this small margin. This extra bit of dough gives the crust some flexibility to shrink ever-so-slightly without pulling away from the pan or compromising your decorative crimped edge. It acts as a safety net, absorbing any potential minor contractions. Once the pie is baked and cooled, you can always trim any truly unsightly excess, though a rustic, slightly generous edge often adds to the homemade charm.
This technique works hand-in-hand with not stretching the dough. By having enough dough to begin with, and then leaving a small excess, you empower your crust to maintain its beautiful form throughout the baking process, ensuring those perfectly fluted or latticed edges remain intact.
7. Bake Low and Slow When Possible: Control the Heat
The temperature at which you bake your pie crust plays a direct role in how much it shrinks. High heat causes the gluten in pie dough to tighten and contract more rapidly and aggressively. This swift tightening can lead to a more pronounced shrinkage, pulling the crust away from the sides of the pan.
If your recipe allows, especially for blind-baking a crust that will later be filled, baking at a slightly lower temperature (around 350°F / 175°C) for a longer duration – the “low and slow” approach – can significantly minimize shrinkage. This gentle heat allows the crust to set more gradually, giving the gluten more time to relax into its form rather than snapping back violently.
However, many pie recipes, particularly those with raw fruit fillings, require a higher initial temperature (e.g., 400-425°F / 200-220°C) to help set the crust quickly before reducing the heat. If your recipe mandates high temperatures, don’t despair! This is where the other tips become even more critical. Ensure your dough is well-rested, not overworked, and properly weighted (if blind baking). By following the other six principles, you can still achieve a beautifully stable crust even when higher temperatures are necessary. It’s about combining strategies to give your pie crust the best possible chance against shrinkage.
Achieving Pie Perfection: Your Journey to Flawless Crusts
Crafting a perfect pie crust, one that is beautifully golden, flaky, and doesn’t shrink, is a rewarding skill for any baker. It truly elevates the entire pie-eating experience. While the process may seem intricate at first, by understanding the science behind dough and patiently applying these seven tips, you’ll soon find yourself creating consistently gorgeous pie crusts with confidence.
Remember, baking is an art that combines precision with intuition. Don’t be afraid to experiment and observe how your dough responds to different handling techniques. With a little practice, these principles will become second nature, and you’ll be well on your way to mastering the art of the perfect, non-shrinking pie crust.
For more in-depth guidance on pie crusts, be sure to explore my comprehensive recipe and photo tutorial for How To Make A Pie Crust. And, if you’re looking for inspiration, dive into some of my favorite pie recipes on the site!
Do you have any personal tips or tricks for preventing pie crusts from shrinking? Share your wisdom in the comments below!